
Guide
How to Sew a Zipper: Easy Step-by-Step Guide for Beginners


I think learning how to sew a zipper feels much harder before the first successful attempt than it actually is. A zipper looks technical because several things have to line up at once: the fabric seam, zipper teeth, zipper tape, stitching line, zipper pull, and top and bottom stops. Once I break the process into preparation, positioning, stitching, and finishing, it becomes much more manageable.
For a beginner, I recommend learning a centered zipper first. This is the familiar zipper installation where the teeth sit directly beneath a seam and equal amounts of fabric cover both sides. It works well for cushion covers, skirts, dresses, pouches, and many other sewing projects.
The basic method is surprisingly simple. Sew the seam below the zipper normally, baste the zipper opening closed, press the seam allowances open, position the zipper beneath the basted seam, stitch around it with a zipper foot, and then remove the basting stitches. Singer and Brother both document variations of this same centered-zipper approach.
The details are what produce a clean result. A zipper that shifts while sewing can make the fabric pucker. Stitching too close to the teeth can prevent the slider from moving freely. Sewing without moving the zipper pull out of the way can produce a crooked line. Skipping pressing can leave the seam bulky or uneven.
My goal in this guide is to make those details predictable rather than intimidating.
Key Takeaways for Sewing a Zipper Successfully
Before starting, these are the principles I would remember:
- A regular zipper foot lets the needle sew close to zipper teeth without the entire presser foot sitting on top of them.
- A centered zipper is usually the easiest zipper installation for a beginner to learn.
- Basting the zipper opening closed first helps keep both fabric sides aligned.
- Pressing the seam allowances open before positioning the zipper creates a flatter and more accurate result.
- Keep the zipper teeth centered over the seam line.
- Secure the zipper tape before final stitching so it cannot shift.
- Do not sew over the zipper teeth, slider, or stops with a standard sewing-machine needle.
- When the zipper pull approaches the presser foot, stop with the needle down, raise the foot, move the slider past the foot, and continue.
- Invisible zippers use a different installation sequence and are usually sewn before the seam below the zipper is completed.
- Always test the zipper before considering the project finished.
The biggest beginner improvement usually comes from slowing down. A zipper does not require fast sewing. Accuracy is far more important than speed.
What a Zipper Is and How It Works
Understanding the basic structure makes zipper sewing easier because each part has a different job.
YKK explains that a zipper consists principally of the elements, slider, and tape. The elements are the teeth or coils that engage with one another, the slider joins or separates them, and the fabric tape provides the material through which the zipper is sewn into the project.
YKK summarizes the basic structure this way:
“Zippers are broadly divided into three components.”
YKK
A typical closed-end zipper also includes top stops and a bottom stop. These prevent the slider from traveling beyond the functional zipper chain.
From a sewing perspective, I mostly care about four areas: the teeth, zipper tape, slider, and stops.
The stitching normally goes through the zipper tape, not the teeth.
That seems obvious when written down, but beginners sometimes concentrate so heavily on getting close to the teeth that the needle travels dangerously close to a metal or plastic element.
The aim is to sew close enough for the zipper to look neat while leaving enough clearance for the slider to travel freely.
Choosing the Right Zipper Before You Sew
Different zippers are designed for different jobs.
A lightweight invisible zipper makes sense in a dress seam where I want the closure to disappear. A sturdy separating zipper is much more appropriate for a jacket. A standard closed-end zipper works well for skirts, cushions, pouches, bags, and similar projects.
Common Zipper Types and Their Best Uses
This table gives a practical beginner comparison.
| Zipper Type | Appearance | Common Uses | Beginner Difficulty |
|---|---|---|---|
| Centered closed-end zipper | Teeth hidden beneath two equal fabric folds | Skirts, dresses, cushions, pouches | Easy |
| Lapped zipper | One fabric side overlaps the zipper | Skirts, dresses, vintage garments | Moderate |
| Invisible zipper | Teeth disappear inside the seam | Dresses, skirts, formal clothing | Moderate |
| Separating zipper | Opens completely at the bottom | Jackets, coats, hoodies | Moderate |
| Fly zipper | Hidden beneath a fly extension | Trousers, jeans, shorts | More advanced |
| Exposed zipper | Teeth intentionally visible | Bags, fashion details, decorative garments | Easy to moderate |
| Two-way zipper | Can open from more than one direction | Long coats, luggage, specialty projects | Depends on application |
YKK categorizes zipper configurations that include closed-end, open-end, two-way separating, and double-slider arrangements.
For a first practice project, I would choose a standard nylon or polyester coil zipper and two pieces of stable woven cotton. Stable cotton is easier to control than slippery satin, stretchy knit fabric, or very thick upholstery material.
What You Need to Sew a Zipper
You do not need specialized professional equipment for a basic zipper.
A sewing machine, zipper foot, zipper, fabric, matching thread, pins or clips, seam ripper, iron, and marking tool are enough for most beginner practice.
The most important specialized tool is the zipper foot.
Singer explains its purpose well:
“The Zipper Foot can be used for inserting zippers as well as making and inserting piping or cording.”
Singer
Unlike a standard presser foot, a zipper foot is narrow enough to let the needle stitch close to a raised zipper edge. Depending on the sewing machine and foot design, it can often be attached or positioned so the needle sews on either side.
I would always check the sewing-machine manual before moving the needle position or attaching an unfamiliar zipper foot. Presser-foot designs vary, and the machine should be turned by hand for the first stitch or two to make sure the needle clears the foot.
Zipper Foot Versus Regular Presser Foot
A regular presser foot is designed to hold fabric evenly around the needle.
That becomes inconvenient around a zipper because the zipper teeth create a raised ridge. The foot cannot sit naturally if part of it rides over the zipper chain.
A zipper foot solves the problem by giving the needle access near one side of the raised edge.
Singer describes the zipper foot as allowing the needle to stitch close to zipper teeth, coils, piping, or similar bulky edges.
For an invisible zipper, there is also a dedicated invisible zipper foot. It generally includes grooves that guide the zipper coils so the needle can stitch extremely close to them. Singer and Brother both describe dedicated concealed or invisible zipper feet as useful for producing a cleaner hidden closure.
I would not rush to buy every sewing-machine foot available. A standard zipper foot handles many zipper projects. Add an invisible zipper foot when invisible closures become a regular part of your sewing.
How to Sew a Zipper Using the Centered Method
For a first zipper, this is the technique I recommend learning.
Imagine that you are making a cushion cover with a zipper running through one seam. The same basic principle can also apply to many garment seams.
Step 1: Mark the Zipper Opening
Place the two fabric pieces right sides together.
Mark where the bottom of the zipper opening should finish.
The zipper teeth need to fall inside the intended opening, while the zipper tape extends beyond the teeth on each side.
Follow the seam allowance specified by your pattern. If you are simply practicing, a common practice seam allowance such as 5/8 inch can provide enough room to work comfortably, but the correct allowance for a real project should come from the pattern.
Step 2: Sew the Seam Below the Zipper
Begin at the lower edge of the fabric and sew toward the marked bottom of the zipper opening using a normal straight stitch.
Backstitch at the point where this permanent seam ends.
This permanent stitching holds the seam below the zipper.
Brother’s centered-zipper instructions similarly have the sewer straight-stitch the permanent seam before changing to basting stitches across the zipper opening.
Step 3: Baste the Zipper Opening Closed
Change to a long basting stitch.
Continue sewing from the end of the permanent seam through the zipper opening.
Do not treat this section as permanent. These stitches will eventually be removed.
The result should look like one continuous closed seam from top to bottom, but the upper section is held together only by temporary stitches.
This is the trick that makes a centered zipper beginner-friendly.
Instead of trying to keep two loose fabric edges perfectly aligned while installing a zipper between them, I temporarily close the seam first.
Step 4: Press the Seam Allowances Open
Turn the fabric to the wrong side.
Press both seam allowances flat and open.
Do not skip this step.
Singer’s basic centered-zipper instructions explicitly call for pressing the basted seam open before positioning the zipper. Brother provides the same general sequence.
A flat seam makes it much easier to position the zipper evenly.
When pressing near a synthetic zipper, be cautious with heat. Focus the iron on the fabric and follow the zipper manufacturer’s material guidance rather than holding a very hot iron against plastic teeth or coils.
Positioning the Zipper Correctly
Place the fabric wrong side up with the seam allowances open.
Close the zipper.
Lay it face down over the seam so the zipper teeth sit directly over the basted seam line.
The center of the zipper chain should align with the center of the seam.
I like to begin by checking the top position first. The top stops need to end where the finished opening should begin, allowing for whatever waistband, facing, seam, or edge treatment comes later.
Then check the bottom.
If the zipper is significantly longer than the opening, decide whether it needs shortening before continuing. Do not simply let an unsuitable zipper extend into construction areas without considering how the rest of the pattern will be assembled.
Holding the Zipper in Place Before Stitching
This is one of the most important steps for preventing a crooked zipper.
You can hold zipper tape in place with pins, hand basting, machine basting, clips where appropriate, or a sewing adhesive designed for temporary fabric positioning.
Singer recommends basting the zipper to the seam allowances and notes that basting glue can also be used in appropriate circumstances.
For a first zipper, I prefer hand basting because it gives excellent control.
Long temporary hand stitches take only a few minutes and greatly reduce the chance of the zipper shifting underneath the fabric.
Make sure the zipper remains centered as you secure both tapes.
Do not stretch the zipper or the fabric while pinning.
Stretching one layer more than the other is a common cause of ripples.
Stitching the First Side of the Zipper
Attach the zipper foot according to your machine instructions.
Set the machine for a normal straight stitch.
Position the fabric right side up.
Begin at the top of one side of the zipper opening.
Your stitching line should run parallel to the seam.
The exact distance depends on the zipper, fabric, style, and pattern. Brother’s centered-zipper instructions, for example, describe topstitching approximately 7 to 10 mm from the seamed edge in that specific method.
Do not obsess over one universal measurement. Consistency matters more.
Choose a reference point on your foot or machine and keep the seam aligned with it.
Sew slowly toward the bottom of the zipper.
What to Do When You Reach the Zipper Pull
The slider is wider than the zipper teeth and can push the presser foot sideways.
Trying to sew directly beside it is one of the easiest ways to make a straight zipper seam suddenly curve.
When you approach the slider, stop.
Leave the needle down in the fabric.
Raise the presser foot.
Move the zipper pull past the foot.
Lower the presser foot.
Continue sewing.
Keeping the needle down anchors the fabric so the stitching position does not move while you relocate the slider.
If the slider cannot move because the zipper opening is still basted closed, you may need to remove a small section of basting temporarily or move the slider from the accessible side according to your installation method.
Sewing Across the Bottom of the Zipper
When you reach the lower end, stop before the zipper’s bottom stop.
Pivot the fabric to sew across the bottom of the zipper opening.
Be careful not to stitch through the bottom stop or hard zipper teeth.
Brother gives an explicit safety warning:
“Make sure the needle does not strike the zipper during sewing.”
Brother
That is not merely about protecting the project. Hitting hard zipper components can break or deflect the needle.
Turn the handwheel slowly if you are uncertain about clearance.
Stitching the Second Side
After sewing across the bottom, pivot again and stitch upward along the opposite side.
Try to maintain the same distance from the seam that you used on the first side.
A centered zipper looks best when its two visible topstitching lines mirror each other.
When you approach the slider again, use the same needle-down technique to move it out of the way.
Finish the stitching securely.
Removing the Basting Stitches
Now comes the satisfying part.
Use a seam ripper to remove the temporary stitches running along the center of the zipper opening.
Work carefully so you do not cut the permanent topstitching or damage the fabric.
Brush away loose threads.
Open the zipper.
Close it.
Open it again.
Check whether the slider travels smoothly from top to bottom.
Look at the right side of the fabric and inspect the spacing.
If everything is aligned, you have successfully installed a centered zipper.
How a Centered Zipper Should Look When Finished
On the right side, two fabric edges should meet neatly above the zipper teeth.
The zipper should sit centered beneath the seam.
Two parallel topstitching lines should run down the sides and connect near the bottom.
The fabric should lie flat rather than forming waves or puckers.
On the wrong side, both pieces of zipper tape should be secured evenly.
The slider should move without catching the surrounding fabric.
For a first zipper, I would prioritize smooth operation and even alignment rather than absolute visual perfection. Slightly uneven topstitching on a practice piece is a much easier problem to fix than a zipper that cannot open.
How to Sew an Invisible Zipper
An invisible zipper is constructed differently from a standard centered zipper.
When properly installed, the zipper chain sits inside the seam and is largely hidden from the right side.
This makes invisible zippers popular for dresses, skirts, fitted garments, and formal clothing.
The critical difference is the order of construction.
Singer notes that unlike a regular zipper, an invisible zipper is inserted before the relevant seam is completely stitched.
Step 1: Prepare the Fabric Edges
Finish the raw edges of the fabric according to your project.
Do not sew the main seam closed yet.
Mark the seam allowance and zipper position accurately.
Accuracy is particularly important because the two sides must meet at the same height when the zipper closes.
Step 2: Open the Invisible Zipper
Open the zipper fully.
Invisible zippers have coils that curl toward the wrong side.
A dedicated invisible zipper foot guides those coils so stitching can run very close to them.
Brother describes the concealed zipper foot as allowing the coil to run through a groove, helping place the stitching close to the zipper.
Step 3: Place the First Zipper Tape
Place the right side of the zipper against the right side of the fabric.
Align the coil with the garment’s seam line.
Pin or baste the tape in place.
Double-check that the top of the zipper sits correctly relative to the garment’s top edge.
Step 4: Sew the First Side
Place the zipper coil into the appropriate groove of the invisible zipper foot.
Sew from the top toward the bottom.
Stop where the zipper foot can no longer travel comfortably near the slider.
Secure the stitching.
Step 5: Attach the Second Side
Position the second zipper tape against the second fabric piece.
Before sewing, close the zipper temporarily and verify that horizontal seams, waistlines, pattern motifs, or other matching points line up.
Then reopen the zipper and sew the second tape from top to bottom.
Make sure the zipper is not twisted.
Brother specifically emphasizes checking zipper orientation because a twisted zipper will not close correctly.
Step 6: Sew the Seam Below the Zipper
Close the zipper.
Bring the two fabric pieces right sides together.
Switch to a regular zipper foot if needed.
Begin the permanent seam as close as practical to where the zipper stitching ends, then sew downward through the rest of the seam.
Brother’s concealed-zipper instructions similarly complete the lower seam after both zipper sides have been installed.
Press the finished seam carefully.
From the right side, the seam should appear nearly continuous, with little more than the zipper pull visible.
Centered Zipper Versus Invisible Zipper
Beginners frequently confuse these methods, so this comparison helps.
| Feature | Centered Zipper | Invisible Zipper |
|---|---|---|
| Visibility | Covered by equal fabric folds | Mostly disappears into seam |
| Best for | Cushions, skirts, dresses, pouches | Dresses, skirts, formal garments |
| Seam first? | Seam is partly sewn and opening is basted closed | Zipper generally installed before seam below is completed |
| Foot | Standard zipper foot | Invisible zipper foot preferred |
| Topstitching | Usually visible | Usually not visible from right side |
| Beginner difficulty | Easier | Moderate |
| Alignment priority | Keeping zipper centered | Matching both zipper sides precisely |
| Common problem | Wavy or uneven topstitching | Gap or bump below zipper |
My recommendation is to learn the centered zipper first and then move to invisible zippers. The first method teaches zipper-foot control without requiring you to sew immediately beside rolled coils.
How to Sew a Lapped Zipper
A lapped zipper is hidden beneath one overlapping side of fabric.
It was once especially common in skirts and dresses and remains useful when a pattern calls for a deliberately covered zipper.
Instead of two equal fabric folds meeting over the zipper, one side creates a narrow fold and the other overlaps it.
The stitching therefore appears asymmetrical from the right side.
The exact construction varies by pattern, but the general process involves preparing the zipper opening, forming the underlap, attaching one zipper tape close to that fold, positioning the overlapping side, and topstitching the outer lap.
I would follow the specific pattern instructions for a lapped zipper because seam allowances and lap widths can differ.
The main concept to understand is simple: centered means equal coverage; lapped means one side overlaps the zipper.
How to Stop Fabric From Puckering Around a Zipper
Puckering is one of the most common zipper problems.
Several factors can cause it.
The zipper may have been stretched while sewing.
The fabric may have stretched while the zipper remained stable.
The seam may not have been pressed.
The zipper tape may have shifted.
The stitch length or tension may be unsuitable.
Very lightweight or unstable fabric may also need interfacing or another form of stabilization around the zipper opening.
The first correction I would make is preparation.
Press the fabric.
Stabilize it if the pattern recommends doing so.
Secure the zipper before final stitching.
Then sew without pulling either layer.
Let the feed dogs move the fabric naturally.
If the fabric repeatedly ripples even when your technique is controlled, test the zipper on a scrap using the same fabric, interfacing, needle, thread, tension, and stitch length.
How to Keep the Zipper From Moving While Sewing
Zipper creep can make one side finish higher than the other.
Basting solves much of this problem.
Hand basting is slow but reliable.
Pins are faster but may allow some shifting.
Temporary sewing adhesive or narrow fabric-safe tape can also work where appropriate.
Whatever method you choose, check alignment before permanent stitching.
For garments, I would pay particular attention to horizontal seam intersections.
Imagine an invisible zipper crossing a waist seam in a dress. If one zipper half moves upward by only a few millimeters, the waist seam will visibly step up or down when the zipper closes.
Before stitching the second side, close the zipper and mark exactly where the matching seam must meet the zipper tape.
That small preparation step produces a much more professional result.
How to Shorten a Zipper
Sometimes the ideal zipper is slightly longer than the required opening.
Whether it can be shortened and how you should do it depends on the zipper construction.
Do not casually cut the zipper first.
A new stopping point must be created so the slider cannot simply run off the chain.
With some coil zippers, shortening can involve sewing a secure bar across the zipper below the desired endpoint and then trimming the excess below that new stop. PFAFF’s invisible-zipper instructions, for example, describe creating a stitched stop before trimming an overly long coil zipper.
Metal zippers may require a different method, including removing individual teeth and installing appropriate stops.
For expensive garments or separating zippers, I would buy the correct length whenever possible rather than improvising.
Common Zipper Sewing Problems and How to Fix Them
The Zipper Pull Gets Stuck
First check whether fabric or thread has been caught in the slider.
Do not force it aggressively.
Examine the wrong side and gently release any trapped material.
If your stitching runs too close to the zipper chain, the slider may be rubbing against the seam. In that situation, the stitching may need to be removed and resewn slightly farther away.
One Side of the Zipper Is Higher Than the Other
This usually happens because the zipper shifted during installation.
For an invisible zipper, it is particularly noticeable at waist seams or patterned fabric.
Remove the affected side and reposition it rather than trying to disguise a significant mismatch later.
The Fabric Is Wavy
Check whether you stretched the fabric or zipper while sewing.
Press the seam carefully and see whether the ripple relaxes.
If not, restitch with the zipper properly secured and the fabric supported.
Lightweight fabric may also benefit from stabilization.
The Stitching Curves Around the Zipper Pull
The zipper slider pushed the foot away from the teeth.
Do not sew around the slider.
Stop with the needle down, raise the foot, move the slider to the opposite side, lower the foot, and continue.
The Needle Hits the Zipper
Stop immediately.
Never continue forcing the machine.
Check needle position, zipper-foot position, and zipper alignment.
Rotate the handwheel manually before restarting so you can confirm that the needle clears the foot and zipper.
Brother specifically warns that needle contact with the zipper can break the needle and potentially cause injury.
The Invisible Zipper Is Still Visible
Your stitching may be too far from the zipper coil.
An invisible zipper foot is designed to guide the coil so the needle can stitch close to it.
If the zipper tape is correctly positioned but the chain remains visible, resewing closer to the coil may improve the finish.
Do not sew so close that stitches enter the coil itself.
Zipper Sewing Mistakes I Would Avoid
A common first mistake is using the standard presser foot because changing feet seems inconvenient. The zipper foot exists specifically to give the needle clearance around zipper teeth.
Another mistake is skipping basting. Permanent stitching feels faster until the zipper shifts and needs to be removed.
I would also avoid pulling the fabric behind the machine. Let the feed mechanism advance the project while your hands guide rather than drag.
Another frequent issue is sewing quickly over the lower zipper area without checking for the bottom stop. Slow down around every hard zipper component.
Pressing should not be treated as optional either. Sewing creates construction; pressing helps shape that construction.
Finally, test the zipper before completing the remaining garment or project. Discovering that a zipper is twisted or jammed is much easier to fix before waistbands, linings, facings, or other pieces have been attached.
A Beginner Practice Exercise for Learning How to Sew a Zipper
If zipper insertion still feels intimidating, I would not begin with an expensive garment.
Cut two rectangles from plain cotton.
Choose a standard closed-end zipper.
Sew the rectangles together using the centered-zipper method in this guide.
Do not worry about turning the sample into anything.
The objective is to practice the sequence:
prepare, sew, baste, press, position, secure, stitch, remove basting, test.
Once that works, make a second sample.
Try to improve only three things: straighter topstitching, better alignment, and smoother slider movement.
Then make a simple zippered cushion or pouch.
By the time you install a zipper in a real garment, the physical steps will already feel familiar.
Brother gives a similar practical recommendation in its invisible-zipper tutorial, encouraging practice on scrap fabric before risking an important project.
How to Make a Zipper Look More Professional
A professional-looking zipper usually comes from preparation rather than decorative tricks.
Use the correct zipper length and type.
Choose zipper tape that matches the project unless contrast is intentional.
Finish raw edges where appropriate before zipper installation.
Mark accurately.
Baste carefully.
Press throughout construction.
Use consistent topstitching.
Match horizontal seams before attaching the second zipper half.
Trim loose threads.
Check the inside as well as the outside.
The wrong side does not need to look decorative, but it should look controlled. Zipper tapes should not twist unpredictably, raw edges should be treated according to the project, and loose thread ends should be removed.
For garments, a lining or facing may eventually conceal much of the zipper tape, but careful installation still affects how smoothly the zipper functions.
When to Hand-Sew Part of a Zipper
A sewing machine handles most zipper construction efficiently, but hand sewing remains useful.
Hand basting provides excellent control.
Small stitches can secure zipper tape in difficult areas.
Hand finishing may be appropriate around couture garments, delicate fabrics, linings, or places a machine foot cannot reach cleanly.
I do not think machine sewing and hand sewing should be treated as competing methods.
A few minutes of temporary hand basting can save considerably more time than removing a badly shifted machine-sewn zipper.
Sewing Zippers in Stretch Fabric
Stretch fabric adds another variable because the fabric may lengthen as it moves through the machine while the zipper tape remains comparatively stable.
That can create rippling.
Follow the pattern’s stabilization instructions carefully.
Interfacing or another suitable stabilizer may be required along the zipper opening.
Do not stretch the fabric while positioning or sewing the zipper.
A walking foot can help some layered sewing tasks, but ordinary zipper installation still requires the clearance of a zipper-specific foot near the teeth. Machine compatibility and project construction should guide the choice.
Practice on scrap fabric first because knit behavior varies dramatically.
A stable ponte knit behaves very differently from a thin, highly elastic jersey.
Sewing a Zipper in Heavy Fabric
Heavy denim, canvas, upholstery material, or multiple seam layers can make zipper installation harder.
Use a needle appropriate for the fabric weight.
Reduce bulky seam allowances where the pattern permits.
Press carefully.
Move over thick intersections slowly.
Avoid pulling the project through the machine.
A zipper foot is especially useful because it prevents the full width of a standard presser foot from having to ride over the raised zipper area.
When approaching unusually thick seams, turn the handwheel manually for the first stitches if necessary.
The objective is controlled penetration, not speed.
How to Know Whether Your Zipper Is Finished Correctly
Before moving to the next stage of the project, I would run through a simple visual and functional check.
The zipper opens completely.
The zipper closes completely.
The slider moves smoothly.
No fabric catches in the slider.
The zipper is not twisted.
The top edges align.
Horizontal seams match where necessary.
The fabric lies reasonably flat.
Topstitching is consistent for visible zipper styles.
The needle has not damaged the zipper chain.
The zipper tape is securely attached.
If all of those checks pass, I would continue with the project rather than obsessing over tiny cosmetic variations that only the person who sewed the item will notice.
Conclusion
Learning how to sew a zipper becomes much less intimidating when I treat the process as careful alignment rather than an advanced sewing trick. For a beginner, the centered zipper is the best place to start: sew the permanent seam, baste the zipper opening closed, press the seam allowances open, center the zipper beneath the seam, secure it, and stitch with a zipper foot before removing the temporary basting.
The most important lessons are simple. Use the right foot, press before sewing, stop and move the slider instead of sewing around it, and never force the needle across zipper teeth or hard stops. Once those habits become automatic, invisible and lapped zipper techniques become easier to understand.
I would practice on two pieces of inexpensive cotton before installing a zipper in a garment you care about. The goal of the first sample is not perfection. It is learning how the zipper behaves under the presser foot. Once that feels familiar, make another sample and focus on alignment. A few deliberate practice runs can turn zipper installation from one of the most intimidating sewing steps into an ordinary construction skill.
READ: Doubtnut Valuation: From $154M Peak to $10M ALLEN Acquisition
Frequently Asked Questions
How Do You Sew a Zipper for Beginners?
The easiest beginner method is usually a centered zipper. Sew the seam below the zipper opening normally, baste the zipper section closed, press the seam allowances open, and position the closed zipper face down with its teeth centered over the basted seam. Secure the zipper tape, attach a zipper foot, and topstitch around the zipper. Remove the temporary basting stitches last. Singer and Brother both document versions of this basic sequence for centered zipper insertion.
Do I Need a Zipper Foot to Sew a Zipper?
A zipper foot is strongly recommended because it allows the needle to stitch close to the zipper’s raised teeth or coils without the full width of a standard presser foot getting in the way. Singer describes zipper feet as suitable for zipper insertion and other tasks requiring stitching close to a raised edge. Some specialized installations, especially invisible zippers, become much easier with a dedicated invisible zipper foot.
Can I Sew a Zipper With a Regular Sewing Machine?
Yes. Most ordinary home sewing machines can install zippers when equipped with a compatible zipper foot. You generally need only a straight stitch for basic zipper installation. The exact foot attachment and needle position vary by machine, so check your sewing-machine manual. Before beginning, rotate the handwheel manually to confirm that the needle clears the zipper foot, particularly if you have moved the needle position.
Why Does My Fabric Pucker When I Sew a Zipper?
Puckering can occur when the fabric stretches, the zipper shifts, the seam is not pressed properly, or the material needs stabilization. Secure the zipper before permanent stitching and avoid pulling the fabric as it travels through the machine. Lightweight, stretchy, or loosely woven fabrics may require interfacing or another stabilizer around the zipper opening. I would test the full zipper setup on scrap material when working with a difficult fabric.
How Do I Sew Past the Zipper Pull?
Stop sewing before the zipper pull reaches the presser foot. Leave the needle down in the fabric, raise the presser foot, move the zipper slider past the foot, lower the foot, and continue stitching. Keeping the needle down maintains your position while the slider is moved. Trying to sew around the bulky slider often pushes the zipper foot sideways and creates visibly crooked topstitching.
How Do You Sew an Invisible Zipper?
An invisible zipper is normally attached before the seam below it is completely sewn. Open the zipper, place the zipper tape right sides together with the fabric, and sew each side separately using an invisible zipper foot when possible. The foot guides the zipper coil while stitching is placed close to it. After both sides are attached, close the zipper and sew the remaining seam below it. Singer and Brother both document this general construction sequence.
How Do I Keep a Zipper Straight While Sewing?
Secure it thoroughly before final stitching. Hand basting gives excellent control, while pins or appropriate temporary sewing adhesive can also work. For a centered zipper, align the teeth directly over the basted seam before securing the tape. For an invisible zipper, mark important matching points such as waist seams on both zipper tapes. Sew slowly and use a consistent visual reference on the zipper foot or fabric to maintain an even stitching line.
Can You Cut a Zipper if It Is Too Long?
Some zippers can be shortened, but the correct method depends on the zipper construction. A new stop must be created before or as part of shortening so the slider cannot run off the chain. PFAFF, for example, describes creating a stitched stop before trimming excess from certain invisible coil zippers. Metal, separating, and specialty zippers may require different techniques, so I would check the zipper manufacturer’s guidance before cutting.
What Is the Easiest Zipper to Sew?
For learning how to sew a zipper, I would begin with a standard closed-end zipper installed using the centered method. The basted seam helps keep the fabric aligned while the zipper is positioned underneath it, and a standard zipper foot provides enough control for straightforward topstitching. Invisible zippers can produce a cleaner garment finish but require more precise positioning, while fly and separating zippers introduce additional construction steps.
Sources
- Brother Sewing Machine Operation Manual: Centered zipper installation, basting, zipper-foot positioning, topstitching, and needle-safety guidance.
- Singer: Basic centered zipper installation and explanation of how a zipper foot allows stitching close to zipper teeth and raised edges.
- Brother Sewing: Concealed zipper installation, alignment, zipper-foot use, and finishing the seam below an invisible zipper.
- Singer: Invisible zipper installation and dedicated invisible zipper-foot guidance.
- YKK: Technical explanation of zipper structure, including zipper tape, elements, slider, and zipper operation.
- PFAFF: Invisible zipper installation and guidance for shortening certain coil zippers.
Disclaimer
This article provides general sewing education rather than instructions for one specific sewing machine, zipper, garment pattern, or fabric. Presser feet, needle positions, machine controls, zipper construction, seam allowances, and recommended techniques vary by manufacturer and project. I recommend following the sewing pattern, sewing-machine manual, and zipper manufacturer’s instructions whenever they differ from a general tutorial. Keep fingers clear of the needle area, stop the machine before making adjustments, and never intentionally sew through hard zipper teeth, sliders, or stops.

GD7 Playz Blogspot 2025/03/RBS.html: Meaning, URL Structure, Safety & What to Know
Introduction
When I first look at a search phrase such as gd7 playz.blogspot/2025/03/rbs.html, the most important thing is to separate what the URL actually tells us from what people may assume it means. The phrase looks like a specific webpage address associated with a Blogger or Blogspot site, but the address alone does not provide enough information to establish exactly what the original page contains.
The structure is interesting because it appears to combine a blog name, a Blogger-style domain, a year and month path, and an individual post ending in “rbs.html.” Blogger supports individual posts, post URLs, timestamps, titles, labels, and permalinks, so this general structure is consistent with the way Blogger organizes blog content.
My goal in this guide is therefore to explain the keyword carefully rather than invent a definition for “RBS.” I will break down the URL, explain what can reasonably be inferred from its structure, discuss why people may search for an obscure Blogspot address, examine different interpretations of the term, and show readers how to evaluate an unfamiliar webpage before trusting it.
Key Takeaways About gd7 playz.blogspot/2025/03/rbs.html
The keyword gd7 playz.blogspot/2025/03/rbs.html appears to refer to a specific Blogger-style webpage rather than a general software term or universally recognized technology. The URL structure can provide clues about the platform and post organization, but it cannot independently establish the content, author, purpose, or credibility of the page.
The “gd7 playz” portion may represent the blog name or publishing identity. The “2025/03” portion resembles a date-based Blogger path. The “rbs.html” portion looks like an individual post permalink or slug. Blogger documentation confirms that individual posts have URLs and permalink information, and that publishers can configure parts of their post URLs.
I believe the most important point for readers is simple: a URL is an identifier, not proof of what is behind it. A technically formatted address can lead to useful information, ordinary blog content, outdated material, or something that deserves caution.
The exact expansion of “RBS” should also be treated carefully. The acronym has many possible meanings in different contexts, and the keyword alone does not establish which one was intended by the original publisher.
What Is gd7 playz.blogspot/2025/03/rbs.html?
The phrase gd7 playz.blogspot/2025/03/rbs.html appears to be a shortened or imperfectly formatted representation of a Blogspot-style webpage address. A complete Blogger address normally contains a blog subdomain followed by the Blogger domain and then a path identifying the post.
The important distinction is between the search phrase and the actual live URL. When people type a URL into a search engine, they may remove punctuation, spaces, or parts of the domain accidentally. For example, “gd7 playz.blogspot/2025/03/rbs.html” contains a space between “gd7” and “playz,” which makes it look different from a conventional web address.
That does not necessarily mean the phrase is meaningless. Search engines frequently interpret incomplete or incorrectly formatted queries and attempt to find pages associated with the terms. A person may also have copied the phrase from another website, social media post, video description, comment, or message.
From my perspective, the safest description is that the keyword points toward a particular Blogger-style page associated with the name “GD7 Playz” and the path “2025/03/rbs.html,” but the exact page content needs to be verified separately.
Breaking Down the URL Structure
Looking at each component separately makes the keyword much easier to understand.
| URL Component | What It Appears to Represent | What We Can Safely Infer |
|---|---|---|
| gd7 playz | Possible blog or publisher name | It appears to identify the publishing site or brand |
| Blogspot | Blogger hosting domain | The address appears associated with Blogger-style hosting |
| 2025 | Year component | It resembles a year-based post path |
| 03 | Month component | It resembles a March date component |
| rbs.html | Post path or slug | It appears to identify an individual page |
| Full phrase | Search keyword | It combines the above elements into one query |
The key takeaway from this breakdown is that most of the information comes from the URL’s structure rather than from verified information about the article itself.
Blogger’s official documentation describes post data including a post title, body, author, URL, timestamp, labels, comments, and other information. It also documents permalink settings for posts.
What Does “GD7 Playz” Mean?
The phrase “GD7 Playz” appears to function like a blog, channel, creator, or publishing identity. The word “Playz” naturally resembles language used by gaming creators, entertainment publishers, or online communities, but that wording alone does not prove that the page is exclusively about gaming.
This distinction matters because search results can encourage readers to make assumptions. If a name contains a word associated with gaming, readers may automatically conclude that every page on the site contains game guides or gaming tools. That conclusion would go beyond what the URL itself establishes.
In my analysis, “GD7 Playz” should therefore be treated as the apparent identity associated with the URL rather than as a confirmed description of the site’s complete subject matter.
A publisher can also change its content over time. A blog that once discussed one topic may later publish unrelated posts. Consequently, a site’s name should not be treated as a complete description of a particular article.
What Does “2025/03” Tell Us?
The 2025/03 portion is one of the clearest clues in the keyword. It resembles the date-based URL pattern commonly associated with Blogger posts.
Blogger’s documentation shows that posts have timestamps and URLs, while its help resources explain that publishers can configure post permalinks. Official Blogger community discussions also document the familiar year/month/post-name format used by Blogger posts.
This means that “2025/03” can reasonably be interpreted as a path associated with March 2025. However, I would avoid treating the URL alone as definitive proof of the exact publication date of the content currently visible on a page.
There can be situations involving republishing, permalink settings, redirects, or changes to posts. For that reason, the page’s own visible publication information is stronger evidence than simply reading numbers in a URL.
What Does “RBS.html” Mean?
The rbs.html portion is more difficult to interpret.
The “.html” ending is consistent with a webpage filename-style structure. The “rbs” portion may be a shortened title, abbreviation, identifier, or term chosen by the publisher. Blogger allows publishers to work with post permalinks, meaning the final part of a post URL can be related to the post’s chosen URL or title.
What I cannot responsibly conclude is that “RBS” definitely stands for one particular phrase.
RBS is an acronym used in many unrelated contexts. It can refer to different concepts in banking, education, technology, gaming, organizations, and other areas. Without a verified explanation from the original page, assigning one meaning would risk turning speculation into misinformation.
For SEO content, this is particularly important. An article can rank for a strange keyword by repeating an invented explanation, but ranking does not make the explanation correct.
Why Are People Searching for This Keyword?
There are several reasonable explanations for searches involving an obscure URL.
First, a person may have encountered the address somewhere else and wants to know what it is before opening it. This is common with unfamiliar links.
Second, the person may be looking for a page that was previously shared in a gaming community, group, video, comment, or forum.
Third, someone may have seen the phrase in search results and wants to understand why it appears there.
Fourth, the person may have copied the address incorrectly and is trying different versions of the keyword to locate the original page.
Finally, a searcher may simply be researching an unfamiliar phrase because it has started appearing repeatedly online.
The important lesson is that search demand does not automatically establish authority. A phrase can receive searches because people are confused about it, not because the underlying page represents a major technology or established product.
Is gd7 playz.blogspot/2025/03/rbs.html a Framework?
Some third-party pages found in search results describe the keyword using technical language, including claims that it relates to an HTML framework or modular gaming structure. Other pages describe it more generally as a Blogspot article or gaming-related page.
These descriptions conflict with one another, which is itself useful evidence: there is not a sufficiently reliable basis for presenting the “framework” interpretation as an established fact.
A framework normally has identifiable technical characteristics. Depending on the technology, readers would expect documentation, version information, code examples, installation instructions, a repository, API references, or other evidence showing that a reusable software system exists.
A Blogspot post can discuss a framework without being a framework itself. A page can also contain HTML without being an “HTML framework.”
Therefore, I would not describe gd7 playz.blogspot/2025/03/rbs.html as an established framework unless the original publisher provides clear technical documentation supporting that claim.
Why the Difference Between a Blog Post and a Tool Matters
Imagine two webpages.
The first is an article explaining how a gaming dashboard might be designed. The second is an actual downloadable framework containing reusable code, documentation, and implementation instructions.
Both pages could mention HTML, dashboards, gaming, and modular design. Yet they serve completely different purposes.
This distinction prevents a common mistake in online research: confusing an article about a technology with the technology itself.
If a reader searches for GD7 Playz RBS expecting software, the reader should look for concrete evidence such as installation steps, code repositories, documentation, or a demonstrable working project. If none exists, the page may simply be informational content.
How to Evaluate the Page Before Trusting It
When I evaluate an unfamiliar webpage, I look at several independent signals rather than relying on the URL alone.
Check the Exact Domain
Start by confirming the complete domain name. A genuine Blogger address and an unrelated domain containing similar words are not the same thing.
Pay attention to spelling, additional characters, unexpected subdomains, and redirects.
Check the Page Title
The title should explain what the page is about. If the title has nothing to do with the search phrase, investigate further.
Check the Author or Publisher
A transparent page should provide some indication of who created the content when authorship matters. Blogger supports post author information as part of its post data.
Check the Date
If the article discusses software, games, security, or online services, date information can matter significantly. A page from March 2025 may no longer reflect the current situation in September 2026.
Check External Links
Look at where the page sends visitors. Links to recognized documentation or established resources can provide context. Unexpected download links, suspicious redirects, or requests for credentials deserve additional caution.
Check for Download Requests
A page that unexpectedly asks users to download executable files should be treated more carefully than an ordinary informational article.
Check for Login Requests
Never enter a password simply because a webpage asks for one. Confirm that the login destination belongs to the service you intended to use.
A Practical Safety Checklist
| Check | What to Look For | Recommended Response |
|---|---|---|
| Domain | Correct spelling and expected host | Continue only if it matches your expectation |
| Page title | Clear relationship to the keyword | Investigate if unrelated |
| Author | Identifiable publisher or author | Look for additional credibility signals |
| Date | Publication or update information | Consider whether information may be outdated |
| Links | Relevant and recognizable destinations | Avoid suspicious redirects |
| Downloads | Unexpected executable or archive files | Do not download without verification |
| Login | Requests for passwords or credentials | Verify the destination first |
| Claims | Strong technical or financial claims | Look for independent evidence |
The table is useful because no single signal is perfect. A legitimate page can have a simple design, while a deceptive page can look professional. I prefer a combined assessment.
How Blogger Pages Work
Blogger is a publishing platform that allows users to create and manage blogs. Google’s official Blogger documentation explains that users can create a blog, choose a blog address, publish posts, and manage blog settings.
Blogger also provides tools for search visibility. Google explains that publishers can make blogs visible to search engines and use relevant keywords in titles and text.
This explains why an obscure Blogger page can potentially appear in search results. A page does not need to be hosted on a large corporate website to be discoverable.
At the same time, search visibility should not be confused with endorsement. A page appearing in a search engine does not automatically mean that its claims have been independently verified.
Why Blogspot URLs Can Look Technical
A URL such as gd7 playz.blogspot/2025/03/rbs.html can look more technical than a modern URL because it exposes structural elements.
The year and month create a recognizable path. The “.html” ending resembles an older static webpage structure. The short “rbs” segment looks like a file or technical identifier.
But appearance can be misleading.
A URL does not necessarily describe the technology running the page. It mainly provides an address that helps identify and retrieve content.
For that reason, I would not infer software architecture, programming language, database technology, or framework capabilities solely from the URL.
What If the Page No Longer Opens?
An old or obscure webpage may become unavailable for many reasons.
The blog could have been deleted. The post could have been removed. The owner could have changed settings. A domain or subdomain could have become unavailable. The page might also redirect somewhere else.
Blogger provides tools for redirects and URL management, which means URL behavior can change when publishers modify their sites. Google’s Blogger help documentation specifically discusses changing or redirecting URLs.
If the exact page no longer loads, I would not replace missing evidence with speculation. Instead, search for the exact URL in quotation marks, look for references from reliable sources, and compare cached or archived descriptions where appropriate.
Can Search Results Prove What the Original Page Says?
Search snippets can be useful, but I would treat them as clues rather than complete evidence.
A search engine may display text generated from a page, surrounding context, metadata, or other signals. Third-party websites may also create pages targeting the same keyword without having any direct connection to the original publisher.
This is especially important with unusual keywords. Once a phrase becomes searchable, multiple websites may publish articles about it. Some writers may copy assumptions from earlier pages, causing the same unsupported claim to appear repeatedly.
Ten websites repeating the same statement do not necessarily equal ten independent confirmations.
Why Third-Party Articles Need Careful Reading
During research for this topic, I found several third-party pages discussing the same keyword. Their explanations were not consistent.
Some presented the phrase as a normal Blogspot page. Others described it as gaming-related. Another set of pages made stronger technical claims about frameworks or modular HTML systems.
Because those claims do not agree, I would not use the strongest version as a fact without primary evidence.
This is an important research principle for unusual SEO keywords: repetition is not verification.
If the original source is unavailable, the responsible approach is to distinguish between what is observable, what other websites claim, and what remains unknown.
What Could “RBS” Stand For?
Without the original page’s explanation, “RBS” has no single reliable expansion in this context.
It could theoretically be an abbreviation chosen by the blog author. It could represent the title of a game-related topic, an internal label, a project name, or a completely unrelated abbreviation.
For example, if a hypothetical publisher created a post called “RBS Gaming Guide,” the resulting slug could contain “rbs.” That would not mean that RBS is a recognized technology.
Similarly, if “RBS” were the initials of a phrase used by a particular gaming community, readers outside that community might not recognize it.
The practical answer is therefore straightforward: the keyword does not provide enough evidence to define RBS conclusively.
Common Misconceptions About gd7 playz.blogspot/2025/03/rbs.html
Misconception 1: The URL Must Be a Software Tool
A webpage address does not prove that the page is software.
A blog post can contain explanations, screenshots, code snippets, reviews, or links without being a tool itself.
Misconception 2: “HTML” Means It Is an HTML Framework
The “.html” ending identifies a webpage-style filename or URL pattern. It does not establish that the page represents an HTML framework.
Misconception 3: Search Ranking Means Verification
Search engines can index a wide variety of content. Ranking or appearing in search results does not independently verify every claim made on a page.
Misconception 4: Every Blogspot Page Is Unsafe
Blogger is a legitimate publishing platform. Individual pages should still be evaluated based on their content and behavior rather than judged solely because they use Blogspot.
Misconception 5: Every Blogspot Page Is Automatically Safe
The opposite assumption is also incorrect. A legitimate hosting platform can contain user-generated content, so readers should still use normal online safety practices.
How to Research the Keyword More Effectively
If I were investigating gd7 playz.blogspot/2025/03/rbs.html from scratch, I would use a structured process.
First, I would search the exact phrase in quotation marks. This helps distinguish exact-match references from pages merely containing some of the same words.
Second, I would search variations such as “GD7 Playz RBS,” “GD7 Playz Blogspot,” and “RBS GD7 Playz.”
Third, I would look for the original Blogspot domain rather than relying exclusively on articles written about it.
Fourth, I would compare dates. If an article discussing the page was published long after the supposed original post, it should not automatically be treated as evidence of what the original page contained.
Fifth, I would look for independent references. If a gaming community, official developer, documentation site, or established publisher refers to the page, that can provide additional context.
Finally, I would clearly separate verified facts from interpretations.
How to Read an Unfamiliar Gaming Blog
If the GD7 Playz name is indeed associated with gaming content, readers can apply a few additional checks.
Look at whether the article identifies the game being discussed. Check whether screenshots match the game. Look for update dates if the article discusses current features. If it recommends a download, determine whether that download comes from the game’s official source.
Gaming communities often share unofficial guides, mods, tools, files, and links. Some may be useful, while others may be outdated or unsafe.
I believe readers should be particularly cautious when a gaming page asks them to disable security software, provide account credentials, install unknown applications, or complete unrelated surveys before receiving a supposed file.
How to Distinguish Information From Promotion
A page may look like an informational guide while primarily encouraging visitors to click advertisements or external links.
That does not automatically make the page fraudulent. Advertising is a normal part of online publishing.
The useful distinction is whether the article answers the reader’s question independently.
For example, an informative article about a game feature should explain the feature. A page that repeatedly tells readers to click external links without providing meaningful information is less useful as a reference.
When evaluating GD7 Playz-related content, I would therefore look at the actual information density rather than judging the page solely by its appearance.
What Readers Should Do If They Encounter a Suspicious Redirect
If an unfamiliar page immediately redirects through several unrelated domains, I would close the page rather than continuing through each redirect.
Do not enter credentials simply because a redirected page displays a familiar-looking logo. If you need to access a game, social network, email account, or other service, navigate to the service’s known official website independently.
Similarly, do not install browser extensions or applications simply because an unfamiliar page says they are required to continue.
A normal article generally should not need unusual security changes just to display text.
How the Keyword Relates to SEO
From an SEO perspective, gd7 playz.blogspot/2025/03/rbs.html is an example of a highly specific long-tail search phrase.
It contains what appears to be a brand or blog name, a platform identifier, a date path, and a specific slug. Such queries can have very different intent from broad terms such as “gaming blog” or “HTML framework.”
Google’s official Blogger guidance states that publishers can use relevant keywords in titles and text to help search engines understand their blog content. It also provides tools for controlling search visibility and post URLs.
However, keyword targeting should not be confused with factual authority. A publisher can target an unusual phrase successfully while still needing to provide accurate, useful information.
For this reason, an article targeting the keyword should focus on clarity, evidence, and the actual questions readers are asking.
Recommended Content Structure for This Keyword
If I were creating an SEO page around this query, I would organize it around the user’s likely questions rather than repeating the keyword excessively.
A useful structure would include:
- What is gd7 playz.blogspot/2025/03/rbs.html?
- How to understand the URL structure
- What GD7 Playz may refer to
- What the RBS portion means or does not establish
- Why people search for the page
- Whether the page should be trusted
- How to check an unfamiliar Blogspot page
- Common misconceptions
- Frequently asked questions
This approach provides topical coverage without keyword stuffing.
Practical Example: Evaluating the URL
Imagine a reader receives the phrase from a friend.
The reader searches the exact phrase and finds several pages describing it differently. One page calls it a gaming resource, another calls it a technical framework, and another simply describes it as a Blogspot article.
Instead of choosing the most detailed description automatically, I would return to the primary source.
If the original page clearly says it is a gaming article, that supports the gaming interpretation.
If it contains technical documentation, code, and implementation instructions, that may support a technical interpretation.
If the page is unavailable, I would state that the exact purpose cannot be confirmed.
This method protects readers from accepting a confident explanation simply because it contains more technical vocabulary.
First Table: Evidence Strength for Different Claims
| Claim About the Keyword | Evidence Available From the URL | Confidence |
|---|---|---|
| It resembles a Blogger/Blogspot post address | Strong structural indication | Relatively high |
| “2025/03” resembles a year/month path | Strong structural indication | High |
| “rbs.html” identifies a page or slug | Strong structural indication | High |
| GD7 Playz is a gaming brand | Name suggests it, but not sufficient proof | Low to moderate |
| RBS has one specific meaning | Not established by URL alone | Low |
| It is an HTML framework | Conflicting third-party descriptions | Low |
| It contains a downloadable tool | Not established | Unknown |
| It is safe or unsafe | Requires page-level examination | Unknown |
The most important takeaway from this table is that URL structure can provide useful information, but it cannot answer every question about the underlying page.
What I Believe Readers Should Take From the Evidence
In my view, the strongest conclusion is not a complicated technical definition. It is a methodological one.
When a keyword looks mysterious, start with what can actually be verified.
The phrase appears to identify a Blogger-style post. The date path resembles March 2025. The final “rbs.html” portion appears to identify an individual page. Beyond those structural observations, the available evidence becomes less certain.
That does not mean the page is unimportant. It simply means readers should not confuse online repetition with verification.
A careful article can still be highly useful even when the original page is difficult to verify. The value comes from explaining what is known, identifying what remains uncertain, and giving readers a reliable way to investigate further.
Verified Quote: Why Search Visibility Matters
Google’s official Blogger guidance explains how publishers can improve discoverability by making their blogs visible to search engines and using relevant keywords in titles and text.
“You can make it easier for people to find your blog on search engines like Google and Bing.”
Google Blogger Help
This matters because it explains why even a small Blogger publication can become searchable. Visibility is a publishing and SEO feature, not proof that every claim on a page has been independently checked.
How Bloggers Can Make Pages Easier to Understand
A page targeting an obscure keyword should explain the topic immediately.
The title should tell readers what they will learn. The introduction should answer the main question. Headings should organize the supporting information. Important claims should have evidence where appropriate.
Google’s Blogger documentation also provides publishers with the ability to customize post permalinks, which means URL structure can be part of how a publisher organizes and presents content.
For a phrase such as GD7 Playz RBS, a clear title would be more helpful than repeating the raw URL throughout the page.
What Makes a Good Explanation of an Unknown URL?
A strong explanation should accomplish four things.
First, it should identify the type of URL.
Second, it should explain what can be inferred from its structure.
Third, it should identify uncertainties rather than hiding them.
Fourth, it should give the reader practical steps for verifying the original source.
This is especially important for SEO articles about unusual search terms. The temptation is to invent a complete story around an incomplete keyword. I believe the better strategy is to make the distinction between evidence and interpretation visible to the reader.
Second Table: What to Check Before Using Information From the Page
| Area | Questions to Ask | Why It Matters |
|---|---|---|
| Original source | Can the exact page be opened? | Confirms whether the source is accessible |
| Author | Who published it? | Helps establish accountability |
| Publication date | When was it published or updated? | Indicates how current the information may be |
| Topic | Does the content actually explain RBS? | Prevents assumptions based on the URL |
| Technical claims | Is documentation provided? | Helps distinguish a real tool from a description |
| Downloads | Are files offered? | Requires additional security caution |
| External links | Where do they lead? | Reveals whether the page redirects elsewhere |
| Independent sources | Do reliable sources confirm the claims? | Provides additional verification |
The practical lesson is that readers should evaluate the page as a source rather than judging it by its unusual URL.
Common Questions About GD7 Playz RBS
Is gd7 playz.blogspot/2025/03/rbs.html a real URL?
The phrase resembles a Blogger-style URL, but the version written with a space between “gd7” and “playz” is not a conventional complete web address. The exact live URL should be verified before treating the phrase as a direct link.
What does gd7 playz mean?
“GD7 Playz” appears to be a publishing or blog identity associated with the keyword. The name may suggest gaming because of the word “Playz,” but the name alone does not establish the exact subject of the website.
What does RBS mean in gd7 playz?
The meaning of “RBS” cannot be confirmed from the keyword alone. It may be an abbreviation or short identifier chosen by the publisher. Because RBS has many meanings in different contexts, it would be misleading to assign one expansion without evidence from the original page.
Is gd7 playz.blogspot/2025/03/rbs.html a gaming website?
The name “Playz” can suggest gaming-related content, and some third-party search results describe the keyword in a gaming context. However, the URL itself does not prove that the entire site or particular page is gaming-focused.
Is GD7 Playz RBS an HTML framework?
There is insufficient reliable evidence to establish that it is a recognized HTML framework. Some third-party pages make technical claims about the keyword, but those descriptions are inconsistent. A real framework would normally have clearer documentation or other technical evidence.
Is Blogspot safe?
Blogger is a legitimate Google blogging platform, but individual pages should still be evaluated separately. A platform being legitimate does not mean every user-created page contains accurate or trustworthy information.
Why does the URL contain 2025/03?
The year/month pattern resembles Blogger’s date-based post URL structure. It is consistent with a post associated with March 2025, although readers should use the page’s own publication information when an exact date matters.
Should I download files from an unfamiliar GD7 Playz page?
I would not download an unknown file simply because a page recommends it. Check the source, file type, destination, and reputation first. Executable files and unexpected installers deserve particular caution.
Can the RBS page be trusted?
Trust should be determined from the actual page and supporting evidence rather than from the Blogspot name or URL alone. Check authorship, claims, links, dates, downloads, and independent references before relying on important information.
Why are so many websites discussing this keyword?
An unusual keyword can generate curiosity when people encounter it in search results, social media, forums, or other websites. Once a phrase becomes searchable, additional sites may publish content targeting it. That does not mean every article has independently verified the original information.
Conclusion
When I examine gd7 playz.blogspot/2025/03/rbs.html, the most useful conclusion is that it appears to be a specific Blogger-style webpage address whose structure provides some clues but does not reveal everything about the original content. The “2025/03” section resembles a date-based path, while “rbs.html” appears to identify an individual page or post.
I believe readers should be particularly careful about claims that go beyond those basic observations. Search results contain conflicting descriptions of the keyword, including claims that it represents gaming content or a technical framework. Without reliable primary evidence, those interpretations should remain descriptions of what others claim rather than established facts.
For anyone researching the page, the best next step is to verify the exact original URL, inspect the publisher and article, check the date, examine external links, and avoid downloads or credential requests that cannot be independently verified.
The broader lesson is useful beyond this one keyword: when an unfamiliar URL becomes popular, the right response is not to assume that it is either important or dangerous. Instead, I recommend separating observable facts from speculation and allowing reliable evidence to determine the final interpretation.
Read More : C.S.I. Las Vegas Cast: Actors, Characters & Guide
Frequently Asked Questions
What is gd7 playz.blogspot/2025/03/rbs.html?
It appears to be a Blogger-style webpage address associated with a blog or publisher identified as GD7 Playz. The “2025/03” portion resembles a year/month path, while “rbs.html” appears to identify an individual post. The exact content and purpose of the original page should be verified directly rather than inferred solely from the URL.
What is the purpose of the GD7 Playz RBS page?
The exact purpose cannot be established confidently from the keyword alone. Some third-party pages associate it with gaming or technical content, but their descriptions are inconsistent. I would therefore avoid presenting one particular purpose as confirmed unless the original page or a reliable primary source clearly establishes it.
Does RBS have a confirmed meaning on this page?
No confirmed meaning can be established from the URL itself. RBS is a widely used acronym with different meanings across different fields. Unless the original publisher explains the abbreviation, assigning a specific expansion would be speculation.
Is gd7 playz.blogspot/2025/03/rbs.html safe to visit?
The safety of an individual webpage cannot be determined simply from the fact that it uses Blogger or from the URL structure. Readers should verify the exact domain, watch for redirects, avoid entering credentials, and be cautious about downloads or requests to disable security protections.
Is GD7 Playz a Blogger website?
The keyword is formatted like a Blogger or Blogspot address, so that is a reasonable interpretation of its structure. Google’s Blogger documentation confirms that Blogger provides blog addresses, individual post URLs, timestamps, authors, and permalink functionality. The exact live domain should still be checked before making a definitive claim about a particular site.
Can I use information from the RBS page?
You can use information from any webpage as a starting point for research, but important claims should be independently verified. This is especially relevant when the page concerns software, downloads, financial information, account security, or other topics where inaccurate information could cause harm.
Why is the keyword written as gd7 playz instead of a normal domain?
The phrase may have been copied, typed, or indexed with a spacing variation. A normal domain cannot generally contain an ordinary space, so readers should verify the complete original web address before attempting to open it.
Is the March 2025 date still relevant?
The date may be relevant for understanding when a post was originally organized or published, but information from March 2025 may be outdated by September 2026. For current software, gaming, security, or platform information, readers should check newer documentation and current sources.
Sources and References
Google Blogger Help provides documentation on Blogger post data, including URLs, titles, authors, timestamps, post bodies, and other post properties.
Google Blogger Help also explains search visibility, keyword use, and Blogger permalink customization.
Google’s Blogger Help documentation explains that users can create and manage blogs and choose a blog address or URL.
Third-party search results were reviewed to identify how the keyword is being described online. Because those sources provide conflicting interpretations, their claims were not treated as definitive evidence of what “RBS” means or what the original page contains.
Disclaimer
This article is intended for informational and research purposes. The exact content, ownership, meaning, and current availability of gd7 playz.blogspot/2025/03/rbs.html should be verified from the original webpage or other reliable primary sources. References to possible meanings or third-party descriptions should not be treated as confirmation of claims that cannot be independently verified.
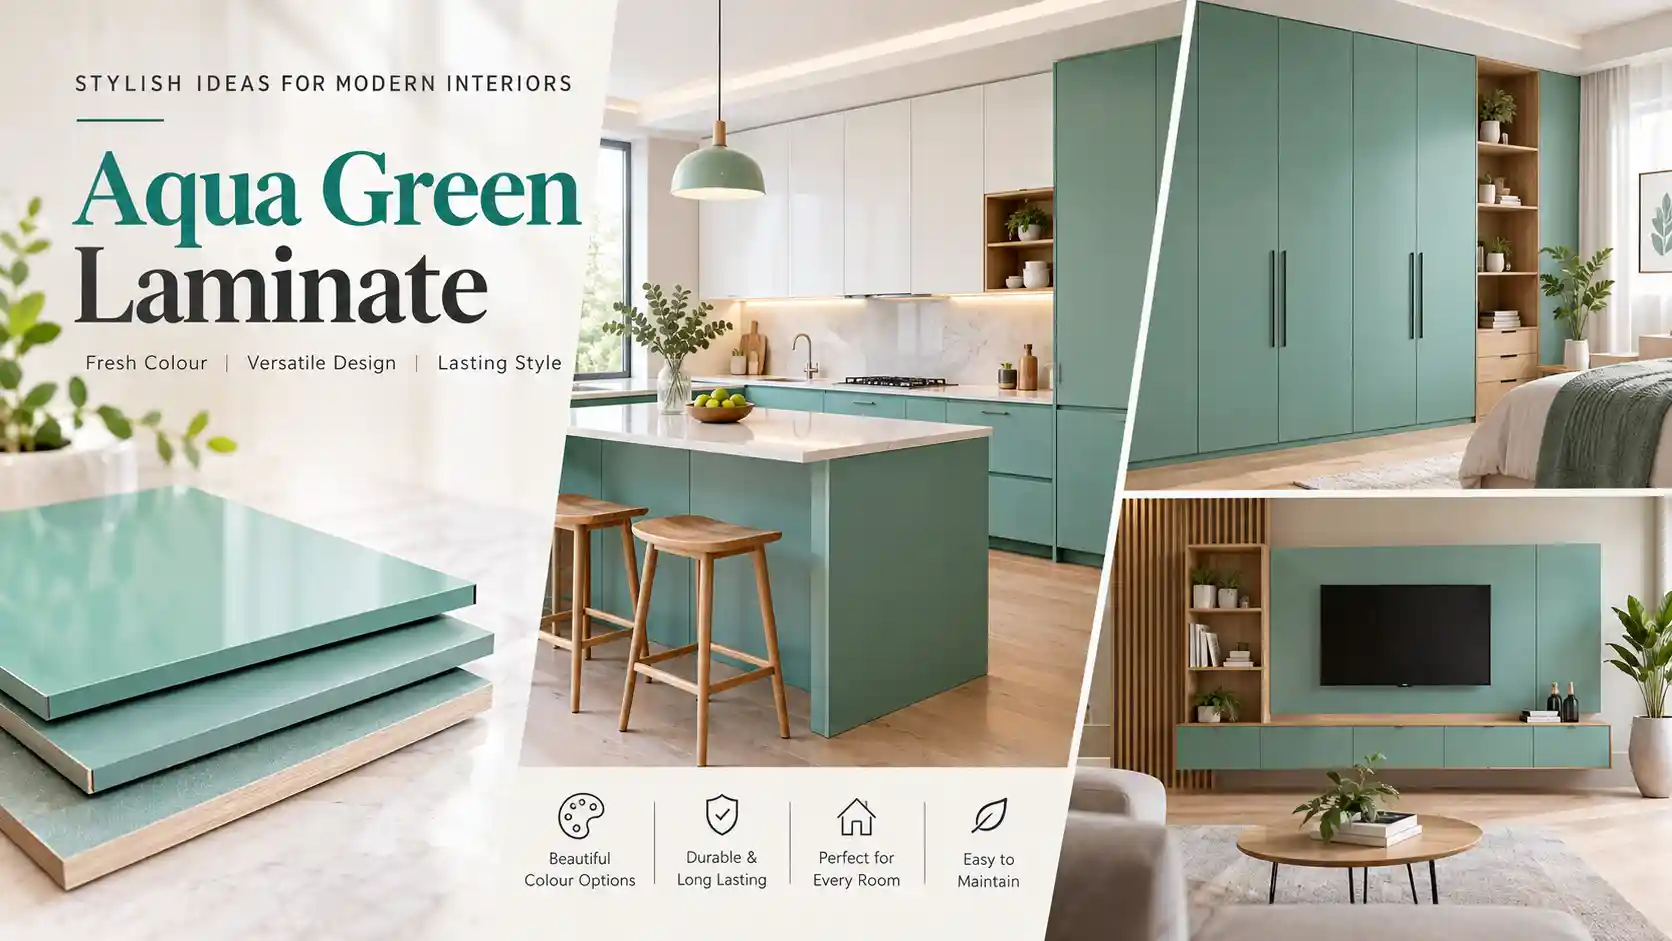
Aqua Green Laminate: Stylish Ideas for Modern Interiors
I believe colour can completely change the character of an interior without requiring a complete renovation. Among the many shades available for modern furniture and cabinetry, aqua green laminate has an interesting balance between freshness, softness and visual character. It sits between blue and green, giving interiors a clean appearance while still adding enough colour to prevent a room from feeling ordinary.
From my perspective, aqua green laminate works particularly well when homeowners want something more distinctive than white, grey or beige but do not want an extremely strong colour dominating the entire room. It can be used on kitchen cabinets, wardrobes, storage units, wall panels, furniture, doors and other interior surfaces.
The important point is not simply choosing aqua green. I have found that the success of any coloured laminate depends on how the shade is combined with lighting, surrounding materials, room size, hardware and finish. A well-planned combination can make the colour feel sophisticated, while poor proportions can make even an attractive shade feel overwhelming.
In this guide, I will explain what aqua green laminate is, where I would use it, which finishes can work best, what colours complement it, how to select the right shade, and what practical considerations I would review before making a final decision.
Key Takeaways for Choosing Aqua Green Laminate
Aqua green laminate can be used across several areas of a modern home, including kitchens, wardrobes, living-room furniture, study units and decorative wall surfaces.
I consider the finish almost as important as the colour itself. Glossy surfaces can create a brighter and more reflective appearance, while matte or suede finishes generally create a softer and more understated effect.
The surrounding colour palette also matters. White, off-white, light grey, natural wood tones, black accents and selected metallic finishes can all be considered when developing an aqua green interior.
For a small room, I would usually avoid covering every visible surface with a strong colour. Using aqua green on selected cabinets or lower units while keeping other surfaces light can create a more balanced result.
I also recommend checking a physical laminate sample before ordering. Digital screens can display colours differently, so the shade seen on a phone or computer should not be treated as the final reference.
What Is Aqua Green Laminate?
Aqua green laminate is a decorative surface material featuring an aqua-green colour that can be bonded to furniture boards, cabinet shutters, panels and other suitable substrates. Depending on the manufacturer and collection, the material can be available in different thicknesses, surface textures, colours and finishes.
The colour itself is what makes the material distinctive. Aqua green generally combines characteristics associated with both blue and green. That gives it a refreshing appearance that can work with contemporary, coastal, minimalist and transitional interiors.
In my view, one of the biggest advantages of this colour is its flexibility. It does not necessarily need to be used as the dominant colour in a room. It can become a feature colour, a secondary cabinet colour or an accent within a larger neutral palette.
For example, imagine a kitchen with white upper cabinets, aqua green lower cabinets and a light countertop. The aqua green creates visual interest while the white keeps the upper part of the kitchen visually light.
Another approach would be to use aqua green only on an island. In that situation, the island becomes the focal point without requiring the entire kitchen to use the same colour.
Why Aqua Green Laminate Works in Modern Interiors
Colour selection is ultimately subjective, but I believe aqua green has a useful middle ground. Very bright greens can become visually dominant, while very pale colours can sometimes disappear into the background. Aqua green can occupy a position between these extremes.
The exact effect depends on the specific shade. A pale aqua green may feel airy and subtle, while a deeper or more saturated version can create a stronger statement.
Lighting also changes how the colour appears. Natural daylight can make some aqua shades look fresher, while warm artificial lighting may make them appear slightly softer or greener.
This is why I would never select a laminate colour based only on a catalogue image. I would place a physical sample in the actual room and observe it at different times of day.
Colour has long been recognised as an important part of visual experience. Wassily Kandinsky wrote:
“Color is a power which directly influences the soul.”
Wassily Kandinsky, Concerning the Spiritual in Art, as reproduced by Khan Academy.
I would not interpret that statement as meaning that one particular colour creates the same emotional response for everyone. Instead, it highlights why colour deserves deliberate consideration when designing an interior. Aqua green can contribute to the overall visual identity of a space, but the surrounding materials and personal preferences remain equally important.
Where Can I Use Aqua Green Laminate?
I would consider aqua green laminate for much more than kitchen cabinets. Its colour and available finishes make it adaptable to different furniture and interior applications.
Aqua Green Laminate for Kitchen Cabinets
The kitchen is one of the most obvious places to use aqua green. Contemporary kitchen examples show the colour being paired with white, quartz, granite, wood tones and contrasting hardware.
One practical approach is to use aqua green on the base cabinets while keeping the wall cabinets white or another light neutral. This creates a two-tone appearance and prevents the colour from taking over the entire kitchen.
Another option is an aqua green island. This works particularly well when the surrounding cabinetry is neutral.
I would also consider the backsplash carefully. If the laminate already provides a strong colour statement, a simple backsplash can prevent the overall composition from becoming visually crowded.
Current kitchen design examples demonstrate aqua green laminate in both high-gloss and suede finishes, including combinations with white and stone-like countertops.
Aqua Green Laminate for Wardrobes
Bedrooms offer another opportunity for this colour.
Aqua green wardrobe shutters can introduce colour without requiring the walls, flooring or bedding to follow the same palette. If the bedroom contains light wood furniture and neutral walls, an aqua wardrobe can become an intentional feature.
For a calm bedroom, I would generally consider a softer or matte aqua green rather than an extremely reflective finish.
A wardrobe can also combine aqua green with white or wood-effect panels. This creates visual variation and can make a large storage unit appear less monolithic.
Aqua Green Laminate for Living-Room Furniture
Living-room furniture can benefit from a controlled use of aqua green.
Instead of covering an entire entertainment unit in the colour, I might use aqua green on selected cabinet fronts and combine it with natural wood or neutral panels.
The same principle can work for sideboards, display cabinets, shelving units and storage furniture.
The goal is to make the colour feel intentional rather than accidental.
Interior designer David Hicks is often associated with the observation:
“The best rooms have something to say about the people who live in them.”
David Hicks, quoted by the National Kitchen & Bath Association.
For me, that is particularly relevant when selecting a distinctive laminate colour. A coloured cabinet should reflect the atmosphere the homeowner wants rather than simply following a temporary trend.
Aqua Green Laminate for Wall Panels
Aqua green can also be considered for decorative wall applications.
A full feature wall can create a strong visual effect, but I would usually assess the size of the room and amount of natural light first.
Another approach is partial wall panelling. A smaller aqua green section behind a console, television unit or dining area can introduce the colour without making the room feel saturated.
Aqua Green Laminate for Office Furniture
Home offices often rely heavily on neutral colours. Adding aqua green to selected storage units, shelves or desk cabinetry can introduce personality without compromising the functional appearance of the workspace.
For a professional-looking office, I would combine aqua green with white, light grey, natural timber or black hardware.
Choosing Between Matte, Suede and Glossy Aqua Green Laminate
The finish changes the visual character of the same colour.
A glossy finish reflects more light and can give cabinetry a polished contemporary appearance. It can work especially well in kitchens where the goal is a bright, modern aesthetic.
A matte finish reduces reflection and often produces a calmer appearance. I would consider matte aqua green when the colour itself should remain the main visual feature rather than the shine of the surface.
A suede or textured finish provides another option. It can introduce subtle surface character and may be suitable when a softer, more tactile appearance is preferred.
Current aqua green laminate products are available in multiple finishes, including high-gloss, matte, suede and textured options.
Finish Comparison Table
Before selecting a finish, I would compare the practical and visual differences rather than choosing based only on a product photograph.
| Finish | Visual Character | Where I Would Consider It | Main Consideration |
|---|---|---|---|
| High Gloss | Bright, reflective and contemporary | Modern kitchens, feature cabinets, furniture | Reflections and visible marks may be more noticeable |
| Matte | Soft and understated | Bedrooms, wardrobes, modern kitchens | Can create a calmer appearance |
| Suede | Smooth with a softer visual effect | Kitchens, wardrobes and furniture | Shade can look different under changing light |
| Textured | Adds surface interest | Feature furniture, wall panels and cabinets | Surrounding patterns should remain controlled |
| Acrylic-style | Rich colour depth and polished appearance | Premium-looking furniture and cabinetry | Physical samples are important before selection |
The main takeaway is that there is no single universally correct finish. I would choose according to the room, lighting, maintenance expectations and overall design direction.
Best Colour Combinations With Aqua Green Laminate
Aqua green becomes much easier to use when the surrounding colours are planned in advance.
Aqua Green and White
White is one of the simplest combinations.
White upper cabinets with aqua green lower cabinets can create a fresh two-tone kitchen. The same concept can be applied to wardrobes and storage furniture.
I particularly like this approach when the room is relatively small because the white areas can help maintain visual openness.
Aqua Green and Natural Wood
Natural wood tones can make aqua green feel warmer.
Aqua green cabinet fronts combined with oak-like, walnut-like or other natural wood finishes can produce contrast between cool colour and warm material.
I would keep the wood tone consistent rather than introducing several unrelated wood finishes into the same room.
Aqua Green and Light Grey
Light grey can create a restrained contemporary palette.
This combination is useful when white feels too stark but a dark contrast feels too heavy.
Aqua green cabinetry with a light-grey wall or countertop can create a subtle transition between the two colours.
Aqua Green and Black
Black hardware, fixtures or selected furniture details can provide strong contrast.
However, I would use black deliberately. Too much black alongside a saturated aqua green can make a small space feel visually heavy.
Black handles, lighting fixtures or a few accessories can be enough.
Aqua Green and Beige
Beige and warm neutrals can soften aqua green.
This is worth considering when the goal is to create a warmer interior rather than a strongly cool colour scheme.
How Room Size Affects Aqua Green Laminate Selection
Room size should influence how much colour is used, although it should not automatically determine whether aqua green is suitable.
In a small kitchen, I would consider using aqua green on lower cabinets and keeping the upper cabinets light. This creates a visual boundary while allowing the upper portion of the room to remain bright.
In a larger kitchen, there is more opportunity to use aqua green across multiple cabinet sections or an island.
A large bedroom could accommodate an aqua green wardrobe more easily than a very small bedroom with several other strong colours.
The same principle applies to living rooms. A small entertainment unit may need only a few aqua green panels, while a larger open-plan space may support a more substantial feature.
The important factor is proportion.
How Lighting Changes Aqua Green Laminate
Lighting can significantly influence how a colour appears.
Natural daylight changes throughout the day. Morning light, afternoon light and evening artificial lighting can all produce different impressions.
I recommend placing a laminate sample near a window, under room lighting and beside the materials that will surround it.
This simple process can reveal differences that are difficult to notice in a showroom or online catalogue.
Warm lighting may make aqua green appear somewhat softer or greener, while cooler lighting can emphasize its blue-green character.
The direction of natural light also matters. A room receiving strong direct sunlight may show the laminate differently from a darker room.
Because manufacturers themselves may note that digital images do not perfectly represent physical colours, I consider physical sampling an important step before final selection.
Aqua Green Laminate in Small Kitchens
Small kitchens require careful colour distribution.
I would not automatically reject aqua green simply because the kitchen is small. Instead, I would control where the colour appears.
One practical design scenario is:
- Aqua green lower cabinets
- White upper cabinets
- White or light quartz countertop
- Simple backsplash
- Minimal hardware
- Good task lighting
- Light flooring
This arrangement gives aqua green a clear role without making every surface compete for attention.
Another option is to use aqua green only on one section of cabinetry.
If the kitchen already contains patterned flooring or a decorative backsplash, limiting the laminate colour can create a cleaner overall composition.
Aqua Green Laminate in Large Kitchens
Large kitchens provide more flexibility.
Aqua green can be used on base cabinets, tall storage units or an island. It can also be combined with natural wood or neutral cabinetry.
For an open-plan kitchen, I would consider how the colour interacts with the living and dining areas. Because there are fewer visual boundaries in an open-plan layout, a strong kitchen colour can influence the appearance of the entire connected space.
This can be useful when the same colour appears in smaller details elsewhere, such as cushions, artwork or decorative accessories.
The objective is not necessarily to match everything. Instead, the colour can create a visual connection between different parts of the home.
Practical Durability and Maintenance Considerations
Laminate is commonly selected for furniture and cabinetry because it can provide a decorative surface without requiring painted finishes.
However, the exact performance depends on the specific product, substrate, installation and manufacturer specifications.
Some manufacturers offer laminate products with properties such as resistance to scratching, staining, heat or moisture. These claims should always be checked against the technical documentation for the exact laminate being purchased.
For everyday cleaning, manufacturers commonly recommend a soft or non-abrasive cloth and an appropriate mild cleaning solution. Formica, for example, describes its laminate surfaces as easy to clean and recommends a damp, non-abrasive cloth with mild liquid detergent for routine cleaning.
I would avoid assuming that every aqua green laminate has identical resistance characteristics. Two products can share a colour name while having different construction, finish and technical specifications.
Common Mistakes When Choosing Aqua Green Laminate
One mistake is choosing the colour from a screen without checking a physical sample.
Another is using too many competing colours. Aqua green already provides visual identity, so adding several strong colours can create unnecessary competition.
A third mistake is ignoring the finish. The same colour can appear completely different in high gloss, matte or textured form.
A fourth mistake is selecting hardware without considering the laminate. Black, brass, silver and other finishes can each produce different visual results.
Another common issue is failing to consider lighting. A shade that looks perfect in a showroom may look different under the lighting conditions of the actual room.
Finally, I would avoid selecting laminate only because it is currently popular. A colour should make sense for the space and for the people who will use it.
Step-by-Step Guide to Selecting Aqua Green Laminate
Step 1: Define the Application
First, determine exactly where the laminate will be installed.
A kitchen cabinet, wardrobe, wall panel and office cabinet have different practical requirements.
Step 2: Decide How Much Colour You Want
Choose whether aqua green will be the main colour, secondary colour or accent.
This decision helps narrow the number of possible combinations.
Step 3: Select the Finish
Compare matte, gloss, suede and textured options.
Think about how the finish will interact with lighting and how much visual reflection you want.
Step 4: Select Complementary Materials
Choose the countertop, backsplash, flooring, handles and surrounding furniture before finalising the colour.
Aqua green should be considered as part of the complete composition.
Step 5: Test a Physical Sample
Place the actual laminate sample in the room.
Check it during daylight and artificial lighting.
Step 6: Review Technical Specifications
Check the manufacturer’s information for thickness, surface properties, application suitability, maintenance requirements and any relevant resistance ratings.
Step 7: Confirm the Final Layout
Only after the colour and materials have been evaluated together would I move to final ordering and installation.
What Should You Compare Before Buying Aqua Green Laminate?
The following comparison can help organise the decision.
| Selection Factor | Questions to Ask | Why It Matters |
|---|---|---|
| Colour | Is the aqua shade too blue, too green or balanced? | Colour perception changes the overall design |
| Finish | Gloss, matte, suede or textured? | Finish changes reflection and visual character |
| Application | Kitchen, wardrobe, furniture or wall? | Different applications may have different requirements |
| Thickness | What thickness does the manufacturer specify? | Thickness can affect application suitability |
| Durability | What resistance properties are documented? | Helps match the product to everyday use |
| Maintenance | What cleaning method is recommended? | Helps avoid damaging the surface |
| Lighting | How does the sample look throughout the day? | Lighting changes colour perception |
| Compatibility | Does it work with the countertop and flooring? | Prevents conflicting materials |
| Sample | Have I seen the physical sheet? | Screen colours are not reliable final references |
| Warranty | What does the supplier or manufacturer cover? | Provides useful purchasing information |
The most important lesson is that colour should not be the only purchasing criterion. I would evaluate the complete specification and the intended application together.
Expert Design Considerations for Aqua Green Laminate
I believe restraint is particularly important when working with a distinctive colour.
If aqua green is being used on a kitchen island, I would allow the island to become the main visual feature instead of adding several other bold elements.
If the colour is being used on wardrobes, neutral walls and bedding can create balance.
If it is being used on a living-room cabinet, natural wood and neutral upholstery can soften the overall composition.
The idea is not to make every component interesting. Some elements can provide visual rest.
A design quote from Steve Jobs, reproduced by the National Kitchen & Bath Association, states:
“Design is not just what it looks like and feels like. Design is how it works.”
I find this principle particularly useful when choosing laminate. A beautiful colour is only one part of the decision. The finished furniture should also work practically within the room.
Can Aqua Green Laminate Look Timeless?
I would avoid describing any specific colour as permanently timeless because design preferences change.
However, aqua green can be used in ways that reduce dependence on short-term trends.
For example, using the colour on cabinet fronts while keeping the countertop, flooring and major architectural elements neutral makes future changes easier.
If the homeowner later changes handles, lighting or accessories, the main cabinetry can remain the visual foundation.
The strongest approach is therefore not trying to predict whether aqua green will remain fashionable forever. Instead, I would create a balanced design where the colour works because of its relationship with the rest of the room.
How to Make Aqua Green Laminate Feel More Premium
A premium appearance does not necessarily require using the most expensive colour or finish.
Proportion, alignment and material coordination have a major impact.
I would focus on clean cabinet lines, consistent hardware, suitable lighting and carefully selected complementary materials.
For example, aqua green cabinetry combined with a simple light countertop and restrained hardware can look more sophisticated than a design containing many expensive but competing finishes.
The quality of installation also matters. Poorly aligned cabinet doors can undermine the appearance of even a high-quality laminate.
This is why I would treat the laminate as one component of a complete interior rather than the entire design solution.
Aqua Green Laminate for Commercial Interiors
Although residential kitchens and wardrobes are common applications, aqua green can also be considered for selected commercial environments.
Offices, reception areas, retail displays, cafés and other interiors can use colour to establish a particular visual identity.
In commercial spaces, however, I would pay particular attention to durability, cleaning requirements, traffic levels and manufacturer specifications.
A feature wall or reception counter may benefit from aqua green without requiring every piece of furniture to use the colour.
The same principle of controlled colour application applies here: one strong visual element can be more effective than many competing ones.
How I Would Approach an Aqua Green Interior
If I were planning an aqua green interior, I would start with the room rather than the laminate catalogue.
First, I would examine natural light, room dimensions and existing finishes.
Then I would decide where colour is actually needed.
After that, I would compare several aqua green samples instead of selecting the first shade that looks attractive online.
I would place those samples beside the countertop, flooring, wall colour and hardware.
Only after seeing the complete combination would I choose the final laminate.
This process may appear slower, but I believe it reduces the chance of making an expensive aesthetic mistake.
Conclusion
I believe aqua green laminate can be a practical way to introduce colour into a modern interior without making the entire room visually overwhelming. Its blue-green character gives homeowners an alternative to standard whites, greys and wood finishes, while its availability across different laminate finishes creates additional design flexibility.
The strongest results, in my view, come from controlling proportion. Aqua green does not have to cover every cabinet or wall. It can be used on lower kitchen cabinets, an island, wardrobe shutters, a media unit, office storage or a selected feature wall.
I would also give equal attention to finish, lighting, surrounding colours and product specifications. A physical sample should be checked in the actual room before the final order is placed.
If you are considering aqua green laminate, my practical recommendation is to start with the application, choose the desired finish, compare complementary materials and test the colour under real lighting. That approach allows the laminate to become part of a cohesive interior rather than simply becoming a colour added to the room.
Read More: Ambass A Door: Meaning, Brands, Types, Features & Guide
Frequently Asked Questions
What is aqua green laminate?
Aqua green laminate is a decorative laminate surface featuring an aqua-green colour. It can be applied to suitable furniture boards, cabinetry, wardrobes, wall panels and other interior surfaces. The exact appearance depends on the manufacturer, shade and finish. I recommend checking the technical specifications of the individual product because thickness, surface properties, maintenance instructions and resistance characteristics can differ between products.
Is aqua green laminate good for kitchen cabinets?
Yes, aqua green laminate can be used for kitchen cabinets when the selected product is suitable for the intended application. Current kitchen designs demonstrate aqua green laminate in both high-gloss and softer finishes. I would usually consider pairing it with white, light grey, natural wood or a light stone-effect countertop. The final choice should also account for lighting, cabinet proportions and the manufacturer’s technical specifications.
What colours go well with aqua green laminate?
White, off-white, light grey and natural wood tones are among the easiest colours to combine with aqua green laminate. Black hardware can create stronger contrast, while beige and warm neutrals can make the colour feel softer. I would select the surrounding palette according to the room’s lighting and existing materials rather than relying on a fixed colour formula.
Is aqua green laminate suitable for small kitchens?
Aqua green laminate can work in a small kitchen when the colour is distributed carefully. One practical approach is to use aqua green on lower cabinets while keeping upper cabinets white or another light shade. A light countertop and relatively simple backsplash can further reduce visual competition. I would always test the actual laminate sample in the kitchen before making the final decision.
Should I choose matte or glossy aqua green laminate?
The choice depends on the appearance you want. Glossy aqua green laminate can create a brighter, more reflective contemporary effect, while matte or suede finishes can produce a softer appearance. I would compare physical samples under the room’s actual lighting before deciding because the same aqua shade can look noticeably different depending on its surface finish.
Can aqua green laminate be used for wardrobes?
Yes, aqua green laminate can be used on wardrobe shutters when the selected product is appropriate for furniture applications. In a bedroom, I would consider combining aqua green wardrobe fronts with neutral walls, light flooring and natural wood or white furniture. A matte or softer finish can be particularly useful when the goal is to create a calm bedroom environment.
How do I clean aqua green laminate?
Cleaning instructions depend on the specific laminate, so I would follow the manufacturer’s care instructions first. Many laminate manufacturers recommend routine cleaning with a soft, non-abrasive cloth and a mild cleaning solution. I would avoid aggressive chemicals, abrasive materials or cleaning methods that are not approved for the particular product.
Does aqua green laminate work with wood?
Yes, aqua green laminate can work effectively with natural or wood-effect finishes. The cool blue-green colour can contrast with warmer wood tones, creating a balanced combination. I would generally keep the number of wood finishes controlled so that the room does not contain too many competing patterns or tones.
How can I make aqua green laminate look modern?
I would focus on simple cabinet forms, clean lines, coordinated hardware and a restrained colour palette. Aqua green can be paired with white, light grey, natural wood or selected black details. The finish also matters: high gloss can produce a polished contemporary appearance, while matte and suede finishes can create a softer modern aesthetic.
Should I buy an aqua green laminate after seeing it online?
I would not make the final colour decision from an online image alone. Different screens can display colours differently, and lighting can change how a laminate appears. A physical sample should be viewed in the intended room alongside the countertop, flooring, wall colour and other materials. This is especially important when choosing a specific aqua shade.
Sources and References
The article’s design and product discussion is informed by current manufacturer and interior-design references, including Greenlam’s aqua green laminate range, CenturyPly’s Aqua Green laminate specifications, Formica’s laminate cleaning guidance, and current aqua green kitchen examples from Livspace.
Greenlam currently lists Aqua Green among its laminate colour options and describes its kitchen laminate range in terms of performance characteristics such as stain and scratch resistance. CenturyPly provides technical specifications for Aqua Green laminate products, including surface-wear, staining, scratching, heat and other test properties.
Current kitchen-design examples also show aqua green laminate used with white, quartz, granite and other neutral materials.
Disclaimer
This article is provided for general interior-design information and should not be treated as a product specification or purchasing guarantee. Laminate colours, finishes, dimensions, technical properties, availability and manufacturer recommendations can vary between products and suppliers. I recommend checking the current technical documentation and obtaining a physical sample before making a final purchase or installation decision.
Research support: The product/design details above were checked against current manufacturer and design sources, including Greenlam, CenturyPly, Formica and current aqua-green kitchen examples. (greenlam.co.in) The quotations used are attributable to the cited original/authoritative sources. (khanacademy.org)
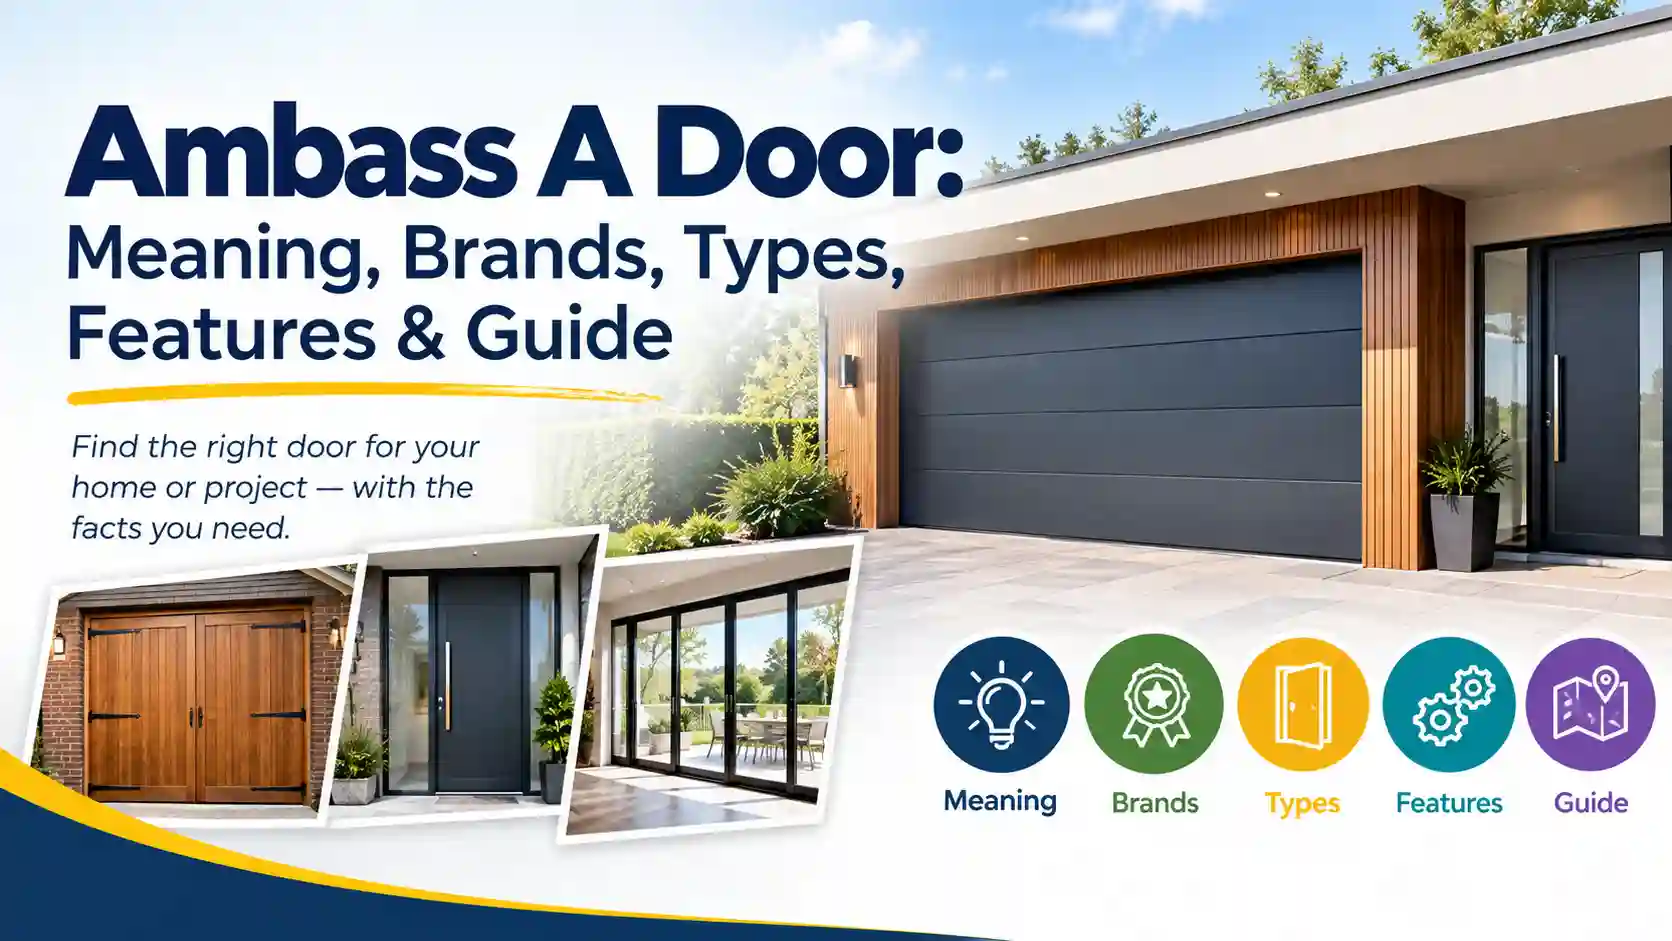
Ambass A Door: Meaning, Brands, Types, Features & What You Need to Know
Introduction
When I first look at the keyword “Ambass A Door,” the spelling immediately raises an important question: is it referring to a specific door company, a product, or simply a variation of another name? That uncertainty is understandable because the words can point toward several closely related names, including Ambassa and Ambassador Doors & Windows.
Based on current search results, I would not treat “Ambass A Door” as the name of one universally recognized global door brand. Instead, it appears to function as a search phrase that can overlap with different businesses and door-related terms. One prominent current result is Ambassa in the Netherlands, which specializes in made-to-measure opening garage doors. Another is Ambassador Doors & Windows in Cape Town, which manufactures and installs frameless, aluminium, and wooden doors and windows.
That distinction matters because someone searching for Ambass A Door may have a very specific product or company in mind. If we assume too quickly that every result refers to the same business, we can easily misunderstand what the searcher actually wants.
In my view, the best way to understand the keyword is therefore to examine the different meanings behind it, identify the major businesses and spellings associated with it, and then look at the practical characteristics of the doors themselves.
What Does Ambass A Door Mean?
The phrase Ambass A Door does not have a single standard dictionary definition. It appears to be a search variation associated with door-related names, especially Ambassa and Ambassador.
The word “ambassador” itself has a well-established meaning. Cambridge Dictionary defines an ambassador as an important official representing one country in another country, while it also gives a broader meaning for a person who represents or promotes an organization, activity, or brand.
Oxford similarly defines an ambassador as someone who represents or promotes a particular activity in its broader, non-diplomatic use.
That explains one possible source of confusion. A search containing “Ambass,” “Ambassador,” and “Door” can move between a physical door product and the broader word “ambassador.”
At the same time, Ambassa is the actual name of a Dutch garage-door company. Its official website says that Ambassa focuses on made-to-measure opening garage doors and describes the company’s philosophy with the phrase “Iedere deur een ambassadeur,” which translates approximately as “Every door an ambassador.”
So, when I analyze the keyword from an SEO and informational perspective, I see three connected concepts:
- Ambass A Door as the exact search phrase.
- Ambassa as a Dutch garage-door brand.
- Ambassador Doors & Windows as a separate South African doors-and-windows business.
Recognizing those differences is the first step toward understanding the keyword correctly.
Why Is Ambass A Door Confusing?
The main reason is that similar words are being used in different contexts.
A person may type “Ambass A Door” because they remember the name of a company but are unsure about its exact spelling. Another person may be searching for Ambassa garage doors. Someone else may be looking for Ambassador Doors & Windows in South Africa.
Search engines then have to interpret the intent behind the phrase.
This is particularly important with brand-related keywords. A small spelling difference can change the company, country, product category, and even the type of door being discussed.
For example, Ambassa’s official website identifies the company as Ambassa B.V., based in Budel in the Netherlands, and focuses heavily on opening garage doors.
By contrast, Ambassador Doors & Windows describes itself as a Cape Town-based company specializing in manufacturing and installing frameless, aluminium, and wooden doors and windows.
These are not simply two pages for the same product. They represent different businesses and different markets.
That is why I would always check the location and product category before assuming that an Ambass A Door search result is the company or product I need.
Ambassa Garage Doors in the Netherlands
One of the clearest current matches for the keyword is Ambassa, a Dutch company specializing in opening garage doors.
According to its official website, Ambassa offers custom-made garage doors in the Netherlands. The company describes options including maintenance-free and wooden opening garage doors, with a focus on insulation, safety, comfort, and customization.
The company also states that its doors are manufactured in the Netherlands and can be customized in areas such as colors, patterns, glazing, and door configuration.
The concept is relatively straightforward.
An opening garage door generally consists of two door leaves that open outward, similar to traditional double doors. This creates a wide opening while keeping the interior garage space relatively clear.
For someone who uses a garage frequently, that design can be practical. Instead of lifting a large door or moving a sectional mechanism upward, the user opens the two leaves and walks or cycles through.
Ambassa specifically describes opening garage doors as suitable for convenient access and emphasizes their broad passage.
The company also offers different material and design options, including maintenance-free doors and wooden versions.
What Are Ambassa Opening Garage Doors?
When I break down the Ambassa product concept, the basic idea is a custom-made outward-opening garage door.
The door is designed to function as an entrance to the garage while also contributing to the appearance and comfort of the property.
Ambassa says its opening garage doors can be made with maintenance-free materials or wood. Its product information also highlights insulation, security, ease of use, customization, and glazing options.
The company lists a U-value range of 0.59 to 1.5 W/m²K for certain configurations and describes insulated frames and HR++ glazing as part of its insulation approach. Because specifications can vary by construction and configuration, I would treat these figures as product-specific rather than assuming that every Ambassa door has exactly the same thermal performance.
This is an important point when comparing doors.
A door’s performance depends on more than its name. Material, frame construction, glazing, seals, installation, dimensions, and configuration can all influence the final result.
Main Features Associated With Ambassa Doors
The following table brings together the main characteristics published by Ambassa for its opening garage doors.
| Feature | What it means | Why it may matter |
|---|---|---|
| Custom manufacturing | Door is made according to the required dimensions and design | Useful when a standard-size door does not fit |
| Opening design | Two door leaves open outward | Provides a broad pedestrian and vehicle opening |
| Maintenance-free option | Steel and aluminium-based construction is available | Can reduce routine maintenance requirements |
| Wooden option | Traditional wood construction is available | Suitable for a classic or natural appearance |
| Insulation | Insulated construction and glazing options are offered | Can help improve garage comfort |
| Security | Multi-point locking and other security features are offered | Important for protecting the garage |
| Glazing | Clear or frosted HR++ glass options are available | Can introduce daylight while maintaining the door’s design |
| Custom colors | Ambassa states that RAL colors are available | Allows the door to coordinate with the property |
| Custom patterns | Different lines and motifs can be selected | Provides greater design flexibility |
The main takeaway is that Ambassa positions its garage doors as a combination of practical access, customization, insulation, and appearance rather than simply as a basic garage barrier.
Ambassa Door Materials: Wood or Maintenance-Free Construction?
Material is one of the first decisions I would consider when choosing a garage door.
Ambassa offers both wooden and maintenance-free opening garage doors. Its maintenance-free option uses steel panels with an aluminium frame, while its wooden option is intended to provide a more traditional appearance.
Wood has a distinctive visual character. It can work particularly well when a property already uses natural materials or when the owner wants a traditional appearance.
The trade-off is that wood generally requires more attention than a maintenance-free metal-based construction.
A maintenance-free option can be attractive when the priority is reducing routine upkeep. However, “maintenance-free” should not be interpreted as meaning that every mechanical component will require zero attention forever. Hinges, locks, seals, and other moving or functional parts can still require inspection or adjustment over time.
From my perspective, the better question is not simply “Which material is best?”
The better question is:
Which material fits the way the garage is used, the appearance of the property, and the amount of maintenance the owner is prepared to accept?
Ambass A Door and Security
Security is another major consideration when discussing any exterior door.
A garage may contain a vehicle, bicycles, tools, equipment, storage items, or provide direct access to another part of the home. The quality of the locking system therefore matters.
Ambassa’s published product information includes security features such as multi-point locking and an SKG*** anti-cylinder-pull handle set, as well as espagnolette locking systems.
The exact security configuration can depend on the door selected, so I would recommend confirming the specification of a particular model rather than assuming that every configuration includes every feature.
Security also involves installation.
A strong door with poor installation may not deliver the same practical result as a properly fitted system. Frame alignment, locking points, hinges, seals, and surrounding construction all matter.
For that reason, I would consider the complete door system rather than focusing only on the panel material.
Ambass A Door and Insulation
Insulation becomes especially relevant when the garage is attached to a house or used as more than a place to park a vehicle.
A garage may function as a workshop, storage area, hobby space, entrance area, or utility space. In those situations, temperature and drafts can become more noticeable.
Ambassa highlights insulation as one of the benefits of its garage doors. Its product page describes insulated construction, insulated frames, and HR++ glazing options.
The company’s current website also positions insulation as part of the broader comfort proposition of its doors.
However, I would avoid judging insulation from a single advertised number.
The complete performance of a garage entrance depends on the door, frame, seals, glazing, installation, and surrounding structure.
When comparing products, I would therefore ask for the complete specification rather than only asking whether a door is “insulated.”
Ambassa A Door and Glazing
Glass can change both the appearance and practical experience of a garage.
A garage without windows can feel dark during the day, particularly if it is used as a workspace or frequently accessed area.
Ambassa states that its opening garage doors can include HR++ glass, with options including clear or frosted glass. Glass can be placed horizontally or vertically, and glazing can be incorporated into one or both door panels.
This creates a useful design choice.
If daylight is important, glazing can make the garage feel more open.
If privacy is important, frosted glass may be preferable.
If the goal is a particular architectural style, the position and proportion of the glazing can become a major design element.
I would therefore treat glass as more than decoration. It can affect daylight, privacy, appearance, and the overall specification of the door.
Ambassador Doors & Windows in South Africa
Another important result associated with the broader “Ambassador door” wording is Ambassador Doors & Windows in Cape Town.
This is a separate business from Ambassa in the Netherlands.
Its official website states that the company specializes in manufacturing and installing frameless, aluminium, and wooden doors and windows. It also lists shutters and frames among its product categories.
The company describes itself as Cape Town based and says it has more than 40 years of experience, while also advertising a five-year product warranty.
This distinction is particularly important for anyone searching the keyword internationally.
If I were looking for a garage door in the Netherlands, a Cape Town-based doors-and-windows company would not necessarily be the relevant result.
Likewise, someone in Cape Town looking for aluminium or frameless doors should not automatically assume that a Dutch garage-door company is the appropriate match.
The location changes the meaning of the search.
Comparing Ambassa and Ambassador Doors & Windows
Because the names are similar, I find a side-by-side comparison useful.
| Category | Ambassa | Ambassador Doors & Windows |
|---|---|---|
| Primary location | Budel, Netherlands | Cape Town, South Africa |
| Main product emphasis | Opening garage doors | Doors and windows |
| Materials mentioned | Steel, aluminium, wood, glass | Aluminium, wood, frameless glass |
| Product category | Garage doors | Doors, windows, shutters and frames |
| Customization | Custom-made garage doors | Custom door and window solutions |
| Market context | Dutch residential garage market | Cape Town doors and windows market |
| Website terminology | Ambassa | Ambassador Doors & Windows |
The key takeaway is simple: similar names do not necessarily mean the same company. The country, product category, and official website should always be checked before making a purchasing decision.
What Does the Word Ambassador Have to Do With Ambassa?
This is where the naming becomes interesting.
Ambassa’s own website explains its philosophy through the phrase:
“Iedere deur een ambassadeur.”
Ambassa, official company website
The phrase literally connects the door with the idea of an ambassador.
In English, an ambassador can mean a representative. Cambridge and Oxford both recognize the broader meaning of a person who represents or promotes an activity, organization, or brand.
That makes the Ambassa name particularly understandable in the company’s branding context.
The company is essentially presenting each door as a representative of its approach to quality, design, service, and craftsmanship.
This also helps explain why searches can sometimes move between “Ambass A Door,” “Ambassa Door,” and “Ambassador Door.”
The words are linguistically close, while the businesses using them may be different.
How to Choose the Right Ambass A Door Result
If I were searching for “Ambass A Door,” I would use a simple identification process.
First, I would check the country.
If the result refers to the Netherlands, I would investigate whether it is the Ambassa garage-door company.
If the result refers to Cape Town, I would check whether it is Ambassador Doors & Windows.
Second, I would check the product.
Is the page about garage doors, exterior doors, windows, or another product?
Third, I would check the official domain.
Brand names can appear on directories, review websites, old pages, or third-party articles. The company’s official website is usually the better starting point for current specifications.
Fourth, I would check the exact model or configuration.
Even within one company, different doors can have different materials, glazing, locking systems, dimensions, and prices.
Finally, I would confirm whether the company actually serves the location where the door will be installed.
What Should You Check Before Buying a Garage Door?
A garage door is a long-term purchase, so I would not make the decision based solely on appearance.
The following checklist provides a more complete way to compare options:
- Measure the opening accurately.
- Decide how the garage will be used.
- Determine whether insulation is important.
- Consider whether glazing is useful.
- Compare wood and maintenance-free materials.
- Check the locking system.
- Ask about installation.
- Confirm warranty terms.
- Ask about maintenance requirements.
- Check delivery and installation times.
- Compare complete prices rather than starting prices alone.
- Confirm which features are included in the quoted price.
- Check whether old-door removal is included.
- Verify the company’s service arrangements after installation.
These questions can prevent a common mistake: comparing two doors that appear similar but actually include very different specifications.
How Garage Usage Should Influence the Door Choice
I believe the way a garage is used should be one of the first questions asked.
Someone who rarely enters the garage may prioritize appearance and price.
Someone who walks through the garage several times a day may care much more about ease of access.
A household that stores bicycles may want a broad opening.
A homeowner using the garage as a workshop may place more emphasis on insulation and daylight.
A person living in a property with a strong traditional architectural style may prefer wood.
Someone looking to reduce maintenance may prefer a maintenance-free material.
The door should therefore be selected around the user’s actual routine rather than around a generic claim that one design is best for everyone.
Common Mistakes When Searching for Ambass A Door
Mistake 1: Assuming All Similar Names Refer to One Company
This is probably the biggest mistake.
Ambassa and Ambassador Doors & Windows are different businesses operating in different markets.
Mistake 2: Ignoring Location
A product available in the Netherlands may not be available in another country.
Likewise, a Cape Town manufacturer may primarily serve its local market.
Location should therefore be one of the first filters.
Mistake 3: Comparing Only Prices
A quoted price can exclude installation, glazing, hardware, removal, customization, or other components.
I would compare complete specifications rather than headline prices.
Mistake 4: Focusing Only on Appearance
A beautiful door still needs to open properly, provide appropriate security, fit correctly, and perform according to the requirements of the property.
Mistake 5: Assuming Every Door Has the Same Specification
Even products from the same manufacturer can differ.
Size, material, glazing, hardware, and configuration can change the final product.
Ambass A Door: Questions to Ask a Supplier
Before placing an order, I would ask the supplier questions such as:
- What exact product or model is being quoted?
- What material is used?
- What is the frame material?
- What insulation specification applies?
- What glazing options are available?
- What locking system is included?
- What dimensions are possible?
- Is the door fully custom-made?
- What installation service is included?
- Is removal of the old door included?
- What warranty applies?
- What maintenance is required?
- How long is the expected delivery period?
- Which parts are covered by after-sales service?
- Does the quoted price include all selected options?
These questions help turn a vague search into a meaningful comparison.
Ambassa’s Customization Options
Customization is one of the stronger themes in Ambassa’s published information.
The company states that customers can select different line patterns and motifs, RAL colors, glazing configurations, and other design elements.
This matters because a garage door is often a significant visual element on the front or side of a property.
A poorly matched door can make an otherwise attractive building look disconnected.
A well-matched door can support the architectural style.
I would therefore consider the surrounding property when selecting the color, panel design, glazing, and material.
A modern house may suit a clean and minimal configuration.
A traditional property may work better with a classic design.
A property with existing timber details may benefit visually from a wooden door.
There is no single correct aesthetic. The useful principle is consistency.
Maintenance Considerations
Maintenance is often overlooked when people focus on a new door’s appearance.
Wood and metal-based doors have different maintenance considerations.
Ambassa specifically promotes its steel-and-aluminium maintenance-free option as a low-maintenance solution.
Wood, by contrast, generally requires more attention to preserve its appearance and condition.
Mechanical elements also deserve attention regardless of the main door material.
Hinges, locks, seals, handles, and other moving components can affect long-term operation.
A sensible maintenance routine should therefore focus on the complete system rather than only the visible surface.
Installation Matters as Much as the Door
I would not separate the product from its installation.
A garage door has to fit the opening correctly, align properly, seal appropriately, and operate smoothly.
Ambassa currently promotes its own specialist installation service and states that its doors can be installed by its team.
The company also states on its current website that its doors are fully customizable and include a ten-year warranty.
Because warranty conditions and installation arrangements can change, I would confirm the exact terms in writing before ordering.
This is especially important for custom-made products.
What Makes a Good Door Comparison?
A good comparison should look at more than one feature.
I would compare:
Design: Does the door fit the property?
Function: Is the opening mechanism appropriate?
Material: Does the material suit the desired appearance and maintenance level?
Insulation: Does the specification meet the property’s needs?
Security: Does the locking system provide the desired level of protection?
Glazing: Is natural light useful?
Customization: Can the dimensions and design be adapted?
Installation: Who installs the door and what is included?
Warranty: What is actually covered?
Service: What happens if something needs adjustment or repair?
This approach produces a more useful decision than simply asking which door is “best.”
A Practical Buying Scenario
Consider a hypothetical homeowner whose garage is attached directly to the house.
The family uses the garage every day for bicycles, storage, and walking between the home and driveway.
In this situation, easy pedestrian access may be particularly important.
The homeowner may also value insulation because the garage is connected to the house.
A wide opening, suitable glazing, secure locking, and good sealing may therefore matter more than a basic low-cost door.
Now consider a different hypothetical homeowner who uses the garage only for occasional storage.
That person might place greater emphasis on appearance, basic security, and maintenance requirements.
The two homeowners could reasonably choose different doors because their needs are different.
This is why I would not recommend selecting a garage door based on a generic ranking.
The right specification depends on the actual use case.
The Role of Brand Reputation
Brand reputation can be useful, but I would still examine the underlying evidence.
A company may have many positive reviews, but reviews do not replace checking the product specification.
Ambassa currently displays customer-review information on its website, including a 9.8/10 rating on pages that show hundreds of reviews.
I would treat those figures as company-published information rather than as an independently verified review study.
When evaluating reputation, I would also look at the age of the reviews, the number of reviews, the nature of complaints, the company’s responses, and whether the feedback relates specifically to the product and installation service.
That gives a more balanced picture.
What I Would Look For in an Ambass A Door Search
If the goal is simply to understand the keyword, I would divide the search into several categories.
If the search is about Dutch garage doors: look for Ambassa and its official Dutch website.
If the search is about Cape Town doors and windows: look for Ambassador Doors & Windows.
If the search is about the word “ambassador”: use a dictionary or language source instead of assuming it refers to a physical door.
If the search is about a specific old product: check archived product information, manufacturer records, or the exact spelling and model number.
This approach reduces the risk of confusing similar names.
Why Search Intent Matters for Ambass A Door
From an SEO perspective, I think this keyword is especially interesting because it has ambiguous intent.
Someone searching the exact phrase may be looking for:
- A company
- A garage door
- A door manufacturer
- A product specification
- A brand explanation
- A location
- A replacement part
- A review
- A comparison
- The meaning of the word
- A spelling correction
That means content targeting the keyword should explain the ambiguity rather than pretending the keyword has only one meaning.
For readers, that makes the article more useful.
For search engines, it also creates an opportunity to connect the exact keyword with related concepts naturally rather than repeating the same phrase unnaturally throughout the article.
A Simple Ambass A Door Decision Framework
I would use the following framework when researching a door:
1. Identify the company.
Confirm the exact business name and official website.
2. Identify the location.
Make sure the company serves your country or region.
3. Identify the door type.
Determine whether you need a garage door, entrance door, patio door, window, or another product.
4. Identify the material.
Compare wood, aluminium, steel, glass, or composite options according to the application.
5. Identify functional requirements.
Consider insulation, security, access, maintenance, and glazing.
6. Compare complete specifications.
Do not compare only headline prices.
7. Confirm installation and warranty.
Make sure you understand what happens after purchase.
This process works even when the original keyword is ambiguous.
Final Comparison: What Should You Prioritize?
| Buying factor | Questions to ask | Importance depends on |
|---|---|---|
| Location | Is the supplier available in my area? | Country and service area |
| Door type | Does the opening mechanism suit my use? | Garage and property layout |
| Material | Do I prefer wood or lower-maintenance construction? | Maintenance preference |
| Insulation | How important is temperature control? | Garage use and connection to home |
| Security | What locking system is included? | Property and stored belongings |
| Glazing | Do I need daylight or privacy? | Garage use and design |
| Customization | Can the size and style be adapted? | Building dimensions |
| Installation | Who installs the product? | Supplier and project |
| Warranty | What is actually covered? | Supplier terms |
| Service | Who handles adjustments or repairs? | Long-term ownership |
The main lesson from this comparison is that a door is a system rather than just a visible panel. The material, frame, hardware, installation, insulation, glazing, and after-sales service all contribute to the final experience.
Verified Terminology: Ambassador and Its Broader Meaning
Because the keyword contains “Ambass,” it is worth clarifying the word ambassador itself.
The word has historically referred to an official representative. Modern dictionaries also recognize broader meanings involving people who represent organizations, activities, or brands.
The American Heritage Dictionary defines an ambassador as including an “authorized messenger or representative” and also recognizes unofficial representatives such as goodwill ambassadors.
This matters because the concept of representation is closely connected with Ambassa’s own branding language.
Ambassa describes its philosophy as:
“Iedere deur een ambassadeur.”
Ambassa, official website
In my view, that wording helps explain why the brand name can look similar to the English word “ambassador.” It is not evidence that every search for “Ambass A Door” refers to the same company, but it does provide useful context for the Ambassa brand.
My Practical Recommendations for Researching Ambass A Door
I would begin with the exact spelling rather than correcting the search automatically.
Next, I would look at the location shown in the result.
Then I would identify the product category.
After that, I would move to the official website of the relevant company.
If the result is Ambassa, I would examine the company’s garage-door range, materials, insulation, security, customization, installation, warranty, and service information.
If the result is Ambassador Doors & Windows, I would examine its specific doors and windows, materials, location, installation services, and warranty information.
Finally, I would compare the exact product against the requirements of the property.
This process is simple, but it prevents one of the most common problems with ambiguous commercial searches: comparing products that were never intended for the same market.
Conclusion
I see Ambass A Door as an ambiguous search keyword rather than the universally recognized name of one single door product. Current information points to closely related names and businesses, most notably Ambassa in the Netherlands and Ambassador Doors & Windows in Cape Town.
The most useful lesson is to identify the company, country, and product category before evaluating a door. Ambassa focuses on made-to-measure opening garage doors and publishes information about materials, insulation, security, glazing, customization, installation, and warranty. Ambassador Doors & Windows, meanwhile, operates in a different market and focuses on doors and windows made from materials including aluminium, wood, and frameless glass.
In my view, anyone researching an Ambass A Door should avoid choosing based on the keyword alone. Instead, I would verify the exact brand, location, model, materials, specifications, installation arrangements, warranty, and after-sales service.
That approach turns a confusing search phrase into a practical buying investigation. Whether the goal is finding a garage door, understanding a brand, or identifying a similarly named company, careful verification is the safest starting point.
Read More: Duaction: Meaning, Benefits & Learning by Action
Frequently Asked Questions
What Is Ambass A Door?
Ambass A Door is best understood as a search phrase rather than a universally standardized product name. Current search results connect the wording with businesses and names such as Ambassa, a Dutch company specializing in opening garage doors, and Ambassador Doors & Windows in Cape Town. The exact meaning therefore depends on the location and product the searcher has in mind. Checking the company’s official website, country, and product category is the easiest way to determine which result is relevant.
Is Ambass A Door the Same as Ambassa?
Not necessarily. “Ambass A Door” and “Ambassa” are similar search terms, but they should not automatically be treated as identical. Ambassa is a Dutch company that focuses on custom-made opening garage doors. Its official website lists options including maintenance-free and wooden doors, glazing, security features, and customization. The spaced phrase “Ambass A Door” may simply be a variation used by people searching for that brand or another similarly named door business.
What Does Ambassa Make?
Ambassa specializes in opening garage doors. Its official product information describes both maintenance-free and wooden versions, custom dimensions, different colors and patterns, glazing options, insulation, and security features. The company is based in Budel, Netherlands, and focuses on the Dutch market. Its products are positioned around comfort, security, insulation, customization, and ease of use.
Where Is Ambassa Located?
Ambassa B.V. is based in Budel in Noord-Brabant, Netherlands. Its official contact page lists its address as Randweg-Zuid 28, 6021 PT Budel. The company provides information and services for customers looking for opening garage doors and offers options for personal advice and showroom visits.
What Types of Doors Does Ambassa Offer?
Ambassa offers opening garage doors in both maintenance-free and wooden constructions. The company also provides different design configurations, colors, patterns, and glazing options. Its website describes HR++ glass options, including clear and frosted glass, and allows different glazing placements. The exact available configuration depends on the chosen door and customer requirements.
Are Ambassa Garage Doors Insulated?
Yes, Ambassa promotes insulation as a feature of its garage doors. Its published product information describes insulated construction, insulated frames, and HR++ glazing options. It also publishes a U-value range for its configurations. Because thermal performance can depend on the complete door and installation configuration, I would confirm the exact specification for the model being quoted rather than assuming every door has identical performance.
What Is Ambassador Doors & Windows?
Ambassador Doors & Windows is a separate Cape Town-based business that manufactures and installs doors and windows. Its official website says that it specializes in frameless, aluminium, and wooden doors and windows and also lists shutters and frames. It should not automatically be confused with Ambassa, the Dutch garage-door company.
Why Is the Keyword Ambass A Door Confusing?
The keyword is confusing because it resembles several names and words. “Ambassa” is the name of a Dutch garage-door company, while “ambassador” is a common English word with both diplomatic and broader representative meanings. There are also businesses using similar names, including Ambassador Doors & Windows in South Africa. The country and product category therefore matter when interpreting the search.
What Should I Check Before Buying an Ambass A Door?
I would check the exact manufacturer, location, door type, material, dimensions, insulation specification, glazing, security hardware, installation service, warranty, maintenance requirements, delivery time, and complete price. If the product is custom-made, I would also confirm how measurements are taken and who is responsible if the final dimensions differ from the original estimate. These details can be more important than the general brand name.
Are Ambassa Doors Custom Made?
According to Ambassa’s official product information, its garage doors are made to measure. The company says customers can customize dimensions, colors, patterns, and glazing configurations. Custom manufacturing can be useful when an existing garage opening does not correspond to a standard door size, but the final design and price should always be confirmed in the supplier’s quotation.
Does Ambassa Offer a Warranty?
Ambassa currently states on its website that its doors include a ten-year warranty. Warranty conditions can change and may vary according to the product or installation, so I would read the written warranty terms before purchasing. It is also useful to determine which components, labor, and service visits are covered.
Sources and References
Cambridge Dictionary provides definitions of “ambassador,” including its diplomatic meaning and its broader meaning as someone who represents or promotes an organization, activity, or brand.
Oxford Learner’s Dictionaries provides the broader definition of ambassador as a person who represents or promotes a particular activity and gives the word’s historical origin.
Ambassa’s official website provides information about its company, opening garage doors, materials, insulation, security, customization, glazing, installation, and warranty.
Ambassador Doors & Windows’ official website provides information about its Cape Town operations and its frameless, aluminium, and wooden doors and windows.
The article distinguishes between these businesses because the available sources indicate that they operate as separate companies in different locations and product categories.
Disclaimer
This article is provided for general informational purposes. “Ambass A Door” is treated as an ambiguous search phrase rather than as the universally recognized name of one single product or company. Product specifications, availability, prices, warranty terms, service areas, and installation arrangements can change over time and may vary by configuration and location. Readers should confirm current information directly with the relevant manufacturer or supplier before making a purchase.
-
 Entertianment2 months ago
YarrList: What It Is, Safety, Legality, and Alternatives
-

 AI2 months ago
vrgamegirl19/comfyui-vrgamedevgirl: Features, Setup, Installation, and Safety Guide
-
 Business2 months ago
410 Terry Avenue N Seattle WA 98109: What Is at This Address?
-

 Health2 months ago
Hemp Gummies for Soothing Relief 750mg / 30 Count: Facts, Safety, Ingredients, and Evidence
-

 AI2 months ago
Open CoDesign: What It Is, Features, Setup, and How It Works
-
 Technology2 months ago
Application Compatibility Toolkit 5.0: Features, Installation, Testing, Fixes, and Modern Alternatives
-
 Guide2 months ago
Best Laptops for Writers in 2026: 7 Top Picks for Writing, Research, and Travel
-

 Business2 months ago
Doubtnut Valuation: From $154M Peak to $10M ALLEN Acquisition