
Guide
Photography Lighting Basics: A Beginner’s Guide to Better Photos

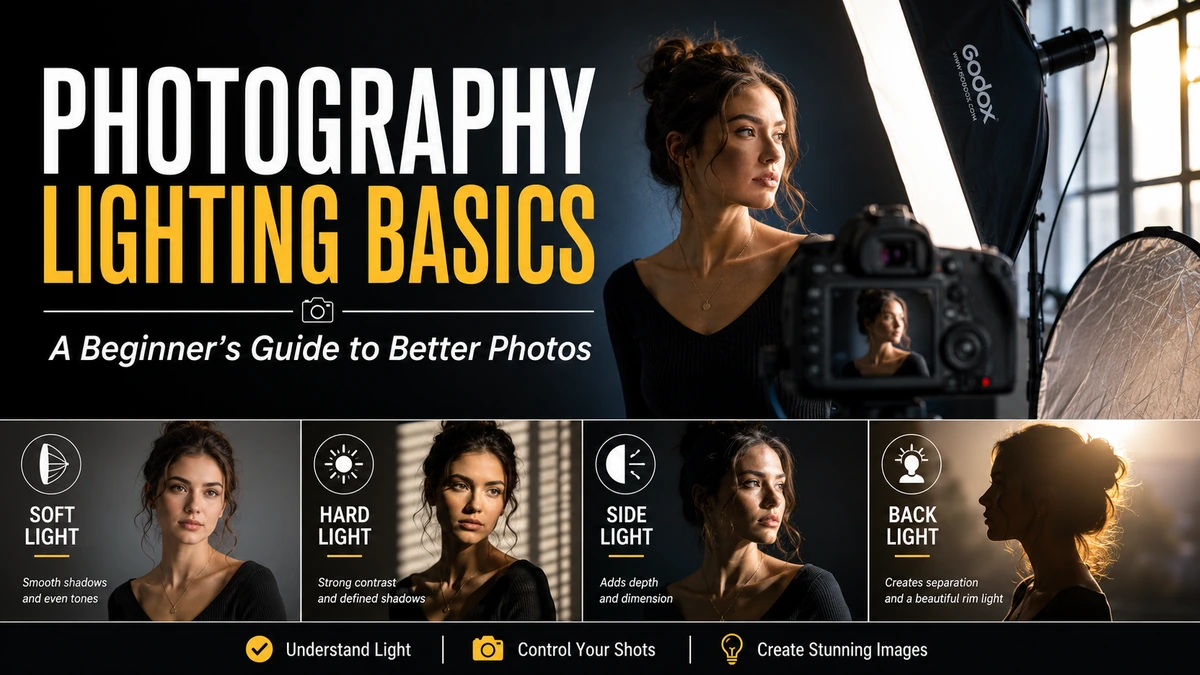
I think lighting becomes much easier once we stop treating it as a collection of complicated studio tricks. At its core, photography is about recording light, and nearly every lighting decision comes back to a few simple questions: Where is the light coming from? How large or small is the source? How bright is it? What color is it? And how does it interact with the subject?
A beginner can own an expensive camera and still struggle with flat portraits, blown-out highlights, muddy indoor images, or distracting shadows. Another photographer can use a phone beside a window and create a much more attractive photograph simply because the light is better. That difference is why understanding Photography Lighting Basics often improves images faster than buying another lens or camera body.
The good news is that we do not need a professional studio to learn lighting. Sunlight, windows, doorways, desk lamps, reflectors, white walls, inexpensive LEDs, and a single flash can teach nearly every essential principle. Adobe similarly notes that dramatic portrait lighting does not necessarily require professional equipment because common light sources can be used creatively.
In this guide, I will explain how light quality, direction, exposure, color temperature, diffusion, reflection, natural light, and artificial light work together. More importantly, I will show how to recognize good light before pressing the shutter.
Key Photography Lighting Basics to Remember
Before going deeper, I recommend remembering these principles:
- Light direction determines where highlights and shadows appear.
- Large apparent light sources generally create softer transitions between light and shadow.
- Small or distant apparent light sources tend to produce harder, more defined shadows.
- Moving a light closer to the subject can make it appear softer while also increasing its intensity.
- Front lighting usually reduces visible texture and shadow.
- Side lighting emphasizes shape, depth, and texture.
- Backlighting can create rim light, glow, silhouettes, or separation from the background.
- Diffusion spreads light and usually creates softer transitions.
- Reflectors redirect existing light rather than creating light.
- Aperture, shutter speed, and ISO work together to determine photographic exposure.
- White balance helps the camera render colors appropriately under different light sources.
- Natural and artificial light can be used separately or combined.
- One controlled light source is enough to learn most beginner lighting techniques.
From my perspective, the most useful beginner habit is to examine the light on the subject before looking at camera settings. Exposure controls determine how the camera records the light, but they do not automatically make unattractive light attractive.
What Does Lighting Mean in Photography?
Photography lighting refers to the illumination that reaches a subject and eventually enters the camera.
That sounds simple, but photographers evaluate light through several characteristics. The most important are direction, quality, intensity, color, and contrast.
Direction describes where the light comes from relative to the subject. Quality describes whether shadow edges are hard or soft. Intensity refers to brightness. Color describes whether the light appears warm, neutral, cool, greenish, or another tint. Contrast describes the difference between bright and dark areas.
Imagine photographing the same person in three places.
In the first photograph, the person stands beneath direct midday sunlight. Shadows beneath the nose and eyes may appear dark and sharply defined.
In the second, the person stands beneath an overcast sky. The light is spread across a much larger portion of the sky, producing gentler transitions.
In the third, the person stands beside a large window. One side of the face receives more light while the opposite side gradually becomes darker, creating shape and depth.
The camera and subject did not need to change. Only the lighting changed.
Adobe describes diffused or soft light as light filtered by something, such as sunlight passing through a sheer curtain. It contrasts this with hard direct light, which tends to create higher contrast and sharper shadows.
The Four Characteristics of Light Every Beginner Should Understand
I find it useful to break lighting into four main characteristics before thinking about equipment.
Light Quality: Hard Light Versus Soft Light
Light quality usually refers to whether shadows have sharp or gradual edges.
Hard light produces clearly defined shadows and strong transitions between bright and dark areas. Direct midday sunlight is a familiar example.
Soft light creates wider, smoother transitions. An overcast sky, a large window, or a large softbox positioned close to a subject can create this effect.
Adobe explains that direct light produces stronger contrast and sharper highlights and shadows, while diffused light scatters the rays and creates softer results.
The important concept is apparent source size.
A physically small light close to the subject may appear relatively large from the subject’s position. A much larger source placed very far away can behave like a smaller apparent source.
That explains something photographers sometimes find surprising: the sun is enormous, yet on a cloudless day it creates hard shadows because it occupies a relatively small portion of the sky from our viewpoint.
Cloud cover effectively turns a much larger portion of the sky into the source, spreading the illumination and making shadow edges softer.
A large window works similarly. Move a portrait subject close to the window and the window occupies a large part of the subject’s field of view. The result can be beautifully soft light.
Move the subject far across the room, and that same window appears smaller relative to the subject. The light becomes more directional and can look harder.
Light Direction: Where the Light Comes From
Direction determines which surfaces receive light and which fall into shadow.
Adobe explains that moving a light around the subject changes the mood. Backlighting can create silhouette effects, while side lighting can illuminate one side and leave the other darker.
The easiest way to learn direction is to imagine a clock surrounding the subject.
If the camera is at 6 o’clock and the light is also near 6 o’clock, the subject receives mostly frontal illumination.
Move the light toward 4 or 8 o’clock and shadows begin defining facial features, textures, and shape.
Move it toward 3 or 9 o’clock and the lighting becomes strongly lateral.
Place it around 12 o’clock, behind the subject, and you have backlighting.
No direction is automatically correct. The direction should support the photograph.
Light Intensity: How Bright the Light Is
Intensity determines how much illumination reaches the subject.
A brighter source can allow a lower ISO, faster shutter speed, smaller aperture, or some combination of those settings.
Distance plays a major role. Bringing a lamp or flash closer usually makes it substantially brighter on the subject. Moving it farther away reduces the illumination.
This matters practically because photographers sometimes try to fix dim light by increasing ISO when simply moving the source closer would produce a cleaner and often softer result.
Intensity also affects the balance between multiple sources. If window light illuminates one side of a person’s face and a lamp illuminates the other, changing the lamp’s distance can alter the ratio between highlight and shadow.
Light Color: Warm, Neutral, and Cool Sources
Different light sources have different color characteristics.
Daylight may appear relatively neutral under some conditions. Sunrise and sunset often appear warm. Shade can look cooler. Traditional tungsten lighting is warmer than daylight, while some fluorescent sources can produce greenish tones.
Cameras compensate through white balance.
Canon describes white balance as the process used to make white areas appear white and notes that cameras can match white balance to different light sources or use a custom setting.
Understanding color matters because mixing light sources can produce inconsistent skin tones. A portrait illuminated by warm household lighting on one side and blue daylight on the other may be difficult to correct globally.
Photography Lighting Basics and the Exposure Triangle
Lighting and exposure are closely related, but they are not identical.
Lighting describes the illumination in the scene. Exposure describes how the camera records that illumination.
The three commonly discussed exposure controls are aperture, shutter speed, and ISO.
Nikon explains that these three settings are closely connected and form the basis of photographic exposure.
A useful statement from Nikon summarizes the relationship:
“The three elements, aperture, shutter speed and ISO, are always linked.”
Nikon Learn & Explore
That relationship matters because changing one setting often requires adjusting another to maintain similar overall brightness.
Aperture Controls Light and Depth of Field
Aperture refers to the opening inside the lens.
A wide aperture such as f/1.8 or f/2.8 allows more light through the lens than a smaller opening such as f/8 or f/11.
The confusing part is the numbering system. Smaller f-numbers represent wider openings.
Aperture also influences depth of field. Wider apertures commonly produce shallower depth of field, while smaller apertures can keep more of the scene acceptably sharp.
For a window-light portrait, I might begin around f/2.8 to f/4 when I want some background separation.
For a tabletop product photograph where several parts of the object need to remain sharp, something like f/5.6 to f/11 might make more sense, depending on the lens, camera, subject distance, and desired result.
These values are starting points, not universal rules.
Shutter Speed Controls Time and Motion
Shutter speed determines how long the camera records light.
Nikon explains that faster shutter speeds are more likely to freeze movement, while slower shutter speeds allow more motion blur to appear.
A runner might require a relatively fast shutter speed.
A stationary product photographed from a tripod may allow a much slower shutter.
For handheld portrait photography, shutter speed also needs to be fast enough to reduce visible camera movement and subject movement.
The correct minimum varies with focal length, camera stabilization, subject activity, technique, and image resolution.
ISO Controls the Camera’s Sensitivity Setting
ISO changes how the camera handles the signal used to form the image.
Higher ISO values make it possible to photograph with less available light or use faster shutter speeds, but increasing ISO can introduce more visible noise and reduce image quality depending on the camera and exposure.
Nikon notes that increasing ISO reduces the amount of light required for a comparable exposure and explains that doubling ISO can allow a corresponding change in shutter speed when the other exposure variables remain unchanged.
I generally recommend treating ISO as a practical tool rather than something to fear. A slightly noisy sharp photograph is often more useful than a cleaner image ruined by motion blur.
A Beginner Comparison of Common Lighting Directions
The easiest way to understand lighting direction is to compare how each position changes the subject.
| Lighting Direction | Typical Appearance | Useful For | Main Challenge |
|---|---|---|---|
| Front light | Even, flatter illumination | Documentation, simple portraits, beauty images | Can reduce visible depth |
| 45-degree light | Dimensional with controlled shadows | Portraits, products, food | Shadow depth must be monitored |
| Side light | Strong texture and depth | Dramatic portraits, architecture, still life | Can create high contrast |
| Backlight | Glow, rim light, or silhouette | Outdoor portraits, atmosphere, separation | Subject may become underexposed |
| Top light | Shadows beneath facial features | Moody scenes, natural-looking overhead light | Eye sockets may become dark |
| Bottom light | Unusual, dramatic appearance | Horror, stylized effects | Usually looks unnatural |
| Background light | Separates subject or illuminates backdrop | Portrait and product photography | Spill may reduce contrast |
The most versatile starting point for beginners is usually a light approximately 45 degrees to one side of the camera and slightly above the subject. It produces enough shadow to reveal shape without immediately creating the extreme contrast of full side lighting.
Front Lighting and Why It Can Look Flat
Front lighting occurs when the light source is positioned close to the camera’s direction.
Because the light reaches surfaces from approximately the same direction as the lens, many visible shadows fall behind the subject rather than across surfaces visible to the camera.
That can make skin appear smoother and reduce texture, which may be useful for beauty images or straightforward documentation.
The disadvantage is reduced dimensionality.
A direct on-camera flash demonstrates this clearly. Nikon notes that pointing a flash directly at a subject can produce flat lighting, glare, and shadows behind the subject.
Front light is therefore not wrong. It simply produces a particular look.
Side Lighting Creates Shape and Texture
Side lighting reveals surface variation because raised areas receive illumination while other areas fall into shadow.
For portraits, this can emphasize cheekbones, facial structure, hair texture, and clothing.
For food, it can reveal texture on bread, fruit, sauces, and steam.
For landscape photography, low side light can make hills, rocks, and terrain more dimensional.
Adobe’s photography guidance similarly explains that moving light to the side creates depth through shadows and texture.
If side lighting appears too dramatic, introduce a reflector on the shadow side rather than moving the main light directly in front.
That preserves dimensionality while controlling contrast.
Backlighting for Glow, Rim Light, and Silhouettes
Backlighting places the primary light source behind the subject relative to the camera.
Outdoors, this often happens when the subject stands between the camera and the sun.
Backlighting can create luminous hair, glowing leaves, atmospheric haze, rim light, or a silhouette.
The challenge is exposure.
If the camera exposes primarily for the bright background, the subject may become dark. If it exposes for the subject, the background may become very bright.
Possible solutions include:
- Repositioning the subject.
- Using exposure compensation.
- Adding reflected light.
- Adding fill flash.
- Choosing a silhouette intentionally.
- Photographing in RAW for greater editing flexibility.
- Waiting until the sun is lower and less intense.
I find backlighting especially useful outdoors near sunset because the lower sun is easier to position behind a person and often creates attractive separation.
Adobe notes that golden-hour light is softer, more directional, and warmer because the sun sits lower in the sky.
Hard Light Versus Soft Light: Which Is Better?
Neither.
This is one of the most important Photography Lighting Basics principles to learn.
Soft light is popular because it can create flattering portraits and gentle product photographs. Hard light can create drama, crisp shadows, bold geometry, and graphic compositions.
The correct choice depends on the image.
Imagine photographing a skincare advertisement. Soft light might support a clean, smooth aesthetic.
Now imagine photographing a boxer before a fight. Hard side lighting may emphasize sweat, texture, muscles, and intensity.
The lighting should support the story.
Adobe photographer Caleb Gaskins offers a useful reminder about accessibility:
“You don’t need a lot of equipment to make soft light.”
Caleb Gaskins, Adobe Photography
I agree with the practical lesson behind that advice. A large window, translucent curtain, white wall, or sheet can demonstrate soft-light principles without a dedicated studio.
How to Use Window Light for Better Photos
Window light is one of the best teaching tools available because it allows us to study size, direction, distance, contrast, and diffusion without buying equipment.
Simple Window Portrait Setup
Place the subject roughly beside the window rather than directly facing it.
Turn the subject until the light creates a pleasing highlight-to-shadow transition across the face.
Then move the subject closer to or farther from the window.
Closer usually produces brighter illumination and makes the window appear larger relative to the subject.
Farther away generally reduces brightness and changes the light’s apparent size.
If the shadow side is too dark, place a white board or reflector opposite the window.
If the window light is too harsh, add a sheer curtain.
This simple arrangement teaches four lighting tools at once:
- Position
- Distance
- Diffusion
- Reflection
What If Direct Sunlight Comes Through the Window?
Direct sunlight through a window can produce strong shadows and very high contrast.
That may be perfect for a dramatic photograph.
If you want softer illumination, wait until direct sun no longer enters the window, use a translucent curtain, reposition the subject, or choose a north-facing or otherwise indirectly illuminated window depending on location and time.
Reflectors and Diffusers Explained Simply
Reflectors and diffusers solve different problems.
A reflector redirects light.
A diffuser changes how light passes from the source toward the subject.
For example, suppose window light illuminates the left side of a portrait strongly while the right side becomes too dark.
Place a white foam board on the right. Light from the window strikes the board and reflects back toward the subject.
The shadow becomes brighter.
Now suppose the sunlight itself creates shadows that are too sharp.
Putting a translucent material between the window and subject spreads the source and softens those transitions.
Both techniques modify existing light, but they do it differently.
Beginner Lighting Tools and What They Actually Do
Before buying a complicated lighting kit, I would understand these basic tools.
| Tool | Primary Purpose | Beginner Use | Low-Cost Substitute |
|---|---|---|---|
| Reflector | Redirects existing light | Fill facial shadows | White foam board |
| Diffuser | Softens direct light | Soften window or lamp light | Sheer white curtain |
| Softbox | Enlarges and diffuses artificial light | Portraits and products | DIY diffusion panel |
| Umbrella | Spreads or reflects flash | Quick portrait lighting | Large white reflective surface |
| Speedlight | Portable flash source | Bounce flash, fill flash | Built-in flash has fewer options |
| LED light | Continuous artificial illumination | Video, products, portraits | Bright household lamp for practice |
| Light stand | Holds a light source | Stable positioning | Secure household support for lightweight practice lights |
| Grid | Restricts light spread | Background control and dramatic lighting | DIY flags around continuous lights |
| Flag | Blocks unwanted light | Increase contrast or prevent spill | Black foam board |
| Gray card | Neutral reference | Exposure or white balance workflows | Purpose-built card recommended for accuracy |
What matters more than owning every modifier is understanding what problem each one solves.
If you cannot explain why you need a softbox instead of a reflector, buying more equipment will probably complicate your learning.
How to Use a Reflector Without Making Light Look Artificial
A reflector should normally support the main source rather than eliminate every shadow.
Suppose the left side of a face receives window light. Instead of placing the reflector inches from the right cheek and removing all contrast, begin farther away.
Move it closer gradually while watching the shadow.
Stop when enough detail returns without destroying the shape created by the window.
This teaches an important principle: fill light is about controlling contrast.
White reflectors usually provide gentle fill. Silver surfaces can return more light and produce a brighter effect. Dark surfaces can act as negative fill by reducing bounced light and deepening shadows.
You can even use the room itself.
White walls naturally bounce light. Dark curtains or black boards absorb more of it.
Photography Lighting Basics for Indoor Photography
Indoor lighting often feels difficult because light levels may be low and multiple sources can have different colors.
Imagine photographing someone in a living room at night.
A warm lamp illuminates one side of the face. A television produces bluish light. Ceiling fixtures create downward shadows. The background contains several unrelated color temperatures.
Instead of trying to fix everything with camera settings, simplify the scene.
Turn off unnecessary lights.
Choose one dominant source.
Move the subject toward it.
Then expose for that light.
This single decision frequently improves the image more than raising ISO or applying aggressive editing later.
Use a Window Before Adding Artificial Light
During daytime indoor photography, I normally recommend checking window light first.
A large window can produce light comparable in apparent softness to a large studio modifier.
Turn off overhead lighting if it adds unwanted color or shadows.
Place the subject near the window.
Add a reflector only if necessary.
That can be enough for portraits, food photography, product photographs, crafts, and social-media content.
Introduction to Flash Photography
Flash gives photographers control when ambient light is insufficient, inconsistent, or coming from the wrong direction.
Many beginners dislike flash because they associate it with harsh direct light.
The problem is often not flash itself. It is the position and apparent size of the source.
A flash mounted on top of the camera and pointed directly forward is small and close to the lens axis. That combination can produce harsh, flat-looking results.
A flash bounced from a wall or ceiling behaves differently because the reflecting surface becomes a much larger apparent source.
Nikon describes bounce flash as aiming the unit at a surface such as a wall or ceiling so the subject is illuminated by reflected light.
Nikon’s Chris Ogonek emphasizes direction when teaching beginners:
“The number one thing to be aware of is the direction of light hitting your subject.”
Chris Ogonek, Nikon Learn & Explore
That principle applies whether the source is sunlight, a window, LED panel, or flash.
How to Bounce Flash Indoors
If your flash head tilts or swivels, avoid automatically pointing it directly at the subject.
Instead, try aiming it toward a white ceiling or nearby white wall.
The light travels from the flash to the surface and then reflects toward the subject.
This can create softer, more natural-looking illumination.
Nikon explains that bouncing a Speedlight off a ceiling changes both the direction and quality of the light, although ceiling bounce can sometimes produce shadows beneath the eyes and chin.
Wall color matters.
Bounce a flash from a white wall and the reflected light may remain relatively neutral.
Bounce it from a strongly colored wall and the light can pick up that color.
Nikon specifically notes that bounced flash can acquire the color of the reflecting wall.
A Simple One-Light Portrait Setup
You do not need three or four lights to make a polished portrait.
Start with one.
Position the light about 45 degrees to one side of the subject.
Raise it slightly above eye level and angle it downward.
Move the light fairly close so it appears large relative to the subject.
Use diffusion if needed.
Then observe the shadow side.
If it becomes too dark, introduce a white reflector.
That gives you a main light and controlled fill without adding another powered source.
Once you can consistently create good portraits with one light, adding a background light, hair light, or second fill light becomes much easier because you already understand what the primary source is doing.
White Balance and Color Temperature
Correct brightness does not guarantee correct color.
A photograph can be perfectly exposed and still look unpleasant because the white balance does not match the light.
Canon explains that white balance helps white objects appear white under different illumination and that photographers can select settings corresponding to the light source or set white balance manually.
Color temperature is commonly expressed in Kelvin.
For example, Canon lists representative settings around 5200 K for daylight, 7000 K for shade, 6000 K for cloudy conditions, and 3200 K for tungsten lighting on one of its camera systems. Exact presets and behavior differ among cameras.
Beginners do not need to memorize every Kelvin value.
Instead, learn the visual principle:
- Lower Kelvin values correspond to warmer-colored light sources.
- Higher Kelvin values correspond to cooler-colored light sources.
- Camera white balance compensates for those differences.
Shooting RAW can provide more flexibility for adjusting white balance afterward, but I still prefer getting reasonably close in camera so the preview gives an accurate impression.
How to Combine Natural and Artificial Light
Mixing light sources becomes useful when natural light provides the environment but does not illuminate the subject sufficiently.
Suppose a person stands outdoors near sunset with the sky behind them.
Expose for the sky and the face may become too dark.
You could add a reflector, but it may not provide enough illumination.
A low-powered flash can fill the face while preserving the sunset.
The objective is not necessarily to make the flash obvious.
Instead, think of artificial light as a way to control the relationship between subject and background.
This principle also works indoors.
You can expose for ambient room light first, then add flash only where needed.
Nikon’s flash guidance describes a similar approach of considering the ambient-light exposure before adding flash to control subject detail and balance.
Common Photography Lighting Mistakes Beginners Make
Lighting mistakes often come from trying to solve every problem with the camera.
Mistake 1: Ignoring Light Direction
A photographer sees enough brightness and starts shooting without examining where the light comes from.
Move around the subject first.
Watch how the face, product, or scene changes.
Sometimes turning the subject 30 degrees produces a bigger improvement than changing any camera setting.
Mistake 2: Using Direct Flash for Everything
Direct flash has legitimate uses, but making it the automatic solution can produce flat lighting and strong background shadows.
Learn bounce flash and off-camera positioning whenever the environment allows it.
Mistake 3: Putting the Light Too Far Away
Beginners often place softboxes several meters from the subject because they want an evenly illuminated room.
For portraits, moving the source closer can make it larger relative to the subject and produce softer transitions.
Adobe explicitly notes that bringing a source closer can make it appear softer.
Mistake 4: Trying to Remove Every Shadow
Shadows are not defects.
They create depth, texture, and shape.
The goal is usually to control shadows rather than eliminate them.
Mistake 5: Mixing Too Many Light Colors
Warm lamps, cool windows, green fluorescent fixtures, and flash can produce conflicting colors.
Simplify the scene or deliberately balance the sources.
Mistake 6: Raising ISO Before Improving the Light
If you control the scene, first consider moving the subject or light, increasing source output, opening the aperture, or stabilizing the camera.
Then increase ISO when necessary.
Mistake 7: Buying Multiple Lights Too Early
A beginner with four lights can create four problems at once.
Master one source.
Add a reflector.
Then introduce additional lights gradually.
Step-by-Step Photography Lighting Practice Exercise
I recommend this exercise because it teaches more than memorizing diagrams.
Step 1: Choose One Subject
Use a person, plant, coffee mug, fruit bowl, or small object.
Do not change the subject during the exercise.
Step 2: Use One Light Source
Choose a large window or one continuous lamp.
Turn off unrelated lights.
Step 3: Photograph From the Front
Place the light close to the camera axis.
Take a photograph.
Study the lack or presence of visible shadows.
Step 4: Move the Light 45 Degrees
Move the source or rotate the subject.
Take another photograph.
Compare facial shape, surface texture, and depth.
Step 5: Create Full Side Light
Move the source approximately 90 degrees from the camera.
Notice how contrast increases.
Step 6: Try Backlighting
Move the source behind the subject.
Experiment with exposing for the subject and then exposing for the background.
Step 7: Add Diffusion
Place appropriate translucent diffusion material between the source and subject.
Compare shadow edges before and after.
Avoid placing unsafe materials close to hot lamps.
Step 8: Add a Reflector
Return to the 45-degree setup.
Place a white board opposite the main source.
Move it closer and farther away.
Watch how the shadow side changes.
Step 9: Change the Source Distance
Move the main source close to the subject.
Take a photograph.
Then move it substantially farther away and repeat.
Step 10: Compare the Entire Series
Do not ask which photograph is universally “best.”
Ask what each lighting pattern communicates.
That mindset develops lighting judgment rather than dependence on recipes.
Photography Lighting Recommendations for Common Subjects
Different subjects benefit from different starting points.
Portrait Photography
Begin with soft directional light around 45 degrees from the camera.
A large window or diffused artificial source works well.
Use a reflector only if the shadow side needs additional detail.
For more dramatic portraits, move the light farther toward the side.
Product Photography
Products often benefit from larger diffused sources because reflective surfaces can reveal the shape of the light source.
Move the light while studying reflections rather than only shadows.
White and black cards can be used to create or remove reflections deliberately.
Food Photography
Side light and back-side light often reveal texture better than direct frontal illumination.
A window, diffuser, and white or black foam board can create a strong beginner setup.
Landscape Photography
You cannot move the sun, but you can change your shooting time and position.
Early and late sunlight often produces more directional illumination and longer shadows than midday light. Adobe notes that golden-hour illumination tends to be softer and more directional because of the low solar angle.
Indoor Event Photography
Ambient illumination may be too dim for subject movement.
A higher ISO combined with appropriately fast shutter speed and bounce flash can be more practical than trying to maintain extremely low ISO.
Night Photography
For stationary scenes, a tripod can allow long exposures instead of extremely high ISO.
Nikon notes that night photography commonly relies on controlling aperture and shutter speed, with long exposures becoming useful when the camera is stabilized.
How to Know Whether Your Lighting Is Improving
Do not judge lighting only by brightness.
Instead, ask several questions.
Can I see the shape of the subject?
Are important highlights retaining useful detail?
Do shadows support the mood?
Is the viewer’s attention going where I want it?
Does the skin or product color look believable?
Is the background competing with the subject?
Does the light look intentional?
Could I simplify the setup?
A technically correct histogram cannot answer all of these questions.
Photography combines technical exposure with visual judgment.
The more deliberately you observe light, the less dependent you become on copied settings.
Conclusion
Photography Lighting Basics become much easier when I reduce lighting to a few controllable characteristics instead of memorizing dozens of studio diagrams. Direction tells me where shadows will fall. Apparent source size helps determine whether those shadows look hard or soft. Distance influences both brightness and light quality. Color affects whether the scene feels warm, neutral, or cool, while aperture, shutter speed, and ISO determine how the camera records everything.
The most useful lesson is that better lighting does not automatically require more equipment. A window, curtain, reflector, white wall, or single flash can teach nearly every foundational principle a beginner needs.
My recommended next step is simple: choose one subject and one light source, then photograph the subject with front, side, 45-degree, and backlighting. Add diffusion and reflection only after studying the original results. That exercise will teach more about light than repeatedly changing camera settings without observing the scene.
Once you can predict how light will change before moving it, you are no longer simply finding acceptable illumination. You are beginning to design photographs intentionally.
READ: United States Postal Service LiteBlue: Complete 2026 Employee Guide
Frequently Asked Questions
What Are the Most Important Photography Lighting Basics for Beginners?
The most important Photography Lighting Basics are light direction, quality, intensity, color, and exposure. Direction controls where shadows appear, while apparent source size strongly affects whether those shadows look hard or soft. Intensity determines how much illumination reaches the subject, and color temperature influences the overall color appearance. Aperture, shutter speed, and ISO then determine how the camera records the available illumination. I recommend learning these concepts with one window or one lamp before investing in complex studio equipment.
What Is the Best Lighting for Beginner Photography?
A large window with indirect daylight is one of the easiest lighting sources for beginners. Position the subject near the window and rotate them until the shadows create useful depth. If the opposite side becomes too dark, introduce a white reflector or foam board. If the window produces harsh direct sunlight, diffuse it with an appropriate translucent curtain. Window light makes it easy to observe changes in direction, distance, softness, contrast, and reflection without needing electronic flash equipment.
Is Natural Light Better Than Artificial Light?
Neither natural nor artificial light is universally better. Natural light is accessible and can be beautiful, but its intensity, direction, and color change with weather, location, and time. Artificial light gives photographers greater control over placement and consistency but requires equipment and setup. Adobe notes that natural and artificial light are the two main categories and that artificial illumination can be manipulated more readily. I suggest learning natural light first and then applying the same principles to artificial sources.
What Is the Difference Between Hard and Soft Light?
Hard light creates more defined shadows and stronger transitions between bright and dark areas, while soft light produces smoother transitions and less distinct shadow edges. The apparent size of the source relative to the subject is a major factor. A large source positioned close to a portrait subject generally appears softer than a small distant source. Adobe describes direct sunlight as a common hard-light example and diffused illumination as softer light with scattered rays.
Do I Need a Softbox to Learn Photography Lighting Basics?
No. You can learn Photography Lighting Basics without owning a softbox. A window, curtain, white foam board, wall, desk lamp, or other controllable source can demonstrate direction, reflection, diffusion, contrast, and distance. A softbox becomes useful because it conveniently directs and diffuses artificial light, but the underlying principle is more important than the product itself. Once you understand why a larger diffused source behaves differently from a small bare lamp, using professional modifiers becomes much easier.
Where Should I Place a Light for Portrait Photography?
A useful beginner position is approximately 45 degrees to one side of the camera and slightly above the subject’s eye level. This creates facial shadows that reveal shape without usually becoming as dramatic as full side lighting. Move the source closer for a larger apparent source and adjust its height while watching shadows beneath the eyes, nose, and chin. If the dark side of the face loses too much detail, introduce a reflector rather than immediately moving the main light directly in front.
Why Do My Indoor Photos Look Yellow?
Indoor photographs often look yellow because the camera’s white balance does not fully compensate for warm artificial lighting such as tungsten-type sources. Canon explains that white balance is intended to make whites appear white under different illumination and can be adjusted according to the light source. Mixed lighting can make correction more difficult because one area may receive warm lamp light while another receives cooler daylight. Turning off unnecessary sources can often simplify the problem.
Is Flash Bad for Photography?
Flash is not inherently bad. Harsh results usually come from how flash is positioned or modified. A small direct flash near the camera axis can create flat light, glare, and strong background shadows. Bouncing flash from a suitable neutral wall or ceiling changes its direction and apparent source size, often producing softer and more natural-looking illumination. Nikon specifically recommends learning light direction when working with flash and explains how bounced light can improve indoor portraits.
Sources
- Nikon Learn & Explore, A Basic Look at the Basics of Exposure: Explanation of aperture, shutter speed, ISO, and their relationship in photographic exposure.
- Nikon, Understanding Shutter Speed: Guidance on shutter speed, exposure, motion freezing, and motion blur.
- Nikon, Understanding ISO Sensitivity: Explanation of ISO and its effect on exposure and image noise.
- Adobe Photography, Diffused Light Photography: Guidance on soft light, hard light, diffusion, source distance, and inexpensive modifiers.
- Adobe Photography, Portrait Lighting: Discussion of front, side, and backlighting for portraits.
- Nikon, The Basics of Flash Photography: Guidance on direct flash, bounce flash, direction, and reflected light.
- Canon Camera Manual, White Balance: Technical explanation of white balance and color temperature settings.
- Adobe Photography, Golden Hour Photography: Explanation of softer, warmer, directional low-angle sunlight.
Disclaimer
This article is for general photography education and provides starting points rather than universal exposure or lighting rules. Camera sensors, lenses, flash systems, lighting equipment, stabilization, shooting environments, and creative goals differ. Electrical lights and DIY modifiers should always be used safely, particularly around heat, cables, stands, children, and flammable materials. Camera and flash documentation should be consulted for equipment-specific limitations and operating instructions.

I think learning how to sew a zipper feels much harder before the first successful attempt than it actually is. A zipper looks technical because several things have to line up at once: the fabric seam, zipper teeth, zipper tape, stitching line, zipper pull, and top and bottom stops. Once I break the process into preparation, positioning, stitching, and finishing, it becomes much more manageable.
For a beginner, I recommend learning a centered zipper first. This is the familiar zipper installation where the teeth sit directly beneath a seam and equal amounts of fabric cover both sides. It works well for cushion covers, skirts, dresses, pouches, and many other sewing projects.
The basic method is surprisingly simple. Sew the seam below the zipper normally, baste the zipper opening closed, press the seam allowances open, position the zipper beneath the basted seam, stitch around it with a zipper foot, and then remove the basting stitches. Singer and Brother both document variations of this same centered-zipper approach.
The details are what produce a clean result. A zipper that shifts while sewing can make the fabric pucker. Stitching too close to the teeth can prevent the slider from moving freely. Sewing without moving the zipper pull out of the way can produce a crooked line. Skipping pressing can leave the seam bulky or uneven.
My goal in this guide is to make those details predictable rather than intimidating.
Key Takeaways for Sewing a Zipper Successfully
Before starting, these are the principles I would remember:
- A regular zipper foot lets the needle sew close to zipper teeth without the entire presser foot sitting on top of them.
- A centered zipper is usually the easiest zipper installation for a beginner to learn.
- Basting the zipper opening closed first helps keep both fabric sides aligned.
- Pressing the seam allowances open before positioning the zipper creates a flatter and more accurate result.
- Keep the zipper teeth centered over the seam line.
- Secure the zipper tape before final stitching so it cannot shift.
- Do not sew over the zipper teeth, slider, or stops with a standard sewing-machine needle.
- When the zipper pull approaches the presser foot, stop with the needle down, raise the foot, move the slider past the foot, and continue.
- Invisible zippers use a different installation sequence and are usually sewn before the seam below the zipper is completed.
- Always test the zipper before considering the project finished.
The biggest beginner improvement usually comes from slowing down. A zipper does not require fast sewing. Accuracy is far more important than speed.
What a Zipper Is and How It Works
Understanding the basic structure makes zipper sewing easier because each part has a different job.
YKK explains that a zipper consists principally of the elements, slider, and tape. The elements are the teeth or coils that engage with one another, the slider joins or separates them, and the fabric tape provides the material through which the zipper is sewn into the project.
YKK summarizes the basic structure this way:
“Zippers are broadly divided into three components.”
YKK
A typical closed-end zipper also includes top stops and a bottom stop. These prevent the slider from traveling beyond the functional zipper chain.
From a sewing perspective, I mostly care about four areas: the teeth, zipper tape, slider, and stops.
The stitching normally goes through the zipper tape, not the teeth.
That seems obvious when written down, but beginners sometimes concentrate so heavily on getting close to the teeth that the needle travels dangerously close to a metal or plastic element.
The aim is to sew close enough for the zipper to look neat while leaving enough clearance for the slider to travel freely.
Choosing the Right Zipper Before You Sew
Different zippers are designed for different jobs.
A lightweight invisible zipper makes sense in a dress seam where I want the closure to disappear. A sturdy separating zipper is much more appropriate for a jacket. A standard closed-end zipper works well for skirts, cushions, pouches, bags, and similar projects.
Common Zipper Types and Their Best Uses
This table gives a practical beginner comparison.
| Zipper Type | Appearance | Common Uses | Beginner Difficulty |
|---|---|---|---|
| Centered closed-end zipper | Teeth hidden beneath two equal fabric folds | Skirts, dresses, cushions, pouches | Easy |
| Lapped zipper | One fabric side overlaps the zipper | Skirts, dresses, vintage garments | Moderate |
| Invisible zipper | Teeth disappear inside the seam | Dresses, skirts, formal clothing | Moderate |
| Separating zipper | Opens completely at the bottom | Jackets, coats, hoodies | Moderate |
| Fly zipper | Hidden beneath a fly extension | Trousers, jeans, shorts | More advanced |
| Exposed zipper | Teeth intentionally visible | Bags, fashion details, decorative garments | Easy to moderate |
| Two-way zipper | Can open from more than one direction | Long coats, luggage, specialty projects | Depends on application |
YKK categorizes zipper configurations that include closed-end, open-end, two-way separating, and double-slider arrangements.
For a first practice project, I would choose a standard nylon or polyester coil zipper and two pieces of stable woven cotton. Stable cotton is easier to control than slippery satin, stretchy knit fabric, or very thick upholstery material.
What You Need to Sew a Zipper
You do not need specialized professional equipment for a basic zipper.
A sewing machine, zipper foot, zipper, fabric, matching thread, pins or clips, seam ripper, iron, and marking tool are enough for most beginner practice.
The most important specialized tool is the zipper foot.
Singer explains its purpose well:
“The Zipper Foot can be used for inserting zippers as well as making and inserting piping or cording.”
Singer
Unlike a standard presser foot, a zipper foot is narrow enough to let the needle stitch close to a raised zipper edge. Depending on the sewing machine and foot design, it can often be attached or positioned so the needle sews on either side.
I would always check the sewing-machine manual before moving the needle position or attaching an unfamiliar zipper foot. Presser-foot designs vary, and the machine should be turned by hand for the first stitch or two to make sure the needle clears the foot.
Zipper Foot Versus Regular Presser Foot
A regular presser foot is designed to hold fabric evenly around the needle.
That becomes inconvenient around a zipper because the zipper teeth create a raised ridge. The foot cannot sit naturally if part of it rides over the zipper chain.
A zipper foot solves the problem by giving the needle access near one side of the raised edge.
Singer describes the zipper foot as allowing the needle to stitch close to zipper teeth, coils, piping, or similar bulky edges.
For an invisible zipper, there is also a dedicated invisible zipper foot. It generally includes grooves that guide the zipper coils so the needle can stitch extremely close to them. Singer and Brother both describe dedicated concealed or invisible zipper feet as useful for producing a cleaner hidden closure.
I would not rush to buy every sewing-machine foot available. A standard zipper foot handles many zipper projects. Add an invisible zipper foot when invisible closures become a regular part of your sewing.
How to Sew a Zipper Using the Centered Method
For a first zipper, this is the technique I recommend learning.
Imagine that you are making a cushion cover with a zipper running through one seam. The same basic principle can also apply to many garment seams.
Step 1: Mark the Zipper Opening
Place the two fabric pieces right sides together.
Mark where the bottom of the zipper opening should finish.
The zipper teeth need to fall inside the intended opening, while the zipper tape extends beyond the teeth on each side.
Follow the seam allowance specified by your pattern. If you are simply practicing, a common practice seam allowance such as 5/8 inch can provide enough room to work comfortably, but the correct allowance for a real project should come from the pattern.
Step 2: Sew the Seam Below the Zipper
Begin at the lower edge of the fabric and sew toward the marked bottom of the zipper opening using a normal straight stitch.
Backstitch at the point where this permanent seam ends.
This permanent stitching holds the seam below the zipper.
Brother’s centered-zipper instructions similarly have the sewer straight-stitch the permanent seam before changing to basting stitches across the zipper opening.
Step 3: Baste the Zipper Opening Closed
Change to a long basting stitch.
Continue sewing from the end of the permanent seam through the zipper opening.
Do not treat this section as permanent. These stitches will eventually be removed.
The result should look like one continuous closed seam from top to bottom, but the upper section is held together only by temporary stitches.
This is the trick that makes a centered zipper beginner-friendly.
Instead of trying to keep two loose fabric edges perfectly aligned while installing a zipper between them, I temporarily close the seam first.
Step 4: Press the Seam Allowances Open
Turn the fabric to the wrong side.
Press both seam allowances flat and open.
Do not skip this step.
Singer’s basic centered-zipper instructions explicitly call for pressing the basted seam open before positioning the zipper. Brother provides the same general sequence.
A flat seam makes it much easier to position the zipper evenly.
When pressing near a synthetic zipper, be cautious with heat. Focus the iron on the fabric and follow the zipper manufacturer’s material guidance rather than holding a very hot iron against plastic teeth or coils.
Positioning the Zipper Correctly
Place the fabric wrong side up with the seam allowances open.
Close the zipper.
Lay it face down over the seam so the zipper teeth sit directly over the basted seam line.
The center of the zipper chain should align with the center of the seam.
I like to begin by checking the top position first. The top stops need to end where the finished opening should begin, allowing for whatever waistband, facing, seam, or edge treatment comes later.
Then check the bottom.
If the zipper is significantly longer than the opening, decide whether it needs shortening before continuing. Do not simply let an unsuitable zipper extend into construction areas without considering how the rest of the pattern will be assembled.
Holding the Zipper in Place Before Stitching
This is one of the most important steps for preventing a crooked zipper.
You can hold zipper tape in place with pins, hand basting, machine basting, clips where appropriate, or a sewing adhesive designed for temporary fabric positioning.
Singer recommends basting the zipper to the seam allowances and notes that basting glue can also be used in appropriate circumstances.
For a first zipper, I prefer hand basting because it gives excellent control.
Long temporary hand stitches take only a few minutes and greatly reduce the chance of the zipper shifting underneath the fabric.
Make sure the zipper remains centered as you secure both tapes.
Do not stretch the zipper or the fabric while pinning.
Stretching one layer more than the other is a common cause of ripples.
Stitching the First Side of the Zipper
Attach the zipper foot according to your machine instructions.
Set the machine for a normal straight stitch.
Position the fabric right side up.
Begin at the top of one side of the zipper opening.
Your stitching line should run parallel to the seam.
The exact distance depends on the zipper, fabric, style, and pattern. Brother’s centered-zipper instructions, for example, describe topstitching approximately 7 to 10 mm from the seamed edge in that specific method.
Do not obsess over one universal measurement. Consistency matters more.
Choose a reference point on your foot or machine and keep the seam aligned with it.
Sew slowly toward the bottom of the zipper.
What to Do When You Reach the Zipper Pull
The slider is wider than the zipper teeth and can push the presser foot sideways.
Trying to sew directly beside it is one of the easiest ways to make a straight zipper seam suddenly curve.
When you approach the slider, stop.
Leave the needle down in the fabric.
Raise the presser foot.
Move the zipper pull past the foot.
Lower the presser foot.
Continue sewing.
Keeping the needle down anchors the fabric so the stitching position does not move while you relocate the slider.
If the slider cannot move because the zipper opening is still basted closed, you may need to remove a small section of basting temporarily or move the slider from the accessible side according to your installation method.
Sewing Across the Bottom of the Zipper
When you reach the lower end, stop before the zipper’s bottom stop.
Pivot the fabric to sew across the bottom of the zipper opening.
Be careful not to stitch through the bottom stop or hard zipper teeth.
Brother gives an explicit safety warning:
“Make sure the needle does not strike the zipper during sewing.”
Brother
That is not merely about protecting the project. Hitting hard zipper components can break or deflect the needle.
Turn the handwheel slowly if you are uncertain about clearance.
Stitching the Second Side
After sewing across the bottom, pivot again and stitch upward along the opposite side.
Try to maintain the same distance from the seam that you used on the first side.
A centered zipper looks best when its two visible topstitching lines mirror each other.
When you approach the slider again, use the same needle-down technique to move it out of the way.
Finish the stitching securely.
Removing the Basting Stitches
Now comes the satisfying part.
Use a seam ripper to remove the temporary stitches running along the center of the zipper opening.
Work carefully so you do not cut the permanent topstitching or damage the fabric.
Brush away loose threads.
Open the zipper.
Close it.
Open it again.
Check whether the slider travels smoothly from top to bottom.
Look at the right side of the fabric and inspect the spacing.
If everything is aligned, you have successfully installed a centered zipper.
How a Centered Zipper Should Look When Finished
On the right side, two fabric edges should meet neatly above the zipper teeth.
The zipper should sit centered beneath the seam.
Two parallel topstitching lines should run down the sides and connect near the bottom.
The fabric should lie flat rather than forming waves or puckers.
On the wrong side, both pieces of zipper tape should be secured evenly.
The slider should move without catching the surrounding fabric.
For a first zipper, I would prioritize smooth operation and even alignment rather than absolute visual perfection. Slightly uneven topstitching on a practice piece is a much easier problem to fix than a zipper that cannot open.
How to Sew an Invisible Zipper
An invisible zipper is constructed differently from a standard centered zipper.
When properly installed, the zipper chain sits inside the seam and is largely hidden from the right side.
This makes invisible zippers popular for dresses, skirts, fitted garments, and formal clothing.
The critical difference is the order of construction.
Singer notes that unlike a regular zipper, an invisible zipper is inserted before the relevant seam is completely stitched.
Step 1: Prepare the Fabric Edges
Finish the raw edges of the fabric according to your project.
Do not sew the main seam closed yet.
Mark the seam allowance and zipper position accurately.
Accuracy is particularly important because the two sides must meet at the same height when the zipper closes.
Step 2: Open the Invisible Zipper
Open the zipper fully.
Invisible zippers have coils that curl toward the wrong side.
A dedicated invisible zipper foot guides those coils so stitching can run very close to them.
Brother describes the concealed zipper foot as allowing the coil to run through a groove, helping place the stitching close to the zipper.
Step 3: Place the First Zipper Tape
Place the right side of the zipper against the right side of the fabric.
Align the coil with the garment’s seam line.
Pin or baste the tape in place.
Double-check that the top of the zipper sits correctly relative to the garment’s top edge.
Step 4: Sew the First Side
Place the zipper coil into the appropriate groove of the invisible zipper foot.
Sew from the top toward the bottom.
Stop where the zipper foot can no longer travel comfortably near the slider.
Secure the stitching.
Step 5: Attach the Second Side
Position the second zipper tape against the second fabric piece.
Before sewing, close the zipper temporarily and verify that horizontal seams, waistlines, pattern motifs, or other matching points line up.
Then reopen the zipper and sew the second tape from top to bottom.
Make sure the zipper is not twisted.
Brother specifically emphasizes checking zipper orientation because a twisted zipper will not close correctly.
Step 6: Sew the Seam Below the Zipper
Close the zipper.
Bring the two fabric pieces right sides together.
Switch to a regular zipper foot if needed.
Begin the permanent seam as close as practical to where the zipper stitching ends, then sew downward through the rest of the seam.
Brother’s concealed-zipper instructions similarly complete the lower seam after both zipper sides have been installed.
Press the finished seam carefully.
From the right side, the seam should appear nearly continuous, with little more than the zipper pull visible.
Centered Zipper Versus Invisible Zipper
Beginners frequently confuse these methods, so this comparison helps.
| Feature | Centered Zipper | Invisible Zipper |
|---|---|---|
| Visibility | Covered by equal fabric folds | Mostly disappears into seam |
| Best for | Cushions, skirts, dresses, pouches | Dresses, skirts, formal garments |
| Seam first? | Seam is partly sewn and opening is basted closed | Zipper generally installed before seam below is completed |
| Foot | Standard zipper foot | Invisible zipper foot preferred |
| Topstitching | Usually visible | Usually not visible from right side |
| Beginner difficulty | Easier | Moderate |
| Alignment priority | Keeping zipper centered | Matching both zipper sides precisely |
| Common problem | Wavy or uneven topstitching | Gap or bump below zipper |
My recommendation is to learn the centered zipper first and then move to invisible zippers. The first method teaches zipper-foot control without requiring you to sew immediately beside rolled coils.
How to Sew a Lapped Zipper
A lapped zipper is hidden beneath one overlapping side of fabric.
It was once especially common in skirts and dresses and remains useful when a pattern calls for a deliberately covered zipper.
Instead of two equal fabric folds meeting over the zipper, one side creates a narrow fold and the other overlaps it.
The stitching therefore appears asymmetrical from the right side.
The exact construction varies by pattern, but the general process involves preparing the zipper opening, forming the underlap, attaching one zipper tape close to that fold, positioning the overlapping side, and topstitching the outer lap.
I would follow the specific pattern instructions for a lapped zipper because seam allowances and lap widths can differ.
The main concept to understand is simple: centered means equal coverage; lapped means one side overlaps the zipper.
How to Stop Fabric From Puckering Around a Zipper
Puckering is one of the most common zipper problems.
Several factors can cause it.
The zipper may have been stretched while sewing.
The fabric may have stretched while the zipper remained stable.
The seam may not have been pressed.
The zipper tape may have shifted.
The stitch length or tension may be unsuitable.
Very lightweight or unstable fabric may also need interfacing or another form of stabilization around the zipper opening.
The first correction I would make is preparation.
Press the fabric.
Stabilize it if the pattern recommends doing so.
Secure the zipper before final stitching.
Then sew without pulling either layer.
Let the feed dogs move the fabric naturally.
If the fabric repeatedly ripples even when your technique is controlled, test the zipper on a scrap using the same fabric, interfacing, needle, thread, tension, and stitch length.
How to Keep the Zipper From Moving While Sewing
Zipper creep can make one side finish higher than the other.
Basting solves much of this problem.
Hand basting is slow but reliable.
Pins are faster but may allow some shifting.
Temporary sewing adhesive or narrow fabric-safe tape can also work where appropriate.
Whatever method you choose, check alignment before permanent stitching.
For garments, I would pay particular attention to horizontal seam intersections.
Imagine an invisible zipper crossing a waist seam in a dress. If one zipper half moves upward by only a few millimeters, the waist seam will visibly step up or down when the zipper closes.
Before stitching the second side, close the zipper and mark exactly where the matching seam must meet the zipper tape.
That small preparation step produces a much more professional result.
How to Shorten a Zipper
Sometimes the ideal zipper is slightly longer than the required opening.
Whether it can be shortened and how you should do it depends on the zipper construction.
Do not casually cut the zipper first.
A new stopping point must be created so the slider cannot simply run off the chain.
With some coil zippers, shortening can involve sewing a secure bar across the zipper below the desired endpoint and then trimming the excess below that new stop. PFAFF’s invisible-zipper instructions, for example, describe creating a stitched stop before trimming an overly long coil zipper.
Metal zippers may require a different method, including removing individual teeth and installing appropriate stops.
For expensive garments or separating zippers, I would buy the correct length whenever possible rather than improvising.
Common Zipper Sewing Problems and How to Fix Them
The Zipper Pull Gets Stuck
First check whether fabric or thread has been caught in the slider.
Do not force it aggressively.
Examine the wrong side and gently release any trapped material.
If your stitching runs too close to the zipper chain, the slider may be rubbing against the seam. In that situation, the stitching may need to be removed and resewn slightly farther away.
One Side of the Zipper Is Higher Than the Other
This usually happens because the zipper shifted during installation.
For an invisible zipper, it is particularly noticeable at waist seams or patterned fabric.
Remove the affected side and reposition it rather than trying to disguise a significant mismatch later.
The Fabric Is Wavy
Check whether you stretched the fabric or zipper while sewing.
Press the seam carefully and see whether the ripple relaxes.
If not, restitch with the zipper properly secured and the fabric supported.
Lightweight fabric may also benefit from stabilization.
The Stitching Curves Around the Zipper Pull
The zipper slider pushed the foot away from the teeth.
Do not sew around the slider.
Stop with the needle down, raise the foot, move the slider to the opposite side, lower the foot, and continue.
The Needle Hits the Zipper
Stop immediately.
Never continue forcing the machine.
Check needle position, zipper-foot position, and zipper alignment.
Rotate the handwheel manually before restarting so you can confirm that the needle clears the foot and zipper.
Brother specifically warns that needle contact with the zipper can break the needle and potentially cause injury.
The Invisible Zipper Is Still Visible
Your stitching may be too far from the zipper coil.
An invisible zipper foot is designed to guide the coil so the needle can stitch close to it.
If the zipper tape is correctly positioned but the chain remains visible, resewing closer to the coil may improve the finish.
Do not sew so close that stitches enter the coil itself.
Zipper Sewing Mistakes I Would Avoid
A common first mistake is using the standard presser foot because changing feet seems inconvenient. The zipper foot exists specifically to give the needle clearance around zipper teeth.
Another mistake is skipping basting. Permanent stitching feels faster until the zipper shifts and needs to be removed.
I would also avoid pulling the fabric behind the machine. Let the feed mechanism advance the project while your hands guide rather than drag.
Another frequent issue is sewing quickly over the lower zipper area without checking for the bottom stop. Slow down around every hard zipper component.
Pressing should not be treated as optional either. Sewing creates construction; pressing helps shape that construction.
Finally, test the zipper before completing the remaining garment or project. Discovering that a zipper is twisted or jammed is much easier to fix before waistbands, linings, facings, or other pieces have been attached.
A Beginner Practice Exercise for Learning How to Sew a Zipper
If zipper insertion still feels intimidating, I would not begin with an expensive garment.
Cut two rectangles from plain cotton.
Choose a standard closed-end zipper.
Sew the rectangles together using the centered-zipper method in this guide.
Do not worry about turning the sample into anything.
The objective is to practice the sequence:
prepare, sew, baste, press, position, secure, stitch, remove basting, test.
Once that works, make a second sample.
Try to improve only three things: straighter topstitching, better alignment, and smoother slider movement.
Then make a simple zippered cushion or pouch.
By the time you install a zipper in a real garment, the physical steps will already feel familiar.
Brother gives a similar practical recommendation in its invisible-zipper tutorial, encouraging practice on scrap fabric before risking an important project.
How to Make a Zipper Look More Professional
A professional-looking zipper usually comes from preparation rather than decorative tricks.
Use the correct zipper length and type.
Choose zipper tape that matches the project unless contrast is intentional.
Finish raw edges where appropriate before zipper installation.
Mark accurately.
Baste carefully.
Press throughout construction.
Use consistent topstitching.
Match horizontal seams before attaching the second zipper half.
Trim loose threads.
Check the inside as well as the outside.
The wrong side does not need to look decorative, but it should look controlled. Zipper tapes should not twist unpredictably, raw edges should be treated according to the project, and loose thread ends should be removed.
For garments, a lining or facing may eventually conceal much of the zipper tape, but careful installation still affects how smoothly the zipper functions.
When to Hand-Sew Part of a Zipper
A sewing machine handles most zipper construction efficiently, but hand sewing remains useful.
Hand basting provides excellent control.
Small stitches can secure zipper tape in difficult areas.
Hand finishing may be appropriate around couture garments, delicate fabrics, linings, or places a machine foot cannot reach cleanly.
I do not think machine sewing and hand sewing should be treated as competing methods.
A few minutes of temporary hand basting can save considerably more time than removing a badly shifted machine-sewn zipper.
Sewing Zippers in Stretch Fabric
Stretch fabric adds another variable because the fabric may lengthen as it moves through the machine while the zipper tape remains comparatively stable.
That can create rippling.
Follow the pattern’s stabilization instructions carefully.
Interfacing or another suitable stabilizer may be required along the zipper opening.
Do not stretch the fabric while positioning or sewing the zipper.
A walking foot can help some layered sewing tasks, but ordinary zipper installation still requires the clearance of a zipper-specific foot near the teeth. Machine compatibility and project construction should guide the choice.
Practice on scrap fabric first because knit behavior varies dramatically.
A stable ponte knit behaves very differently from a thin, highly elastic jersey.
Sewing a Zipper in Heavy Fabric
Heavy denim, canvas, upholstery material, or multiple seam layers can make zipper installation harder.
Use a needle appropriate for the fabric weight.
Reduce bulky seam allowances where the pattern permits.
Press carefully.
Move over thick intersections slowly.
Avoid pulling the project through the machine.
A zipper foot is especially useful because it prevents the full width of a standard presser foot from having to ride over the raised zipper area.
When approaching unusually thick seams, turn the handwheel manually for the first stitches if necessary.
The objective is controlled penetration, not speed.
How to Know Whether Your Zipper Is Finished Correctly
Before moving to the next stage of the project, I would run through a simple visual and functional check.
The zipper opens completely.
The zipper closes completely.
The slider moves smoothly.
No fabric catches in the slider.
The zipper is not twisted.
The top edges align.
Horizontal seams match where necessary.
The fabric lies reasonably flat.
Topstitching is consistent for visible zipper styles.
The needle has not damaged the zipper chain.
The zipper tape is securely attached.
If all of those checks pass, I would continue with the project rather than obsessing over tiny cosmetic variations that only the person who sewed the item will notice.
Conclusion
Learning how to sew a zipper becomes much less intimidating when I treat the process as careful alignment rather than an advanced sewing trick. For a beginner, the centered zipper is the best place to start: sew the permanent seam, baste the zipper opening closed, press the seam allowances open, center the zipper beneath the seam, secure it, and stitch with a zipper foot before removing the temporary basting.
The most important lessons are simple. Use the right foot, press before sewing, stop and move the slider instead of sewing around it, and never force the needle across zipper teeth or hard stops. Once those habits become automatic, invisible and lapped zipper techniques become easier to understand.
I would practice on two pieces of inexpensive cotton before installing a zipper in a garment you care about. The goal of the first sample is not perfection. It is learning how the zipper behaves under the presser foot. Once that feels familiar, make another sample and focus on alignment. A few deliberate practice runs can turn zipper installation from one of the most intimidating sewing steps into an ordinary construction skill.
READ: Doubtnut Valuation: From $154M Peak to $10M ALLEN Acquisition
Frequently Asked Questions
How Do You Sew a Zipper for Beginners?
The easiest beginner method is usually a centered zipper. Sew the seam below the zipper opening normally, baste the zipper section closed, press the seam allowances open, and position the closed zipper face down with its teeth centered over the basted seam. Secure the zipper tape, attach a zipper foot, and topstitch around the zipper. Remove the temporary basting stitches last. Singer and Brother both document versions of this basic sequence for centered zipper insertion.
Do I Need a Zipper Foot to Sew a Zipper?
A zipper foot is strongly recommended because it allows the needle to stitch close to the zipper’s raised teeth or coils without the full width of a standard presser foot getting in the way. Singer describes zipper feet as suitable for zipper insertion and other tasks requiring stitching close to a raised edge. Some specialized installations, especially invisible zippers, become much easier with a dedicated invisible zipper foot.
Can I Sew a Zipper With a Regular Sewing Machine?
Yes. Most ordinary home sewing machines can install zippers when equipped with a compatible zipper foot. You generally need only a straight stitch for basic zipper installation. The exact foot attachment and needle position vary by machine, so check your sewing-machine manual. Before beginning, rotate the handwheel manually to confirm that the needle clears the zipper foot, particularly if you have moved the needle position.
Why Does My Fabric Pucker When I Sew a Zipper?
Puckering can occur when the fabric stretches, the zipper shifts, the seam is not pressed properly, or the material needs stabilization. Secure the zipper before permanent stitching and avoid pulling the fabric as it travels through the machine. Lightweight, stretchy, or loosely woven fabrics may require interfacing or another stabilizer around the zipper opening. I would test the full zipper setup on scrap material when working with a difficult fabric.
How Do I Sew Past the Zipper Pull?
Stop sewing before the zipper pull reaches the presser foot. Leave the needle down in the fabric, raise the presser foot, move the zipper slider past the foot, lower the foot, and continue stitching. Keeping the needle down maintains your position while the slider is moved. Trying to sew around the bulky slider often pushes the zipper foot sideways and creates visibly crooked topstitching.
How Do You Sew an Invisible Zipper?
An invisible zipper is normally attached before the seam below it is completely sewn. Open the zipper, place the zipper tape right sides together with the fabric, and sew each side separately using an invisible zipper foot when possible. The foot guides the zipper coil while stitching is placed close to it. After both sides are attached, close the zipper and sew the remaining seam below it. Singer and Brother both document this general construction sequence.
How Do I Keep a Zipper Straight While Sewing?
Secure it thoroughly before final stitching. Hand basting gives excellent control, while pins or appropriate temporary sewing adhesive can also work. For a centered zipper, align the teeth directly over the basted seam before securing the tape. For an invisible zipper, mark important matching points such as waist seams on both zipper tapes. Sew slowly and use a consistent visual reference on the zipper foot or fabric to maintain an even stitching line.
Can You Cut a Zipper if It Is Too Long?
Some zippers can be shortened, but the correct method depends on the zipper construction. A new stop must be created before or as part of shortening so the slider cannot run off the chain. PFAFF, for example, describes creating a stitched stop before trimming excess from certain invisible coil zippers. Metal, separating, and specialty zippers may require different techniques, so I would check the zipper manufacturer’s guidance before cutting.
What Is the Easiest Zipper to Sew?
For learning how to sew a zipper, I would begin with a standard closed-end zipper installed using the centered method. The basted seam helps keep the fabric aligned while the zipper is positioned underneath it, and a standard zipper foot provides enough control for straightforward topstitching. Invisible zippers can produce a cleaner garment finish but require more precise positioning, while fly and separating zippers introduce additional construction steps.
Sources
- Brother Sewing Machine Operation Manual: Centered zipper installation, basting, zipper-foot positioning, topstitching, and needle-safety guidance.
- Singer: Basic centered zipper installation and explanation of how a zipper foot allows stitching close to zipper teeth and raised edges.
- Brother Sewing: Concealed zipper installation, alignment, zipper-foot use, and finishing the seam below an invisible zipper.
- Singer: Invisible zipper installation and dedicated invisible zipper-foot guidance.
- YKK: Technical explanation of zipper structure, including zipper tape, elements, slider, and zipper operation.
- PFAFF: Invisible zipper installation and guidance for shortening certain coil zippers.
Disclaimer
This article provides general sewing education rather than instructions for one specific sewing machine, zipper, garment pattern, or fabric. Presser feet, needle positions, machine controls, zipper construction, seam allowances, and recommended techniques vary by manufacturer and project. I recommend following the sewing pattern, sewing-machine manual, and zipper manufacturer’s instructions whenever they differ from a general tutorial. Keep fingers clear of the needle area, stop the machine before making adjustments, and never intentionally sew through hard zipper teeth, sliders, or stops.

I think choosing one of the Best Laptops for Writers requires a different mindset from shopping for a gaming laptop or mobile workstation. Writers rarely need the fastest graphics processor or the highest benchmark score. What usually matters more is whether the keyboard remains comfortable during a long drafting session, whether the display keeps text sharp, whether the battery survives a day away from a charger, and whether the machine is light enough to carry without becoming a burden.
That distinction has become even more important in 2026. Current ultraportables offer far more performance than normal writing software requires, while manufacturers increasingly compete on battery life, AI features, thin designs, high-resolution displays, and premium materials. Apple introduced an M5 MacBook Air in March 2026, Microsoft refreshed its consumer Surface Laptop with Snapdragon X2 processors, Lenovo released an unusually light ThinkPad X1 Carbon Gen 14, and Apple’s inexpensive MacBook Neo created a new budget option for writers who want macOS.
For me, the best writing laptop is therefore not necessarily the most powerful one. It is the computer that becomes least noticeable while I work. A good writing machine should let research tabs, notes, documents, communication apps, reference PDFs, and perhaps light photo editing run smoothly without making the keyboard, battery, screen, operating system, or weight feel like obstacles.
Key Takeaways About the Best Laptops for Writers
- MacBook Air 13-inch M5 is my best overall choice for most writers because it combines a 2.7-pound design, silent operation, sharp 13.6-inch display, 16GB starting memory, 512GB starting storage, and Apple’s claimed battery life of up to 18 hours.
- Microsoft Surface Laptop 8 13.8-inch is my preferred premium Windows option because reviews praise its keyboard and haptic touchpad, while Microsoft specifies Snapdragon X2 processors, Wi-Fi 7, up to 64GB memory, and a removable SSD.
- Lenovo ThinkPad X1 Carbon Gen 14 Aura Edition is especially compelling for writers who prioritize typing feel and portability. Lenovo lists configurations starting at about 2.20 pounds, while independent reviewers praise its keyboard and ergonomics.
- ASUS Zenbook A14 is a strong travel choice because configurations weigh around 2.16 pounds and pair that low weight with a 70Wh battery.
- MacBook Neo is my budget macOS pick at a current U.S. starting price of $599. It offers a 13-inch 500-nit display and up to 11 hours of wireless web use, though 8GB of unified memory limits its long-term headroom.
- MacBook Air 15-inch M5 is the better Mac choice for writers who want more room for a manuscript and research side by side. Its 15.3-inch display provides substantially more workspace while retaining the fanless Air design.
- Lenovo IdeaPad Slim 3i Gen 11 is one of the more practical value-oriented Windows choices, with available 16GB memory, 512GB SSD storage, a 15.3-inch 1920 x 1200 display, a 60Wh battery, USB-C, USB-A, HDMI, and an SD card reader.
- Writers should prioritize keyboard comfort, display quality, battery life, portability, memory, storage, and software compatibility before chasing high processor specifications.
- Snapdragon-based Windows laptops deserve an app-compatibility check if a writer depends on specialized legacy Windows software.
What Writers Actually Need From a Laptop
A useful writing laptop begins with the keyboard.
That might sound obvious, but laptop marketing often gives processors, AI performance, screen resolution, and graphics far more attention than typing feel. For someone writing thousands of words each week, the keyboard is one of the few parts of the computer being physically used almost continuously.
RTINGS summarizes the buying priority well:
“For most writers, getting a laptop that provides a great user experience is far more important than finding one with amazing CPU performance.”
RTINGS.
I agree with that framing. Microsoft Word, Google Docs, Scrivener, Obsidian, Notion, Pages, Final Draft, browser research, email, PDFs, and reference software are not usually extreme computing workloads. Even a modest modern processor can handle them comfortably. Writers gain much more from spending money on a better keyboard, better display, longer battery, more memory, or lighter chassis than from buying a processor intended for heavy 3D rendering.
Keyboard Comfort Matters More Than Benchmark Scores
Key travel, spacing, feedback, layout, palm-rest size, deck rigidity, and typing noise all influence the experience.
A technically powerful laptop can still be unpleasant for a writer if its keyboard feels shallow, unstable, cramped, or tiring. Conversely, a less powerful ultraportable with an excellent keyboard can feel far more productive during a four-hour editing session.
The ThinkPad X1 Carbon remains particularly interesting here. Tom’s Hardware praised the Gen 14 keyboard for its cushioned feel, useful travel, solid deck, and intuitive layout. Another 2026 review described it as fast, accurate, quiet, and among the better keyboards in its class.
Display Quality Affects Long Writing Sessions
A writer does not necessarily need OLED, mini-LED, HDR, or extreme color accuracy.
What matters more is crisp text, comfortable brightness, a useful aspect ratio, and manageable reflections.
I generally prefer displays that provide more vertical workspace. A taller screen can show more paragraphs, comments, research notes, or document controls at once. Microsoft’s 13.8-inch Surface Laptop uses a 3:2 display, while Lenovo and many other current productivity laptops use 16:10 panels rather than older 16:9 designs.
Brightness also matters for writers who work near windows, in libraries, or in coffee shops. Apple lists 500 nits for the MacBook Air M5 and MacBook Neo displays, which is useful for a portable productivity machine.
Battery Life Changes Where You Can Work
A laptop that needs an outlet every few hours is technically portable but practically restrictive.
Writers may work in airports, classrooms, libraries, trains, press rooms, hotel lobbies, or locations where outlets are inconvenient. Long battery life means the charger can stay in a bag or even at home during shorter trips.
Manufacturer battery figures should never be treated as guarantees because workload, brightness, browser behavior, wireless use, video calls, background apps, and battery age all affect runtime. They are still useful for comparing design priorities.
Apple rates the M5 MacBook Air at up to 18 hours. Microsoft claims up to 16 hours of active web use for current 13.8-inch Surface Laptop 8 configurations. Lenovo’s reference specifications list up to 19.2 hours in one MobileMark configuration for the X1 Carbon Gen 14.
Best Laptops for Writers Compared
The table below summarizes the machines I would put at the top of a writer-focused shortlist in September 2026. Prices can change by retailer, configuration, region, and promotion, so I treat them as purchasing context rather than permanent specifications.
| Laptop | My Pick For | Display | Weight | Key Advantage | Main Limitation |
|---|---|---|---|---|---|
| MacBook Air 13 M5 | Best overall | 13.6-inch Liquid Retina | 2.7 lb | Excellent balance of portability, battery, silence, and performance | Limited ports |
| Surface Laptop 8 13.8 | Best Windows | 13.8-inch 3:2 touchscreen | About 3.0 lb | Excellent keyboard and haptic touchpad | Premium price, ARM compatibility deserves checking |
| ThinkPad X1 Carbon Gen 14 | Best keyboard-focused premium option | 14-inch configurations | From 2.20 lb | Excellent typing ergonomics and very low weight | Expensive |
| ASUS Zenbook A14 | Best ultralight travel option | 14-inch | About 2.16 lb | Extremely light with 70Wh battery | Keyboard is good rather than class-leading |
| MacBook Neo | Best budget Mac | 13.0-inch Liquid Retina | Compact ultraportable | $599 starting price and good basic writing experience | Only 8GB memory |
| MacBook Air 15 M5 | Best large-screen Mac | 15.3-inch Liquid Retina | Larger than 13-inch Air | Excellent space for research plus drafting | Less portable than 13-inch Air |
| Lenovo IdeaPad Slim 3i Gen 11 | Best value Windows choice | 15.3-inch 1920 x 1200 | Configuration-dependent | Strong ports and sensible productivity specs | Less premium construction |
Specifications are based on current manufacturer documentation and 2026 reviews.
The important point is that there is no single specification that makes one of these laptops universally better. The 2.20-pound ThinkPad may matter more to a traveling journalist than a larger screen. A novelist working mostly from home may prefer the 15-inch MacBook Air. A student may gain more from the $599 MacBook Neo than from paying several times as much for a business-class ThinkPad.
MacBook Air 13 M5 Is the Best Laptop for Most Writers
My overall recommendation is the 13-inch MacBook Air with M5.
Apple introduced the M5 model in March 2026 with 16GB unified memory and 512GB storage as the current baseline configuration. The 13-inch version starts at $1,099 in the United States, weighs 2.7 pounds, uses a 13.6-inch Liquid Retina display, and offers up to 18 hours of claimed battery life. It remains fanless, so writing in a quiet library or bedroom does not produce cooling-fan noise.
For writing, the processor is almost beside the point. M5 provides far more performance than a normal writing workflow needs. What makes the Air attractive is the complete package around that processor: low weight, silent operation, a good keyboard, an excellent trackpad, high-resolution text rendering, strong standby behavior, and a battery designed for all-day mobile use.
Apple’s hardware chief framed the Air around the same balance:
“MacBook Air is the perfect laptop for anyone who values the unrivaled combination of performance and portability.”
John Ternus, Apple.
That is manufacturer marketing, so I would not accept it as independent proof that the Air is perfect. Independent testing of the earlier M4 Air nevertheless consistently praised the same characteristics, and Apple’s M5 refresh retains the basic physical design while improving storage, wireless connectivity, and performance.
Who Should Buy the MacBook Air M5
I think it fits novelists, bloggers, copywriters, freelance writers, journalists, students, academics, editors, and anyone who spends much of the day in browsers and document applications.
The main consideration is macOS compatibility. Most mainstream writing tools work well on the Mac, but a writer dependent on Windows-only publishing, corporate, transcription, or research software should check that software before changing platforms.
The other weakness is connectivity. The Air has two Thunderbolt 4 ports plus MagSafe and a headphone jack. That is enough for many writers, but people connecting SD cards, multiple USB-A devices, Ethernet, displays, and other accessories may need a hub or dock.
Surface Laptop 8 Is the Best Premium Windows Laptop for Writers
For writers who prefer Windows, I would put the Surface Laptop 8 13.8-inch near the top.
The current consumer version uses Qualcomm Snapdragon X2 Plus or X2 Elite processors. Microsoft lists a 13.8-inch touchscreen, two USB-C/USB4 connections, USB-A, a headphone jack, Wi-Fi 7, up to 64GB of memory in some markets, and a removable SSD. Weight is about 3 pounds.
The keyboard and touchpad are the bigger reasons to consider it.
The Guardian’s 2026 review describes the keyboard and touchpad this way:
“the keyboard and trackpad are some of the best you can get on a PC.”
The Guardian.
That matters more to me than the X2 processor’s AI capability. Writers interact with the keyboard for hours. Surface Laptop 8 also uses a 120Hz display and haptic touchpad, features that make scrolling, cursor movement, and general navigation feel more responsive.
The ARM Compatibility Question
There is one caveat I would investigate before buying.
The consumer Surface Laptop 8 uses Qualcomm’s ARM architecture rather than a traditional x86 Intel or AMD processor. Windows on ARM compatibility has improved substantially, and The Guardian found that most users may not notice a difference unless they depend on specific x86 applications. Still, specialized writing utilities, old publishing software, niche citation tools, hardware drivers, or corporate applications can create exceptions.
If my workflow depended on unusual Windows software, I would verify each essential application first rather than assume compatibility.
ThinkPad X1 Carbon Gen 14 Is My Pick for Serious Typists
The Lenovo ThinkPad X1 Carbon Gen 14 Aura Edition is the machine I would examine most closely if keyboard feel and extreme portability outranked price.
Lenovo’s official specifications list configurations starting at just 0.998 kg, or about 2.20 pounds, with a 58Wh battery. Lenovo also offers mechanical and haptic touchpad options depending on configuration.
Those numbers are impressive for a full 14-inch business laptop.
Independent reviewers are equally positive about the input experience. Tom’s Hardware said the X1 Carbon maintains Lenovo’s standard for excellent input devices, with plenty of key travel, a rigid keyboard deck, visible backlighting, and a practical layout.
I would particularly like this configuration for a journalist, editor, consultant, researcher, or business writer who travels frequently and wants a traditional Windows laptop with strong physical input design.
Why It Is Not My Best Overall Pick
Price is the biggest reason.
The X1 Carbon sits firmly in premium business territory. Tom’s Hardware reported review-period prices well above $2,000 for some configurations, making it hard to justify for a writer who mainly needs a browser, word processor, email, and research tools.
The value proposition improves when weight, business support, connectivity, repairability, keyboard quality, and enterprise features matter enough to justify the premium.
ASUS Zenbook A14 Is Excellent for Writers Who Travel Constantly
The ASUS Zenbook A14 is one of the most interesting machines for anyone who carries a laptop every day.
ASUS lists configurations around 0.98 kg, or 2.16 pounds, paired with a 70Wh battery. Current configurations also include USB-C connectivity, USB-A, HDMI, and a 1.3mm-travel backlit keyboard.
That combination addresses a basic travel problem. Writers often want a laptop light enough to disappear inside a shoulder bag without sacrificing a normal keyboard and display.
Independent review impressions are more measured about the typing experience. PCWorld found the keyboard usable but slightly softer than the best ThinkPad keyboards. That is why I consider the A14 a portability specialist rather than the ultimate typing machine.
The biggest purchasing question is again processor architecture. Many Zenbook A14 configurations use Snapdragon processors, so Windows software compatibility deserves the same check I recommend for Surface Laptop models.
For browser-based writers using Google Docs, Microsoft 365, Notion, WordPress, email, and mainstream communication tools, that may present little difficulty. Someone running specialized legacy Windows applications should investigate first.
MacBook Neo Is the Best Budget Laptop for Writers Who Want macOS
The most disruptive writer-friendly laptop Apple introduced in 2026 may not be the M5 Air. It may be the MacBook Neo.
Apple currently sells the Neo from $599 in the United States. The base model includes an A18 Pro processor, 8GB unified memory, 256GB SSD, a 13-inch 2408 x 1506 Liquid Retina display with 500-nit brightness, and two USB-C ports. Apple rates wireless web battery life at up to 11 hours and video streaming at up to 16 hours.
For pure writing, those specifications are surprisingly capable.
RTINGS calls the MacBook Neo very good for general productivity and highlights its build quality, compact design, and ability to last through a typical work or school day.
The biggest limitation is memory.
Eight gigabytes can handle ordinary document editing and reasonable browsing, but I would prefer 16GB for someone who expects to keep the laptop for many years, runs dozens of heavy browser tabs, works with large research libraries, edits substantial media, or uses local AI tools.
Storage also deserves attention. The $599 model has 256GB, while the $699 configuration increases storage to 512GB and adds Touch ID according to Apple’s current store.
For a student, beginner freelance writer, blogger, or novelist whose work is primarily text, I think the Neo makes much more sense than many cheap Windows laptops with compromised displays, keyboards, batteries, or build quality.
MacBook Air 15 M5 Is the Best Large-Screen Laptop for Writers
Some writers simply work better with more screen space.
The 15-inch MacBook Air M5 uses a 15.3-inch Liquid Retina display and starts at $1,299 in the United States. It carries the same general M5 platform, fanless design, 512GB starting storage, Wi-Fi 7, Bluetooth 6, and up-to-18-hour battery claim as the smaller model.
I would consider the larger screen worthwhile for research-intensive writing.
A novelist can keep a manuscript and outline visible. An academic can work with a paper beside a PDF. A journalist can draft while keeping interview notes or a browser open. An editor can use comments, revision panes, and source material without feeling as constrained.
Tom’s Guide recently named the M5 Air its best overall current 15-inch laptop and reported about 15.5 hours in its own battery testing, adding useful independent context to Apple’s higher manufacturer estimate.
The tradeoff is straightforward: a larger laptop occupies more bag space and is less convenient on small tables, airplane trays, and crowded commutes.
Lenovo IdeaPad Slim 3i Gen 11 Is the Best Practical Budget Windows Choice
For writers who want conventional Windows hardware without paying Surface or ThinkPad prices, the Lenovo IdeaPad Slim 3i Gen 11 deserves consideration.
Lenovo currently lists a 15.3-inch version with up to an Intel Core Ultra 7 configuration, 16GB DDR5 memory in the highlighted specification, a 512GB PCIe SSD, 60Wh battery, and a 1920 x 1200 IPS touchscreen rated at 400 nits and 120Hz. Ports include USB-A, USB-C with power delivery and DisplayPort, HDMI, an SD card reader, and a headphone connection.
That is a sensible set of features for writers who connect cameras, recorders, external drives, monitors, or SD cards.
Unlike Snapdragon machines, this Intel-based system also avoids the ARM software-compatibility question.
The compromise is refinement. Budget and midrange IdeaPad models are designed around value rather than minimum weight, luxury construction, or the most sophisticated trackpads.
For a home-based writer, student, or freelancer who values ports and screen size more than carrying the laptop through airports every week, that tradeoff can be reasonable.
What Specifications Should a Writer Buy in 2026?
Choosing the correct configuration can matter as much as choosing the model.
The table below shows the specifications I would consider sensible for different writing workloads.
| Component | Basic Writing | My Recommended Sweet Spot | Heavy Research or Creative Work |
|---|---|---|---|
| Memory | 8GB | 16GB | 24GB to 32GB+ |
| Storage | 256GB | 512GB | 1TB+ |
| Display | 13-inch class | 13 to 15-inch, sharp IPS/OLED | 15-inch+ or external monitor |
| Processor | Modern entry-level chip | Current Apple M-series, Core Ultra, Ryzen, or Snapdragon X | Higher-end CPU only if other workloads need it |
| Battery | 8+ practical hours | All-day class | All-day plus fast charging |
| Weight | Under 4 lb | Around 2.5 to 3.2 lb | Depends on performance needs |
| Ports | USB-C | USB-C plus useful legacy ports or dock support | Thunderbolt/USB4 and external-display flexibility |
For pure writing, 16GB memory is my preferred target. Eight gigabytes can still work, particularly on a tightly integrated system like the MacBook Neo, but 16GB provides more comfortable headroom for browsers, reference managers, messaging apps, PDFs, and future software.
Storage depends on what “writing” includes.
A novelist storing mostly text may barely use 256GB. A journalist keeping photographs, interview recordings, video clips, scanned documents, and offline research can fill it quickly. I generally see 512GB as the most balanced capacity unless the budget is extremely tight.
Mac or Windows: Which Is Better for Writers?
Neither operating system automatically makes someone a better writer.
I would choose based on software, workflow, and ecosystem.
Why Writers May Prefer a Mac
macOS works particularly well for people already using an iPhone or iPad. Apple’s current MacBook Air and MacBook Neo also deliver quiet operation, strong battery efficiency, good trackpads, and tightly controlled hardware.
Writers using Scrivener, Ulysses, Pages, Microsoft Word, Google Docs, Obsidian, Notion, Adobe applications, and mainstream research tools will find broad software support.
The 2026 MacBook Air is especially attractive because Apple moved the base configuration to 16GB memory and 512GB storage, reducing the need for immediate upgrades compared with earlier generations.
Why Writers May Prefer Windows
Windows offers broader hardware choice and tends to fit corporate environments better.
It can also be safer for someone using specialized legacy applications, custom publishing tools, proprietary corporate software, or unusual peripherals.
Machines such as the ThinkPad X1 Carbon and IdeaPad Slim 3i offer conventional x86 Windows configurations, while the consumer Surface Laptop increasingly relies on ARM processors.
For me, operating-system familiarity matters more than abstract arguments about which platform is superior.
A writer who knows Windows shortcuts instinctively and depends on a particular Windows application may lose productivity moving to macOS. The reverse can also be true.
Which Laptop Is Best for Different Types of Writers?
Different writing careers create different hardware priorities.
| Writer Type | My Preferred Laptop | Why |
|---|---|---|
| Novelist | MacBook Air 13 M5 | Quiet, portable, excellent battery, distraction-free hardware |
| Journalist | ThinkPad X1 Carbon Gen 14 | Very light, excellent keyboard, strong business connectivity |
| Blogger / content writer | MacBook Air 13 M5 | Strong browser multitasking and portable design |
| Windows-first freelancer | Surface Laptop 8 | Premium keyboard, trackpad, and display |
| Student writer | MacBook Neo | Low starting price with good display and keyboard |
| Academic / researcher | MacBook Air 15 M5 | More space for source material beside documents |
| Frequent traveler | ASUS Zenbook A14 | Exceptionally low weight |
| Budget Windows writer | IdeaPad Slim 3i Gen 11 | Useful ports and strong everyday specifications |
These are editorial recommendations rather than universal rankings. The best choice changes when specialized applications, accessibility requirements, employer policies, or personal preferences enter the picture.
Common Mistakes When Choosing a Writing Laptop
The first mistake I would avoid is paying for performance that will never be used.
A high-end discrete GPU adds cost, heat, weight, and power consumption while doing almost nothing for normal word processing. Unless writing is combined with professional video editing, 3D work, game development, or heavy local AI workloads, I would rather invest the money in memory, storage, display quality, or warranty coverage.
Another mistake is ignoring the keyboard until after purchase.
Specifications cannot fully describe typing comfort. When possible, I would spend several minutes typing on the exact keyboard design in a store or buy from a retailer with a reasonable return policy.
Screen size is another area where people overgeneralize.
A 15-inch laptop is not inherently better for writing simply because it shows more text. Writers who commute daily may be more productive with a lighter 13-inch model because they actually carry it everywhere. Home-based researchers may gain much more from the larger screen.
I would also avoid buying 256GB storage without thinking through future needs. Text files are tiny, but recordings, photographs, PDFs, offline cloud folders, podcast files, video, and local AI models are not.
Finally, Windows-on-ARM compatibility should not be ignored. Microsoft’s current Snapdragon systems are excellent productivity machines, and app support has improved substantially, but checking essential specialized applications before purchase remains sensible.
How I Would Choose Among the Best Laptops for Writers
If I wanted one recommendation with the fewest compromises, I would buy the 13-inch MacBook Air M5, assuming macOS fits the workflow.
For Windows, I would choose between Surface Laptop 8 and the ThinkPad X1 Carbon based largely on budget and software architecture. Surface provides a polished consumer experience, while the ThinkPad combines an exceptional keyboard with extreme portability and traditional business-laptop strengths.
A writer who travels constantly should give the Zenbook A14 serious consideration because shaving close to a pound from a typical premium laptop becomes noticeable during daily commuting.
At the opposite end of the price range, the MacBook Neo deserves attention because $599 buys a surprisingly complete writing machine. I would simply accept that its 8GB memory is designed for lighter workloads rather than heavy multitasking.
For large-screen writing, the 15-inch M5 MacBook Air remains my preferred choice because it increases usable workspace without moving into heavy workstation territory.
The Lenovo IdeaPad Slim 3i makes the most sense when a lower budget, conventional Windows compatibility, and useful physical ports matter more than premium materials.
Conclusion
I believe the Best Laptops for Writers are the machines that make writing easier rather than the ones with the most impressive processor specifications. Keyboard quality, screen clarity, battery life, portability, memory, storage, and software compatibility affect everyday writing far more directly than gaming graphics or maximum benchmark scores.
My overall pick for 2026 is the 13-inch MacBook Air M5 because it combines a light 2.7-pound design, silent fanless operation, a sharp display, 16GB starting memory, 512GB starting storage, and strong battery efficiency. Windows writers should look closely at Surface Laptop 8, while serious typists and frequent business travelers may find the ThinkPad X1 Carbon Gen 14 worth its premium price.
Budget shoppers have better options than they did a year ago, particularly the $599 MacBook Neo and value-focused IdeaPad Slim 3i.
My next step would be to choose the operating system first, then compare keyboard comfort, weight, screen size, and at least 16GB of memory where the budget allows.
READ: Motherboard Repair: Diagnosis, Common Faults, Repair Options, and When to Replace
Frequently Asked Questions
What Is the Best Laptop for Writers in 2026?
The MacBook Air 13-inch M5 is my best overall recommendation for most writers in 2026. It weighs 2.7 pounds, starts with 16GB unified memory and 512GB storage, uses a sharp 13.6-inch display, runs silently without a fan, and carries an Apple battery rating of up to 18 hours. Writers who require Windows should consider Surface Laptop 8 or Lenovo’s ThinkPad X1 Carbon Gen 14 instead.
How Much RAM Do Writers Need?
I recommend 16GB of memory for most writers buying a new laptop in 2026. Eight gigabytes can still handle basic documents, email, and moderate web browsing, which is why the 8GB MacBook Neo remains viable at $599. Heavy researchers frequently running large numbers of browser tabs, reference-management software, PDFs, communication tools, and creative applications will benefit from 16GB or more. Writers combining text work with video, local AI, or professional media may prefer 24GB to 32GB.
Is a MacBook Air Good for Writers?
Yes. The M5 MacBook Air is particularly well suited to writers because it combines a quiet fanless design, sharp display, long claimed battery life, good portability, 16GB starting memory, and 512GB starting storage. Apple currently offers 13.6-inch and 15.3-inch versions, making it possible to choose between portability and additional workspace. The main reasons not to choose one are macOS incompatibility with required software or the need for more built-in ports.
What Is the Best Windows Laptop for Writers?
I consider the Surface Laptop 8 one of the strongest premium Windows options for writers. Reviewers praise its keyboard and haptic trackpad, while Microsoft offers 13.8-inch and 15-inch configurations with Snapdragon X2 processors. The ThinkPad X1 Carbon Gen 14 is another excellent choice, particularly for people who prioritize keyboard quality and minimum weight. Its configurations start around 2.20 pounds.
What Is the Best Budget Laptop for Writers?
The MacBook Neo is my favorite budget writing laptop if macOS is acceptable. Apple currently sells it from $599 in the United States with an A18 Pro processor, 8GB memory, 256GB SSD, and a sharp 13-inch display. For Windows users, the Lenovo IdeaPad Slim 3i Gen 11 provides a more traditional PC configuration with available 16GB memory, 512GB SSD storage, and a useful range of ports.
Is 256GB Storage Enough for a Writer?
256GB can be enough if a writer primarily creates text documents and relies heavily on cloud storage. It becomes restrictive when the workflow includes interview audio, photographs, video clips, large PDF libraries, offline cloud folders, or creative applications. I generally recommend 512GB for a new writing laptop because it provides more comfortable long-term headroom. The 2026 MacBook Air now starts at 512GB, while the entry MacBook Neo starts at 256GB.
Should Writers Buy a 13-Inch or 15-Inch Laptop?
I would choose 13 inches for frequent travel and 15 inches for research-heavy writing or primarily desk-based work. A 13-inch MacBook Air is easier to carry and use in cramped spaces, while the 15.3-inch MacBook Air provides more room for a manuscript and reference material side by side. Neither size is universally better. The more useful question is whether carrying comfort or on-screen workspace affects your particular routine more.
Are Chromebooks Good for Writers?
Chromebooks can work well for writers who live almost entirely in web applications such as Google Docs, WordPress, Notion, and browser-based research tools. They are less suitable when specialized desktop applications are required. RTINGS has historically recommended inexpensive Chromebooks for basic writing because text editing is not processor-intensive, but software compatibility is the deciding factor. I would compare a budget Chromebook carefully with the $599 MacBook Neo and inexpensive Windows machines before deciding.
Do Writers Need an Expensive Laptop?
No. Writing itself is not a demanding computing workload. Most modern processors can run word processors, browsers, email, and research tools easily. I would spend extra money only when it buys a substantially better keyboard, longer battery life, lighter chassis, higher-quality display, additional memory, greater storage, or durability that matters to the workflow. RTINGS similarly emphasizes user experience over maximum CPU performance when recommending laptops for writers.
Sources and References
- Apple, 2026 MacBook Air M5 announcement and current MacBook Air specifications, for pricing, memory, storage, display, weight, ports, and battery information.
- Microsoft, current Surface Laptop 8 specifications, for display, processor, memory, storage, ports, weight, and battery claims.
- The Guardian, Surface Laptop 8 review, for independent keyboard, touchpad, performance, and battery observations.
- Lenovo Product Specifications Reference, ThinkPad X1 Carbon Gen 14 Aura Edition, for weight, battery, and input-device specifications.
- Tom’s Hardware, ThinkPad X1 Carbon Gen 14 review, for independent keyboard and ergonomics evaluation.
- ASUS, Zenbook A14 technical specifications, for weight, battery, keyboard, and connectivity details.
- Apple, MacBook Neo store and technical specifications, for U.S. pricing, memory, storage, display, and battery claims.
- RTINGS, laptops-for-writers guide and MacBook Neo review, for independent writer-focused buying criteria and productivity assessment.
- Lenovo, IdeaPad Slim 3i Gen 11 product specifications, for current Windows value-laptop configuration details.
- Tom’s Guide, 2026 15-inch laptop recommendations, for independent MacBook Air M5 battery testing and current large-screen context.
Disclaimer
This article provides general technology purchasing guidance and reflects my analysis of manufacturer specifications and independent reviews available as of September 2, 2026. I have not personally tested, purchased, or benchmarked the laptops discussed unless explicitly stated, and no such first-hand testing has been claimed here. Laptop prices, configurations, availability, software compatibility, promotions, and specifications can change by country and retailer. Manufacturer battery-life figures are measured under controlled conditions and may differ significantly from real-world use. Before purchasing one of the Best Laptops for Writers, verify the current configuration, keyboard layout, warranty, application compatibility, return policy, and price with the manufacturer or retailer.
-

 Health2 weeks ago
Hemp Gummies for Soothing Relief 750mg / 30 Count: Facts, Safety, Ingredients, and Evidence
-

 Education2 weeks ago
Quizlet NC Permit Test: 2026 North Carolina Permit Study Guide
-

 AI5 days ago
vrgamegirl19/comfyui-vrgamedevgirl: Features, Setup, Installation, and Safety Guide
-

 Education2 weeks ago
Kinematic Equations: Complete Guide With Formulas, Examples, and Solutions
-

 Guide2 weeks ago
Best Laptops for Writers in 2026: 7 Top Picks for Writing, Research, and Travel
-

 Technology1 week ago
Techmeshnews.com: Guide to Content, Ownership, Safety, & Trust
-

 AI2 weeks ago
Open CoDesign: What It Is, Features, Setup, and How It Works
-

 Technology2 weeks ago
Best Coding YouTube Channels in 2026: 12 Channels I Recommend for Learning to Code